Create the Server Configuration and Data Source
|
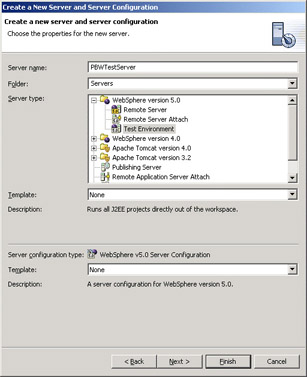
We have now completed assembling the application itself. The next action is to create a server configuration, and add the application to that configuration. If you have not yet created a server configuration (or had one created for you by use of the Run on Server action), then you'll need to create one now. The easiest path is File ( New ( Other, then Server ( Server and Server Configuration, and select the WebSphere version 5.0 ( Test Environment:
Define the Data Source
We now need to define the data source in our newly created server configuration. Go to the J2EE Hierarchy view, and in the server configurations tree locate the newly created server. Open the Server editor, and go to the Data sources page:
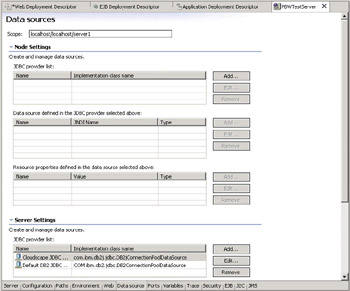
As you can see, we can define JDBC drivers for both the node and individual servers. For our purposes, we'll just use an individual server.
The first step is to ensure you have a JDBC provider defined; there should be pre-defined providers for both Cloudscape and DB2. Select the default CloudScape JDBC provider, and then hit the Add button by the data sources table.
As the Plants-By-WebSphere is an EJB 2.0 application, it requires a version 5 data source – select a Version 5.0 data source, and hit Next:
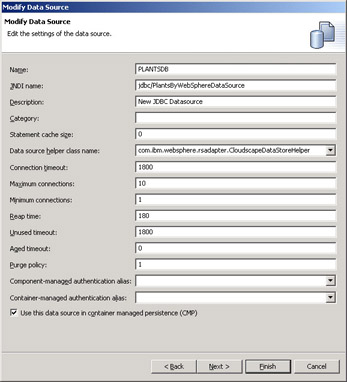
Enter the data source name (typically just the database name, which is PLANTSDB).
The JNDI name is the same as defined in the EJB reference above, which was "jdbc/PlantsByWebSphereDataSource". All other fields can be left as their default values. Hit Next to go to the data source properties page.
Cloudscape persists data as a simple directory in the file system, so you need to define in the data source where this will be. Ensure the databaseName property is selected, and enter the location of the database as the value of this property. If you extracted the database as described above, then this location will be C:/Wrox/5814/PLANTSDB, but it can be anywhere you have located the database. Remember to use forward slashes in the directory name:
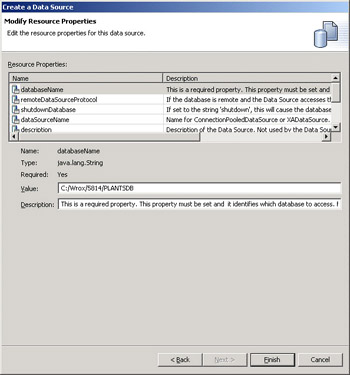
Hit Finish – you have completed creating the data source.
Add the Application to the Server Configuration
The final step before we can test the application is to add it to our newly created server configuration.
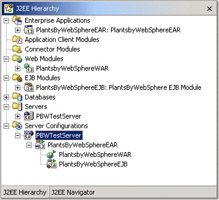
From the J2EE Hierarchy view, select the server configuration you created, and bring up the context menu. Select the Add item; all the enterprise applications in your workspace should be listed on the submenu. Select the Plants-By-WebSphere application, and it will be added to your server configuration:
You are now ready to unit test the application in the Studio test environment.
Note that if you are creating an application and wish to quickly test it using a new database, Studio can complete many of the above steps for you automatically (for CMP beans using EJB 2.0 persistence to a CloudScape database). You must first add the application to the server configuration (as described above). Next, go to the Servers view; by default this is available as a tab in the Tasks view area. Select the server, and execute Create tables and data sources from the context menu. This action will define the data sources, and also create the CloudScape database for all CMP entity beans that are mapped to CloudScape. We could use this option to test Plants-By-WebSphere, but if you wish to use the pre-populated database you need to define the data source as described above.
|
EAN: N/A
Pages: 135