| As explained on page 246, FileMaker includes three predefined privilege sets, Read-Only Access, Data Entry Only, and Full Access. These make it easy to create quick-and-dirty access controls. FileMaker also includes two default accounts, Guest with Read-Only Access and Admin with Full Access. To get the best combination of security and flexibility, however, you really should create privilege sets and accounts tailored to your needs. Creating Accounts Only users with Full Access privileges can define a password other than their own. By default, the Admin account comes with Full Access privileges, so you need to protect it with a master password. This master password is a key part of creating a secure FileMaker network since it keeps anyone else from having full privileges unless you deliberately grant them. Guest, the other default account, offers Read-Only Access to files but you need to activate it first. At that point, you can begin creating individual accounts. Aside from the master password, passwords are set based on the level of access needed, which can run the gamut. For details, see Table 15.2, Access Privileges. Table 15.2. Access PrivilegesCHECK | TO LET USERS |
|---|
Access the entire file | Do any task using a master password. Only choice that grants right to define, change, or delete passwords. Also grants right to change field or group definitions, and document preferences. | Browse records | View record data | Print records | Print any records | Export records | Export any records, copy a found set, enable Web Companion sharing | Override data entry warnings | Enter data even if it doesn't match preset entry options | Design layouts | Create and change layouts | Edit scripts | Create and change scripts | Define value lists | Create and change value lists | Create records | Create new records and enter data | Edit records | Change data in records | Delete records | Delete any records |
To create a password for the Admin account 1. | Open any file and turn file sharing off. Choose File > Define > Accounts & Privileges (Figure 15.14).
Figure 15.14. To create a password, choose File > Define > Accounts & Privileges. 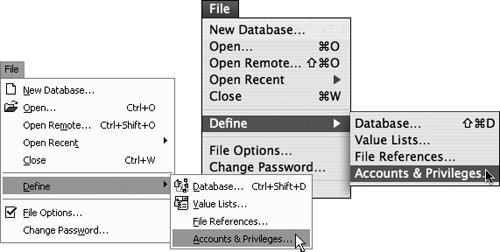
| 2. | When the Define Accounts & Privileges dialog box appears, the Accounts tab is automatically selected (Figure 15.15). Select the Admin account and click Edit.
Figure 15.15. With the Accounts tab active, select the Admin account and click Edit. 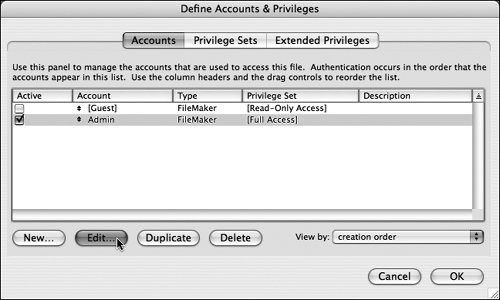
| 3. | In the Edit Account dialog box, type a password into the Password text box (Figure 15.16). Write it down somewhere safe because you cannot bypass the password once it's entered. Click OK to close the dialog box.
Figure 15.16. In the Edit Account dialog box, type a password into the Password text box. Be sure to write it down for safekeeping. 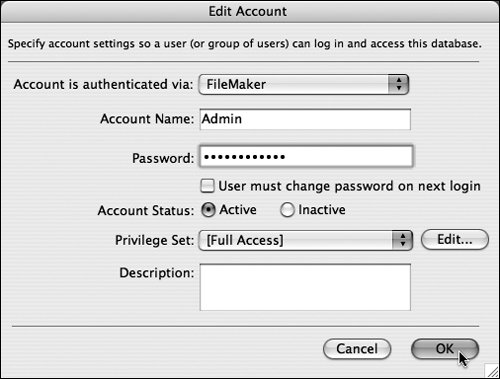
| 4. | When the Define Accounts & Privileges dialog box reappears, click OK to close the dialog box.
| 5. | When the Confirm Full Access Login dialog box appears, type in the name of the Full Access Account (Admin unless you changed it) and the Password you chose in step 3 (Figure 15.17). Click OK to close the dialog box and apply the password protection. Remember to turn File Sharing back on for the file you turned off in step 1.
Figure 15.17. The last step requires that you type in the name of the Full Access Account (Admin unless you changed it) and the Password you just chose. 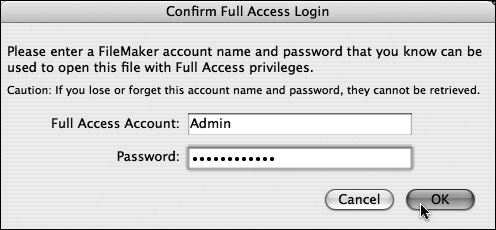
|
 Tip Tip
Passwords can include up to 31 characters, can include spaces, and are case sensitive. For example, WayWest will not be accepted in place of waywest. If you haven't already written it down, do so now.
To activate the Guest account 1. | Open any file and choose File > Define > Accounts & Privileges.
| 2. | When the Define Accounts & Privileges dialog box appears, the Accounts tab is automatically selected (Figure 15.15). Find the line for the [Guest] account and select the Active box (Figure 15.18). Click OK to close the dialog box.
Figure 15.18. Find the line for the [Guest] account and select the Active box. 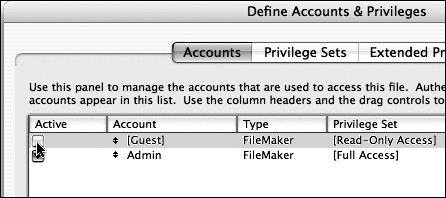
| 3. | When the Confirm Full Access Login dialog box appears, type in the name of the Full Access Account (Admin unless you changed it) and the Password you chose in step 3 on the previous page. Click OK to close the dialog box and apply the activation. The Guest Account option now is available at login for files assigned the Read-Only privilege set (Figure 15.19). (For more information, see Creating Privilege Sets on page 259.)
Figure 15.19. The Guest Account option appears at login for files assigned the Read-Only privilege set. 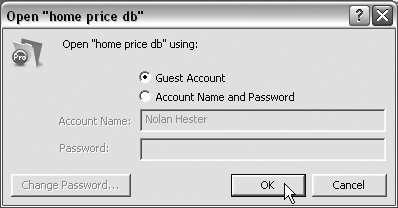
|
To create user accounts 1. | Open any file and choose File > Define > Accounts & Privileges.
| 2. | When the Define Accounts & Privileges dialog box appears, the Accounts tab is automatically selected. Click New (Figure 15.20).
Figure 15.20. To create user accounts, make sure the Accounts tab is automatically selected and click New. 
| 3. | When the Edit Account dialog box appears, use the Account Name and Password text windows to create a new account (Figure 15.21).
Figure 15.21. Use the Account Name and Password text windows to create a new account. 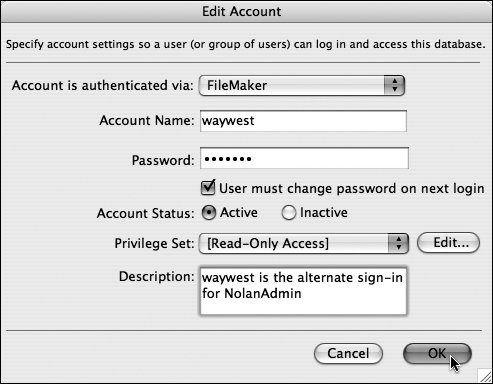
| 4. | If you're creating an individual user account, select User must change password on next login (see third Tip). Make sure that Active is selected.
| 5. | For now, use the Privilege Sets drop-down menu to choose one of FileMaker's three predefined privilege sets, for safety's sake probably Read-Only Access. (Once you create customized privilege sets on page 259, you can come back and change this to the appropriate set.) Click OK to close the dialog box.
| | | 6. | The new account is now listed in the Define Accounts & Privileges dialog box (Figure 15.22). Click OK to close the dialog box.
Figure 15.22. The new account is added to the list of accounts. 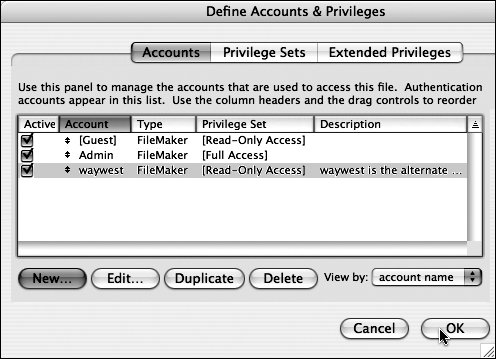
| 7. | When the Confirm Full Access Login dialog box appears, type in the name of the Full Access Account (Admin unless you changed it) and the Password you chose in step 3 on page 253 (Figure 15.23). Click OK to close the dialog box and create the account.
Figure 15.23. As always, when the Confirm Full Access Login dialog box appears, type in the name of the Full Access Account and the Password. 
|
Tips In step 3, unless your records sit on an external server, leave the default setting as Account is authenticated via set to FileMaker. In step 3, if you're setting up accounts for individual users, make the Account Name the same as the person's User Name (as shown in Edit > Preferences > General on Windows, File > Preferences > General on the Mac). That way, users only have to type in their password since FileMaker automatically fills in the Account Name. In step 4, assuming you're creating accounts for each user (the preferred approach), the beauty of selecting User must change password on next login is that it creates the best of both worlds: Each user can create a truly private password, yet you as the administrator still can control which files and actions that account can access through privilege sets. If you're creating a shared account do not select User must change password on next login. That's because one user could create a password that no one else sharing the account would know. As with creating databases and relationships back in Chapter 10, this business of creating accounts and privilege sets can turn into a tail-chasing affair of which comes first. It's inevitable that as you create accountsand then switch over later to creating privilege setsyou'll realize you need to create yet another of one or the other. It's not a problem. If you're working in the Define Accounts & Privileges dialog box, just click the Accounts or Privilege Sets tab to switch over and make the addition.
|