| FileMaker's networking abilities make it easy for PCs and Macs to share the same FileMaker database file. Inevitably, layouts will not look exactly the same on each platform. And since the Windows and Mac operating systems use different default fontsand render them at 96 dpi on Windows and 72 dpi on Macstext may also appear a bit differently. In some cases, this will force you to add a bit more space to tight Mac-generated layouts used on Windows machines. But, overall, the FileMaker match across platforms is pretty close. Since FileMaker 8 sticks with the .fp7 format introduced with FileMaker 7, anyone on the network using version 7 or newer can access the same files. To host a file simply means being the first user to open a shared FileMaker file. Anyone opening the file after the host is considered a guest. The host can set access rights and make file changes that guests cannot. For details, see Table 15.1, Network Rights: Hosts vs. Guests. FileMaker's network access privileges, by the way, are not the same as the access rights set by your computer's operating system. For information on setting Web access to FileMaker, see Publishing on the Web on page 265. Table 15.1. Network Rights: Hosts vs. GuestsPARTY | HAS RIGHT TO |
|---|
Host Only | Change file user status or close shared file Define, delete, change access rights or groups Define fields or change field definitions Save file copies (with Save a Copy command) Reorder layouts | Any User (One at a time) | Edit record or layout Define, change value lists Define, change own passwords Define, change relationships Open ScriptMaker dialog box | Any User (Any time) | Find, sort, browse records Export, import records Choose a page setup and print Switch layout view or mode Check spelling |
File sharing is set file by file using the FileMaker Network Settings dialog box. When a host needs to make substantial changes to a file, sharing must be turned off (see Table 15.1, Network Rights: Hosts vs. Guests) and guest users temporarily are denied access to the file. Once the host finishes the modifications, the file can again be shared. A file can be shared by no more than five users at any one time. To share it with more users than that you need to use FileMaker Server Advanced or share it over the Web (see Publishing on the Web on page 265). To share a file as host 1. | Open the file you want to share ( in Windows, in Windows, on the Mac). on the Mac).
| 2. | Choose Edit > Sharing > FileMaker Network (Windows) or FileMaker Pro > Sharing > FileMaker Network (Mac) (Figure 15.1). When the FileMaker Network Settings dialog box appears (Figure 15.2), make sure the file you want to share is selected in the Currently open files list and select On next to Network Sharing.
Figure 15.1. To turn FileMaker file sharing on or off, choose Edit > Sharing > FileMaker Network (Windows) or FileMaker Pro > Sharing > FileMaker Network (Mac). 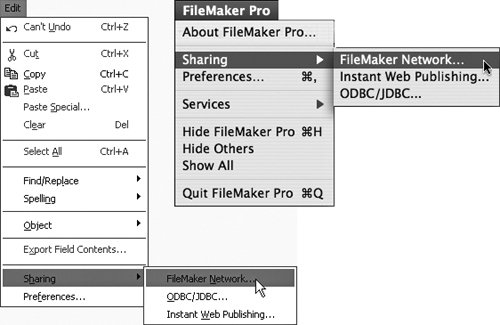
Figure 15.2. To share a file, make sure the file you want to share is selected in the Currently open files list and select On next to Network Sharing. 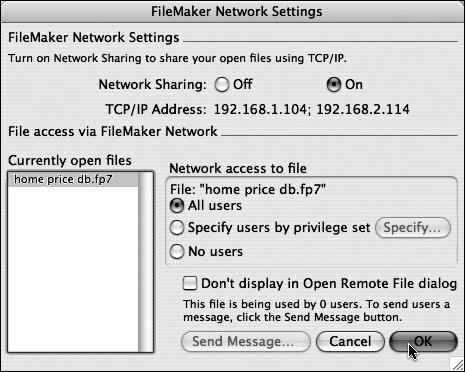
| 3. | In the Network access to file panel, select All users.
or
Select Specify users by privilege set, click Specify, and in the Specify users by privilege set dialog box, select one of three sets: Full Access, Data Entry Only, or Read-Only Access (Figure 15.3). Click OK to apply the privileges and close the dialog box.
Figure 15.3. Select Specify users by privilege set and click Specify (top). In the Specify users by privilege set dialog box, select one of three sets: Full Access, Data Entry Only, or Read-Only Access (bottom). 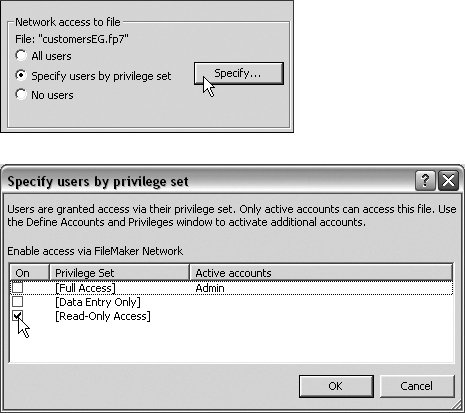
| 4. | Back in the FileMaker Network Settings dialog box, click OK to close it and activate sharing.
|
 Tips Tips
In step 3 if No users is selected, guests won't be able to open the fileeven if Network Sharing is set to On. Read-Only Access is just what it sounds like: users can see files but not change them. Data Entry Access is similar except that users can create, change, and delete FileMaker records. The Full Access set does all that, plus lets users change layouts, value lists, and scripts. Though their access powers differ, all three choices allow sharing.
To close a shared file as host 1. | If you're hosting the file, close it ( in Windows, in Windows, on the Mac). on the Mac).
| 2. | A dialog box appears listing other users of the file (Figure 15.4). Click Ask.
Figure 15.4. When you try to sharing a file being used by others, click Ask to alert guests that you want to close the file. 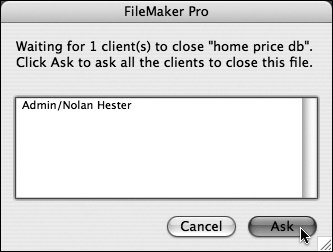
| 3. | Guest users will be alerted to close the file (Figure 15.5). If all the guests click Close Now, the file closes immediately on the guest and host machines. If a guest clicks Cancel, FileMaker leaves the file open until the guest closes it. If a guest doesn't respond, FileMaker automatically closes the file in 30 seconds.
Figure 15.5. When guests using an about-to-be-closed file receive a message from the host, they can click Close Now to close the file immediately or Cancel to leave it open until they're done. 
|
To stop sharing a file but leave it open 1. | If you need to work on a shared database and therefore need to stop sharing the file but leave it open for your own work, choose Edit > Sharing > FileMaker Network (Windows) or FileMaker Pro > Sharing > FileMaker Network (Mac).
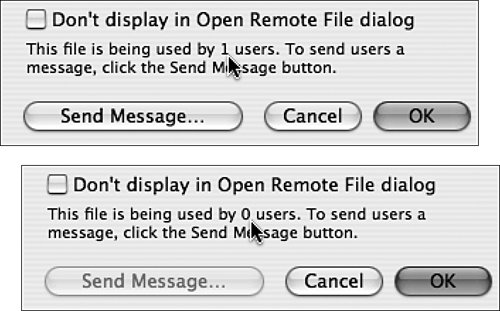
| 2. | When the FileMaker Network Settings dialog box appears, select a file in the Currently open files list and click Send Message (Figure 15.6).
Figure 15.6. To stop sharing a file but leave it open, select a file in the Currently open files list and click Send Message. 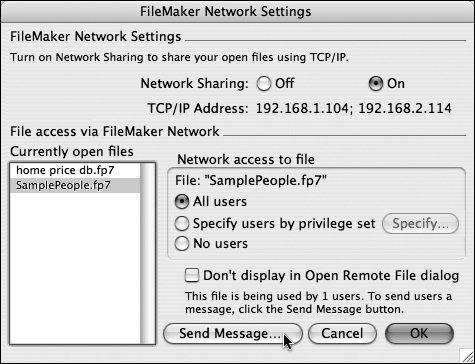
| 3. | When the message dialog box appears, type your message in the text window and click OK (top, Figure 15.7). All guests using the database immediately receive your message (bottom, Figure 15.7).
Figure 15.7. Type your message in the text window and click OK (top) and guests using the database immediately receive your message (bottom). 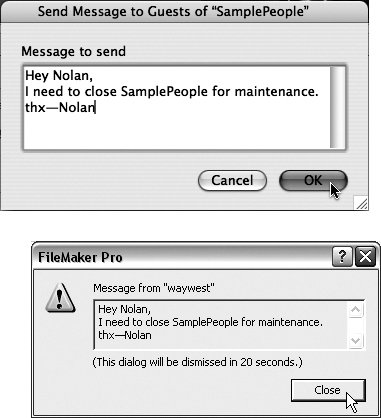
| 4. | Once all guests close the shared file, change Network Sharing to Off for that file (Figure 15.8). The file will no longer be visible over the network but will remain open on your computer so that you can work on it. Remember to turn file sharing back on after you finish maintenance work on the file.
Figure 15.8. Once all guests close the shared file, change Network Sharing to Off for that file. 
|
Tip
To open a file as a guest 1. | Choose File > Open Remote or use your keyboard ( in Windows, in Windows,  on the Mac). on the Mac).
| 2. | When the Open Remote File dialog box appears, set the View drop-down menu to Local Hosts (Figure 15.10). In the left-hand Hosts list, select the computer where the shared database resides, then in the right-hand Available Files list, select the database you need.
Figure 15.10. In the Open Remote File dialog box, set the View drop-down menu to Local Hosts, select a computer from the Hosts list, and then select the database you need in the Available Files list. 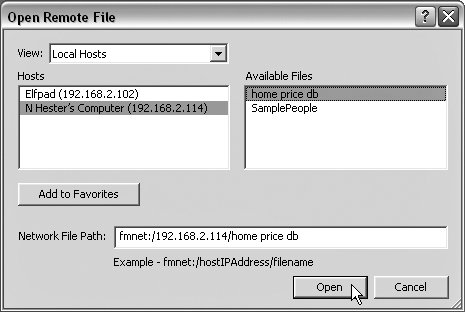
| 3. | Click Open and the shared database opens with the host computer listed in parentheses in the title bar (Figure 15.11). Depending on your access privileges, you can then view, add, or edit records. See Setting Accounts and Privileges on the next page.
Figure 15.11. The shared database opens with the host computer listed in parentheses in the title bar. 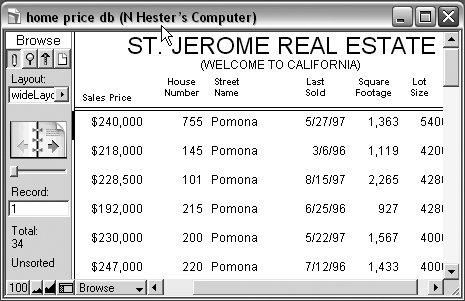
|
Tips In step 2, if the host computer is listed in the Open Remote File dialog box but none of the shared databases appear, check the host computer's sharing and firewall settings. They may be set to block guests. In step 2, if you regularly connect to the same host computer or the same databases, click Add to Favorites to open the Edit Favorite Host dialog box (Figure 15.12). Give a nickname to the host computer, set your view to only see the databases you need, and click Save. Back in the Open Remote File dialog box, set View to Favorite Hosts to see your customized view (Figure 15.13). Figure 15.12. The Add to Favorites feature lets you give a nickname to a host computer and set your view to only see the databases you need. 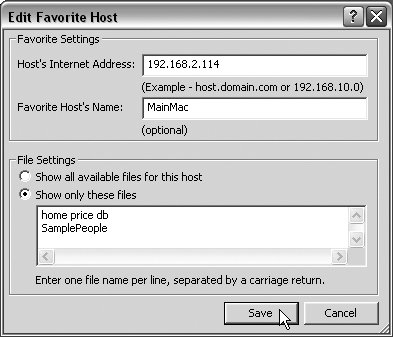 Figure 15.13. Back in the Open Remote File dialog box, set View to Favorite Hosts to see your customized view.  In step 2, if you need to use the Hosts Listed by LDAP, get the required server settings from your network administrator. Unless the host has closed or stopped sharing a file you recently used, you can reopen it by choosing File > Open Recent and choosing it from the submenu.
|