| Use the information in this section for printer and fax setup in Linux and Solaris operating environments. For printing procedures and additional information, see the subsequent sections in this chapter. Note This section applies only to UNIX users . Windows users should simply use their standard operating system printer setup windows , then continue to Basic Printing on page 75.
How to Print Right Now OpenOffice.org automatically installs the "Generic Printer" and it usually works right away. If you haven't tested printing yet, just print a Writer document to your Generic Printer (choose File > Print) and see what happens. If it prints and makes you happy, and that's all you need, ignore the rest of this chapter. If it doesn't work, see Setting Up a New Printer With an Existing or Imported Driver on page 55 or set up a new printer following the directions in Setting Up a New Printer With an Existing or Imported Driver on page 55. Converting StarOffice 5.2 UNIX Printers Use the printer administration tool spadmin to take all your 5.2 printers and bring them into the current release. It's in the office/program directory of your new installation. Once you've finished, use the other procedures in this section to double-check the properties for your converted printers. The setup windows and names of options have changed dramatically from 5.2. It's all for the better, much simpler and easier, but it's a good idea to check nonetheless. -
After installing OpenOffice.org 1.0, start the spadmin application. -
Click the New Printer button at the bottom of the window that appears. -
In the window that appears, select the last option in the option list, then click Next . -
The tool will convert all 5.2 printers, then display them. See Figure 4-1. Figure 4-1. Main window of New Printer Device AutoPilot 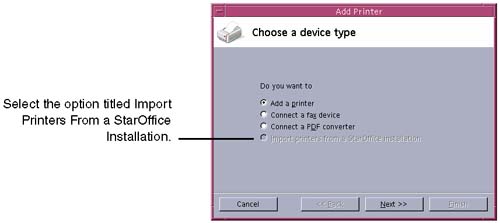 Setting Up a New Printer With an Existing or Imported Driver The program automatically sets itself up with a Generic Printer that prints to your computer's default printer. You should be fine to print using that printer; if you aren't, follow these steps to specify the right printer. Note Whatever you do, don't delete the Generic Printer. You'll need it in order to just open , much less print, files that were created with older versions of the software, or otherwise just think that they need a Generic Printer in order to just exist on your system. This doesn't make much sense, but it's true nonetheless. In addition, the Generic Printer is what's used to print to a file (PostScript).
-
Start the spadmin tool in the OpenOffice.org 1.0 directory. The window in Figure 4-2 will appear. Figure 4-2. Main printer administration window 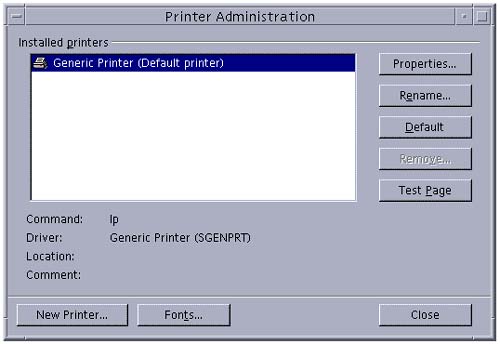 -
Click New Printer. -
The window in Figure 4-3 will appear. Keep Add a printer selected and click Next. Figure 4-3. Choosing to create a new printer 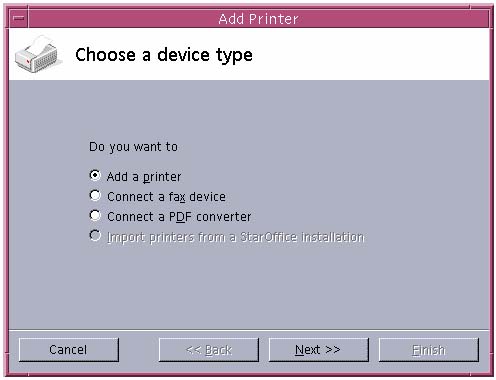 -
The window in Figure 4-4 will appear. Select the appropriate driver and click Next. If the driver you want isn't there, click Import and locate the directory where the driver is, then select it again when it appears in Figure 4-4. Click Next. Figure 4-4. Selecting or importing a printer driver 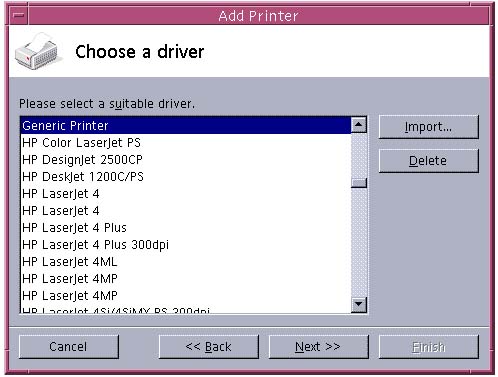 -
The window in Figure 4-5 will appear. Select the appropriate command line for the printer you want to print to and click Next. Figure 4-5. Selecting the command line to the printer 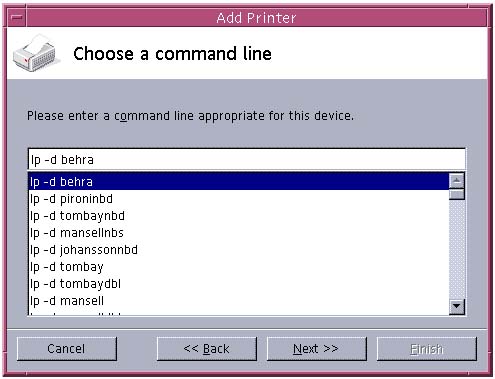 -
The window in Figure 4-6 will appear. Name the new printer and click Next. Figure 4-6. Name the printer 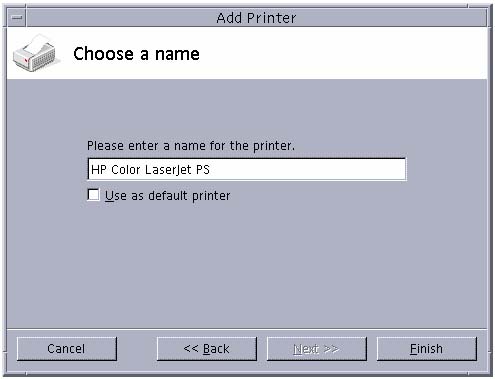 Setting Up a Duplex Printer or Making a Duplex Printer Print Single-Sided If a printer can print duplex, it's almost certainly already set up to print duplex. This procedure points out the settings that control duplex printing, how to turn it off, and how to modify it to "tumble" or print duplex flip flopped from the usual way.  | Be careful of the Create Single Print Jobs option in the Form Letter or Print Options window, for any application, when you print to a duplex printer. If this option is selected, each new print job will begin on a new page even if you are using a duplex printer. If this field is not checked then the first page of the second copy might be printed on the reverse side of the last page of the first copy, especially if there is an odd page number. | -
Start the spadmin tool in the OpenOffice.org 1.0 directory. The window in Figure 4-7 will appear. Figure 4-7. Main printer administration window  -
Select the printer you want to configure and click Properties. The window in Figure 4-8 will appear. Figure 4-8. Printer properties 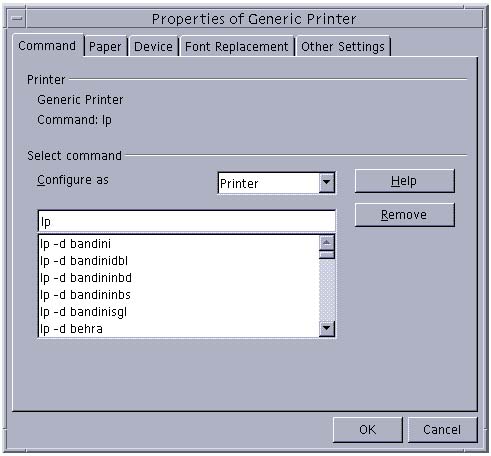 -
Select the Paper tab and click the Duplex dropdown list to see the duplex options (see Figure 4-9). Figure 4-9. Selecting a queue (the duplex-enabled printer) 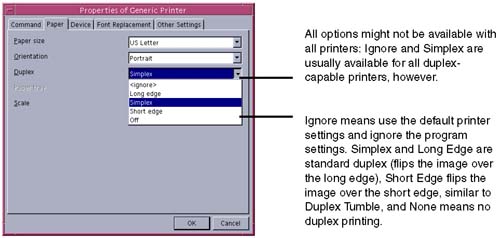 Figure 4-10 shows the differences between the two types. Figure 4-10. Difference between Simplex/Long Edge and Short Edge  The None option turns off duplexing so that each page is printed on a different sheet of paper. The Ignore option prints the page the same was as DuplexNoTumble (standard duplex printing). -
Click OK to close the window and save changes. Note To turn the duplex feature on and off on the fly, choose File > Print and select the printer. Click the Properties button and in the Printer Properties window, click the Paper tab. From the Duplex list, select the option you want.
Setting Up General Printer Options The Configure button lets you open the Printer Properties window, where you can set options like duplex printing, input trays, paper size and orientation, device information, and margins. (For duplex printing, see Setting Up a Duplex Printer or Making a Duplex Printer Print Single-Sided on page 57.) You don't have to enter information in this window; default values are set up for each window, and document-specific windows let you specify much of the same information. Those windows generally override anything you set here. Note For detailed information on how portrait and landscape printing really works, see Specifying Portrait or Landscape Orientation on page 83, as well as the printing procedure for each application, in the printing chapter for each.
-
Start the spadmin tool in the OpenOffice.org 1.0 directory. The window in Figure 4-7 will appear. Figure 4-11. Main printer administration window 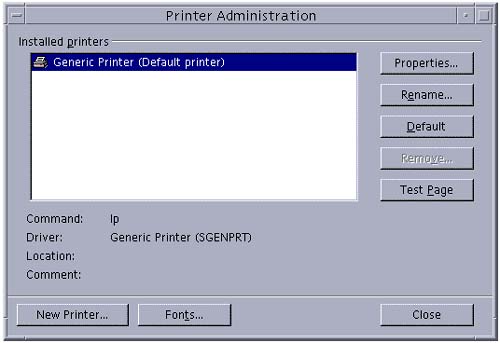 -
Select the printer you want to configure and click Properties. -
Enter the appropriate information in the Paper, Device, and Additional settings tabs of the Printer properties window (Figure 4-12 through Figure 4-14). Figure 4-12. Entering printer paper options 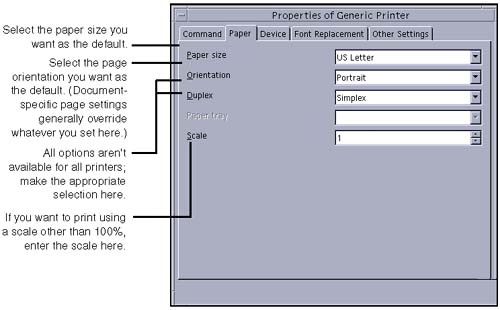 Figure 4-14. Entering printer device options 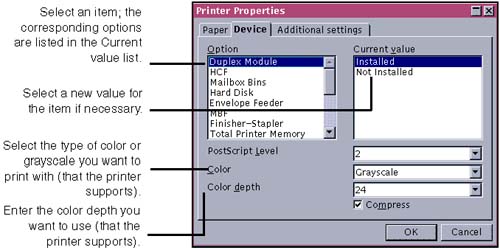 Note If you're using the generic printer driver, to support older PostScript printers select Level 1 under PostScript. Otherwise select Level 2. If your printer can only issue black and white output, set Grayscale under the Color field; otherwise set Color. If conversion under Grayscale leads to poor results, you can always set Color under the Color field and leave the conversion to the printer or PostScript emulator. -
When you've finished, click OK. Changing the Displayed Name of a Printer -
Open the Printer Setup window. -
Select the printer, such as Generic Printer, in the Installed printers list. -
Click Rename. -
Enter a new name in the Install window and click OK. Making a Printer Your Default Printer Your default printer is the one a document is printed to when you click the Print File Directly icon in the function bar. -
Open the Printer Setup window. -
Select the printer you want and click the Default Printer button. Note You can't remove a printer if it's your default printer.
Removing a Printer If you don't want a printer in the list of available printers anymore, follow these steps. -
Open the Printer Setup window. -
If the printer is your default printer, select a different printer in the list and click Default Printer. You can't remove your default printer. -
Select the printer you want to remove and click Remove. Click Yes when prompted. Setting Up Faxing Capabilities You can fax documents directly from Writer or Web, if you have a fax modem and have installed fax software. To fax, see Faxing on page 79. -
Start the spadmin tool in the OpenOffice.org 1.0 directory. The window in Figure 4-15 will appear. Figure 4-15. Main printer administration window 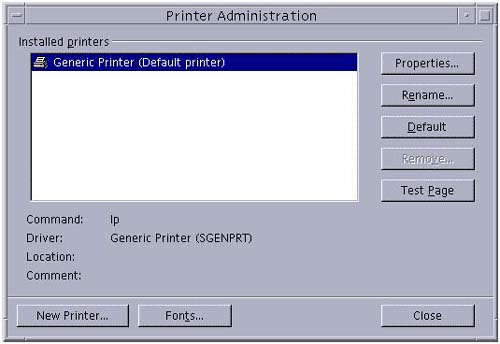 -
Click New Printer. The window in Figure 4-16 will appear. Choose to create a new fax connection and click Next. Figure 4-16. Choose to connect a fax device 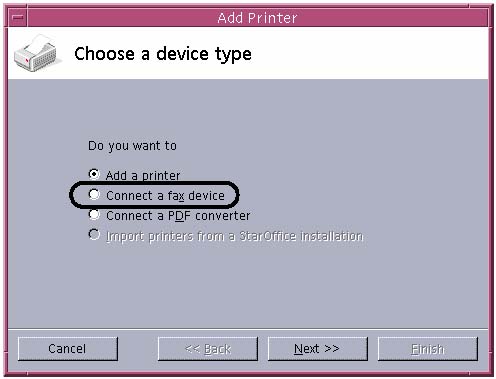 -
The window in Figure 4-17 will appear. Select the default driver, or another driver. The windows you see next will depend on what you choose here. Figure 4-17. Choose the default driver or new driver 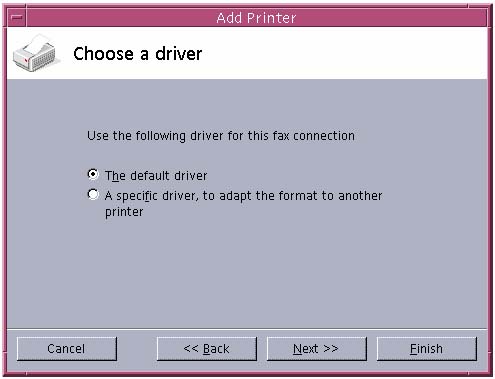 -
If you chose the default driver The window in Figure 4-18 will appear. The path you enter is entirely dependent on your system's fax capabilities. When you've entered it in the top field, click Next. Skip to step 6. Figure 4-18. Enter a fax path window 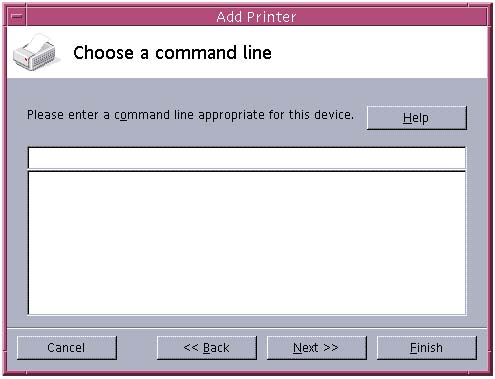 -
If you chose to use another driver The window in Figure 4-19 will appear. Select the driver to use for the fax. If the right driver isn't there, click Import and point to the directory where the driver is located, then select it when it appears in Figure 4-19. Figure 4-19. Choose a fax driver window 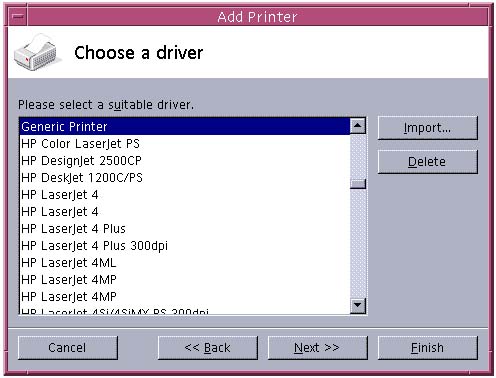 Click Next. The window in Figure 4-20 will appear. Enter the path and click Next, then continue to step 6. Figure 4-20. Enter a fax path window 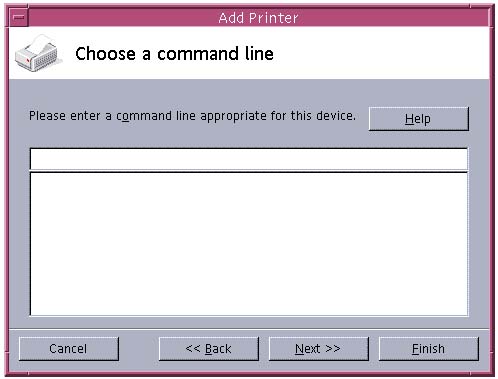 -
Once you've specified the fax driver, either by using the default or selecting a specific one, the Choose a Name window will appear as shown in Figure 4-21. Name the fax and click Finish. The fax will be available in printer dropdown lists and in the main spadmin window. Figure 4-21. Name the fax connection 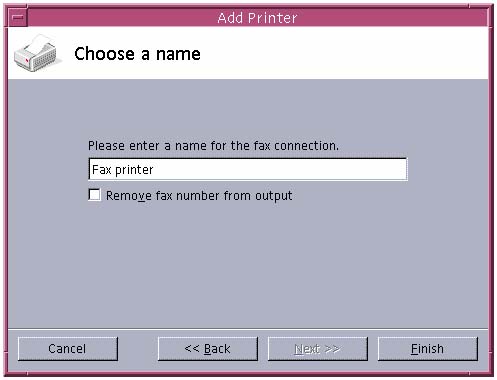 Setting Up One-Click Faxing You can fax by clicking an icon on the function bar; these steps cover specifying the fax device to use, and displaying the faxing icon. -
Choose Tools > Options > Text Document > Print. Select the Fax item in the list. See Figure 4-22. Figure 4-22. Selecting a default fax 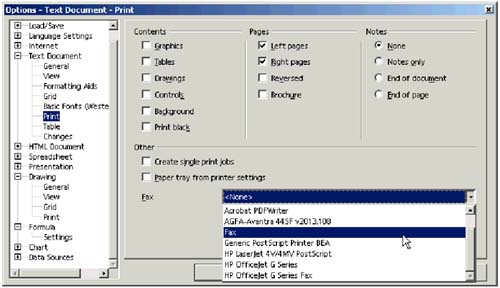 Note If in item titled simply "Fax" appears, you should be able to use that. Otherwise select the device you just set up. This varies depending on your operating system and the goodies provided with it. -
If you'll be faxing HTML documents, choose Tools > Options > HTML Document and repeat the previous step. -
To enable printing from the toolbar, right-click on the function bar (the topmost toolbar). Choose Visible Buttons > Send Default Fax. See Figure 4-23. Figure 4-23. Choosing to view the Default Fax icon 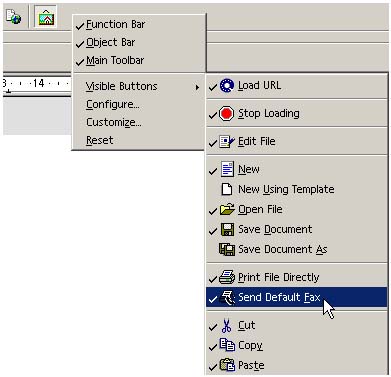 -
The Send Default Fax icon will appear. Click this to fax directly from a text or HTML document. See Figure 4-24. Figure 4-24. The Default Fax icon  Setting Up Printing to PDF Note Mere hours before sending this book to print, build 643 was released. Key features include a macro recorder and native PDF. For more information, and to download build 643, see http://www.openoffice.org/dev_docs/source/643/release_notes.htm.
You can print directly to PDF if you have GhostScript or a similar capability on your system. (The OpenOffice.org user list archives have information on setting up your system to use GhostScript.) If you don't, skip this procedure and just print to PostScript (see Considerations for Printing to PostScript or PDF on page 77), and use Adobe Distiller to create a PDF from the PostScript file. Troubleshooting We recommend that you search the archives of the users@openoffice.org mailing list, available through www.openoffice.org. If it hasn't been discussed there, it doesn't exist or it works perfectly every time. Note On UNIX, and possibly in Windows, nothing remotely related to the program, whether your GhostScript application or the program itself or your data sources, should be installed in a directory with a space in it. So if you're having problems, make sure nothing you're using is in C:\Program Files , for instance.
-
Start the spadmin tool in the OpenOffice.org directory; see Figure 4-25. Figure 4-25. Main printer administration window  -
Click New Printer. The window in Figure 4-26 will appear. Figure 4-26. Choose to connect a PDF converter  -
The window in Figure 4-27 will appear. Choose the default, Distiller, or another driver. The windows you see next will depend on what you choose here. Click Next. Figure 4-27. Choose the default driver or a specific driver for the PDF converter 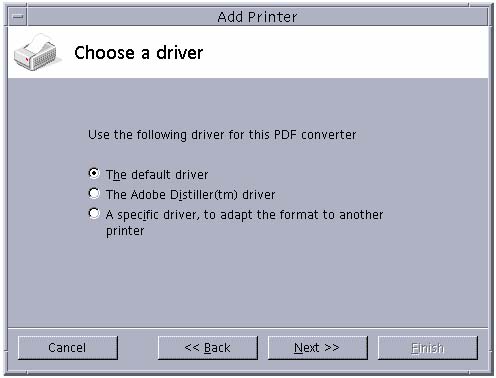 -
If you chose the default driver or Distiller The window in Figure 4-28 will appear. The path you enter is entirely dependent on your system's PDF capabilities. When you've entered it in the top field, click Next. Skip to step 6. Figure 4-28. Enter a PDF converter path window 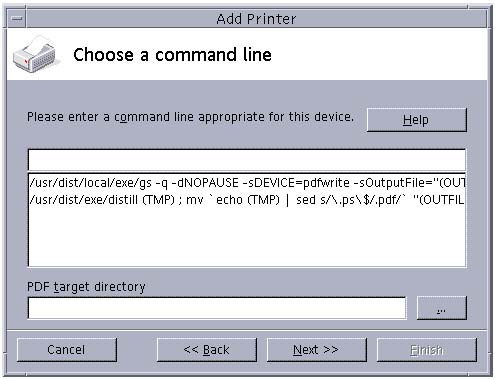 -
If you chose another driver The window in Figure 4-29 will appear. Select the driver and click Next. Figure 4-29. Enter a PDF converter path window 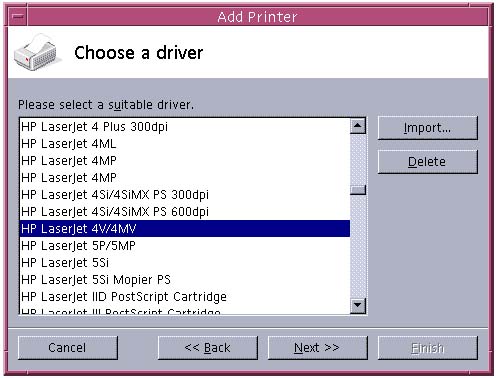 In Figure 4-30, enter the path to the PDF writer and click Next. Continue to step 6. Figure 4-30. Enter a PDF converter path window 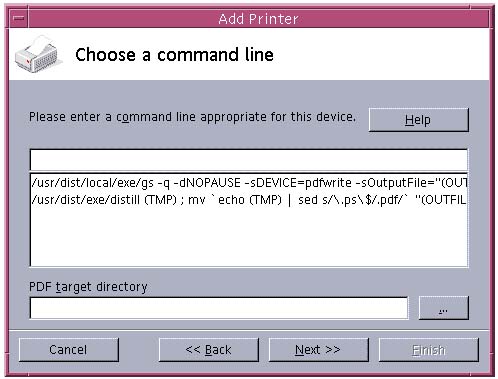 -
Once you've specified a driver by either means, the window in Figure 4-31 will appear. Name the PDF writer and click Finish. The PDF writer will be available in printer dropdown lists and in the main spadmin window. Figure 4-31. Name the PDF converter 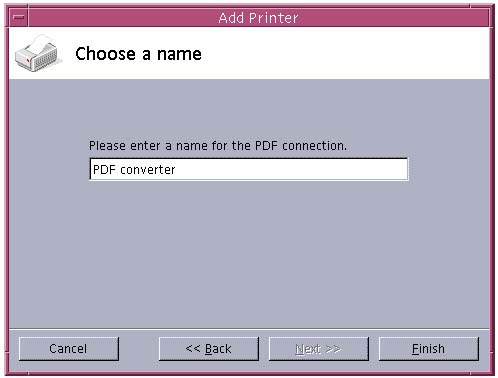 Adding and Substituting Fonts If the fonts aren't working for you as is, use one of these procedures. Adding Fonts to a Printer Note The software works best with the PC truetype fonts.
-
Start the spadmin tool in the OpenOffice.org 1.0 directory; the tool is shown in Figure 4-32. Figure 4-32. Main printer and font administration window 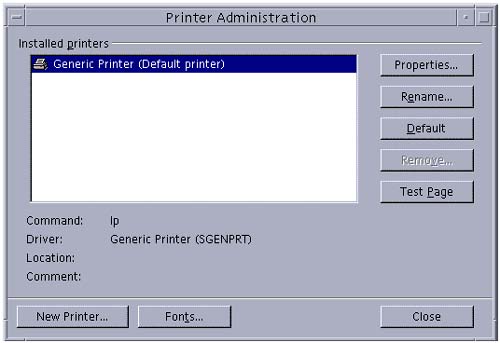 -
Click the Fonts button; the Fonts window (Figure 4-33) will appear. Figure 4-33. Fonts display and adding window 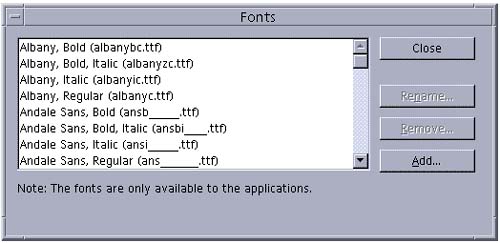 -
Click Add and chose the location of the fonts. Setting Up Per-Printer Font Substitution See also the font substitution instructions in Setting up OpenOffice.org-Wide Font Substitution on page 74. Any setting you create in this procedure overrides a conflicting setting in the Options window. -
Start the spadmin tool in the OpenOffice.org 1.0 directory; the tool is shown in Figure 4-34. Figure 4-34. Main printer and font administration window  -
Click the Properties button and select the Font Replacement tab; the window in Figure 4-35 will appear. Figure 4-35. Font substitution 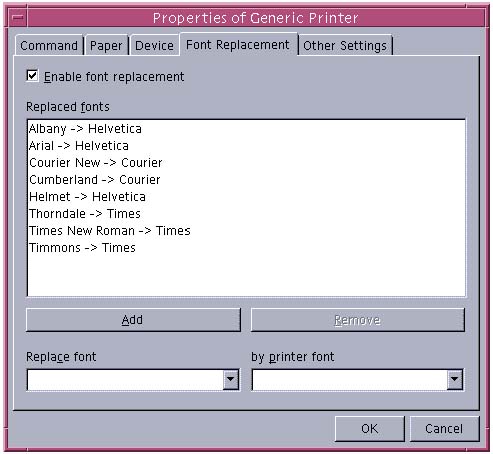 -
Select a font from the left dropdown list, and the font you want the printer to use from the right dropdown list, as shown in Figure 4-36. Then click Add. Figure 4-36. Entering a font substitution 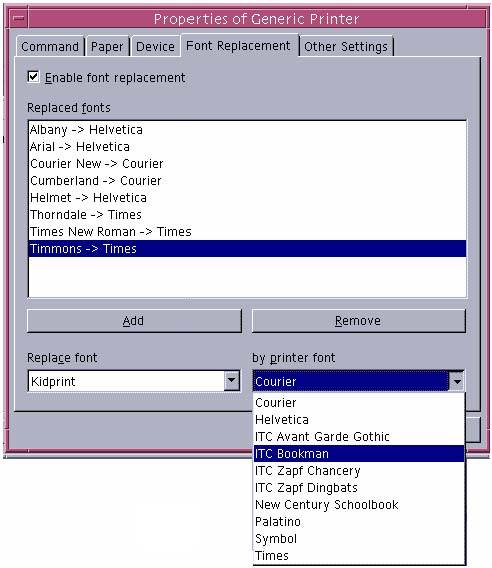 -
When you've finished, click OK. Setting up OpenOffice.org-Wide Font Substitution Note These settings are overridden by settings in Setting Up Per-Printer Font Substitution on page 72. However, this procedure applies to all applications and all printers; the settings on page 72 are per printer.
The font substitution appears to let you substitute one font for another onscreen and have it print normally; or have the substitution take place all the time (onscreen and printing). However, the way it works is that you can either substitute some of the fonts all of the time, or none of the fonts none of the time (i.e., the Screen only setting doesn't work). -
Choose Tools > Options > OpenOffice.org > Font Replacement. -
Select the appropriate original font and the font to substitute, as shown in Figure 4-37. Figure 4-37. Setting up font substitutions 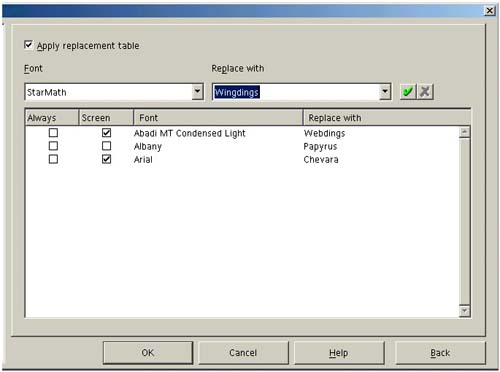 -
Click the green check mark. -
Select the Apply Replacement table checkbox. -
Select the Always checkbox next to the newly added substitution. -
Click OK. Removing OpenOffice.org-Wide Font Substitution Use this procedure to delete a font replacement. -
Select Tools > Options > OpenOffice.org > Font Replacement. -
In the list of replacements , select the replacement you want to remove and click the red X button. -
Click OK. If you want to leave font substitution information intact but disabled, deselect the Apply replacement table option and click OK.  |