Using the Automated Editing Tools
| Writer offers a number of tools to let you compare documents and show the effects of changes made to documents. Comparing Separate DocumentsThis procedure shows you how to compare two separate documents, which is different than comparing different versions of the same document (see Comparing Versions of a Document on page 408). Note You can't compare content that's in special regions , such as headers, footers, footnotes, frames , fields, and sections. And since manually inserted columns are tagged as sections, content in columns can't be compared. Yes, this is a drag. If you want to use columns and compare documents, consider making your page styles multi-column instead. To compare two separate documents:
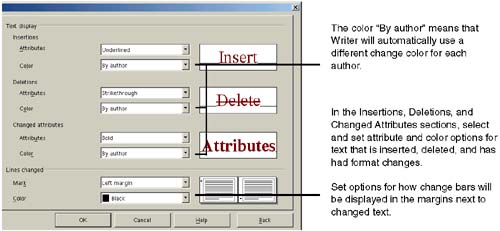
The Accept or Reject Changes window appears. You can either use it to accept or reject changes (see Accepting or Rejecting Changes on page 420) or close it to view the visual differences. The change marks that are displayed are in relation to the starting document. For example, if you started with Document A, then selected Document B to compare it to, the change marks show how Document B differs from Document A. To see what the change marks mean, go to Tools > Options > Text document > Changes. Numbering LinesYou can add line numbers beside lines in Writer. Line numbers are good references for quickly referencing locations in a document; like delivering an edit over the phone. See Numbering Lines on page 419. Using Change Bars and Other Editing MarksYou can show the effects of changes to a document in many different ways, such as displaying change bars in the margins next to text and automatically formatting text in different ways when it is deleted, inserted, or if the text attributes simply change. Setting Up Change Bars and Editing Marks
The editing marks don't show up in your document right away. You must complete the next procedure to show them. You can't assign change formats to specific authors. The program randomly assigns different colors and styles when a different author edits the content. Showing Change Bars and Editing Marks
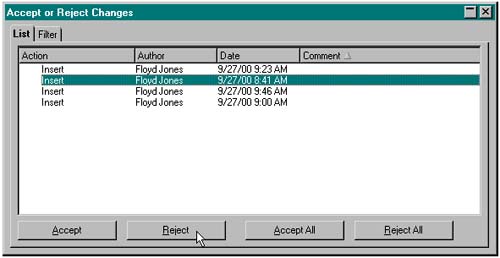
You can turn off the Show option at any time, and as long as the Record option is selected, changes will be tracked. But if you turn off the Record option, changes to the document will no longer be recorded. Accepting or Rejecting ChangesWriter gives you the opportunity to accept or reject changes made to a document. When you accept a change, the content becomes a normal part of the current document. When you reject a change, the change returns to its previous state in the document. In order to accept or reject changes, Writer needs to know that changes have occurred, which means that the Record feature needs to be activated while you work with documents (Edit > Changes > Record). To accept or reject changes:
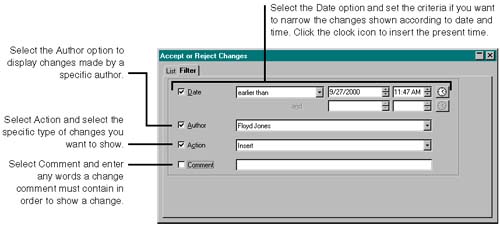
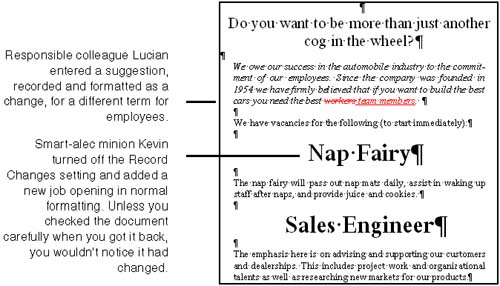
Note Rejecting changes is a great way to perform a selective undo. When you use undo, in order to undo something five steps back, you have to undo the previous four steps as well. With the accept/reject feature, you can pinpoint the exact action you want to undo (reject). While each change is given a generic description, you can pinpoint the change you want to reject like this: With the Accept or Reject Changes window open, select the change, and the change is highlighted in the document. Then click the Reject button. Protecting Your Document When You Send It to Other People to EditIt's all very well to send around your document to other people to get feedback. (Well, you have to pretend that you like to do it.) However, what if someone decides to rewrite part of your original document without recording it as a change? See Figure 11-17. Figure 11-17. The job announcement you sent around, callously hacked by a co-worker You can make sure that any input is recorded as a change, with nice red fonts and underlining, by turning on the Protect Changes features. Once it's on, you specify the password people have to enter in order to turn it off (and you don't tell anyone). Now you've ensured that everything anyone types in your document shows up as an edit, and no one can change the original text.
Once you get the document back, you can stop new text being formatted as an edit by choosing Edit > Changes > Protect Records again so that the check mark next to Protect Records disappears. You'll be prompted to enter the same password you entered in step 3. |

EAN: 2147483647
Pages: 407