Animating Mask Shape
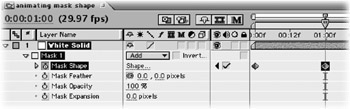
So your mask needs to adjust over time. Don't most things in life? Not a problem. After Effects offers several functions for keyframing your masks. Let's get started by clicking the triangle by the Masks to open up the mask properties.
-
Click the Mask Shape stopwatch to set a shape keyframe. You can also press Shift+Option+M (Shift+Alt+M) to set an initial keyframe on a selected mask
-
Advance in the Timeline and modify your vertexes to make a new shape keyframe.
-
Make the workspace as long as your shape mask animation and RAM preview to see After Effects interpolate the shape transformation.
-
When modifying a Bezier handle, you will affect both the incoming and outgoing curves. To access one handle at a time, use the Convert Vertex Tool, and drag one of the handles. You can also hold down the Option key (Alt) to do the same.
-
If you want to rejoin your handles, use the Convert Vertex Tool to convert the vertex to linear, then back to Bezier again.
EAN: N/A
Pages: 447
- An Emerging Strategy for E-Business IT Governance
- Assessing Business-IT Alignment Maturity
- Linking the IT Balanced Scorecard to the Business Objectives at a Major Canadian Financial Group
- Technical Issues Related to IT Governance Tactics: Product Metrics, Measurements and Process Control
- Managing IT Functions