Using a Timer Object to Set a Time Limit
Using a Timer Object to Set a Time Limit
Another interesting use of a timer object is to set it to wait for a given period of time before either permitting or prohibiting an action. You can also use this timer technique to display a welcome message or a copyright message on the screen or to repeat an event at a set interval, such as saving a file every 10 minutes. Again, this is a little like setting an egg timer in your program. You set the Interval property with the delay you want, and then you start the clock ticking by setting the Enabled property to True.
The following exercise shows how you can use this approach to set a time limit for entering a password. (The password for this program is “secret.”) The program uses a timer to close its own program if a valid password isn't entered in 15 seconds. (Normally, a program like this would be part of a larger application.)
Set a password time limit
On the File menu, click the New Project command, and create a new project named My Timed Password.
The new project is created, and a blank form appears in the Designer.
Resize the form to a small rectangular window about the size of an input box.
Click the TextBox control in the Toolbox, and then draw a text box for the password in the middle of the form.
Click the Label control in the Toolbox, and then draw a long label above the text box.
Click the Button control in the Toolbox, and then draw a button below the text box.
Double-click the Timer control on the Components tab of the Toolbox.
Visual Studio adds a timer object to the component tray below the form.
Set the properties in the following table for the program:
Object
Property
Setting
Label1
Text
“Enter your password within 15 seconds”
TextBox1
PasswordChar
“*”
Button1
Text
“Try Password”
Timer1
Enabled
Interval
True
15000
Form1
Text
“Password”
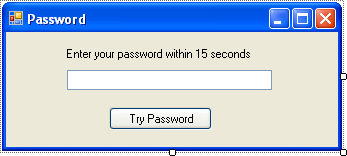
The PasswordChar setting displays asterisk (*) characters in the text box as the user enters a password. Setting the timer Interval property to 15000 gives the user 15 seconds to enter a password and click the Try Password button. Setting the Enabled property to True starts the timer running when the program starts. (If the timer wasn't needed until later in the program, you could disable this property and then enable it in an event procedure.)
Your form looks like this:
Double-click the timer object in the component tray, and then type the following statements in the Timer1_Tick event procedure:
MsgBox("Sorry, your time is up.") EndThe first statement displays a message indicating that the time has expired, and the second statement stops the program. Visual Basic executes this event procedure if the timer interval reaches 15 seconds and a valid password hasn't been entered.
Display the form, double-click the button object, and then type the following statements in the Button1_Click event procedure:
If TextBox1.Text = "secret" Then Timer1.Enabled = False MsgBox("Welcome to the system!") End Else MsgBox("Sorry, friend, I don't know you.") End IfThis program code tests whether the password entered in the text box is “secret.” If it is, the timer is disabled, a welcome message is displayed, and the program ends. (A more useful program would continue working rather than ending here.) If the password entered isn't a match, the user is notified with a message box and is given another chance to enter the password. But the user has only 15 seconds to do so!
Click the Save All button on the Standard toolbar to save your changes. Specify the c:\vb05sbs\chap07 folder as the location.
Test the Timed Password program
TIP
The complete Timed Password program is available in the c:\vb05sbs\chap07\timed password folder.
Click the Start Debugging button to run the program.
The program starts, and the 15-second clock starts ticking.
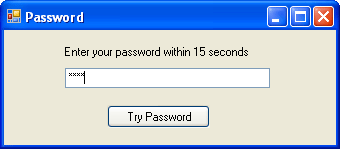
Type open in the text box.
The asterisk characters hide your input, as shown here:
Click the Try Password button.
The following message box appears on the screen, noting your incorrect response:

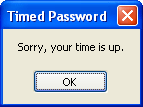
Click OK, and then wait patiently until the sign-on period expires.
The program displays the time-up message shown in this message box:
Click OK to end the program.
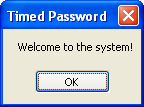
Run the program again, type secret (the correct password) in the text box, and then click Try Password.
The program displays this message:
Click OK to end the program.
The Visual Basic development environment appears.
As you can imagine, there are many practical uses for timer objects. As with For…Next loops and Do loops, you can use timer objects to repeat commands and procedures as many times as you need in a program. Combined with what you learned about the If…Then and Select Case decision structures in Chapter 6, you now have several statements, controls, and techniques that can help you organize your programs and make them respond to user input and data processing tasks in innovative ways. Learning to pick the best tool for the flow-control situation at hand takes some practice, of course, but you'll have ample opportunity to try these tools and techniques as you continue working in the following chapters, and as you construct interesting applications on your own. In fact, you might take the opportunity right now to create a simple project or two from scratch before you tackle the next chapter, which discusses debugging. How about creating a digital clock that displays a different piece of art in a picture box object every 30 seconds?
EAN: N/A
Pages: 168