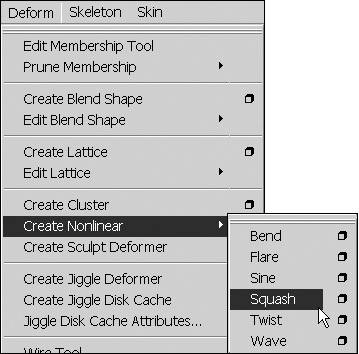
| You can use nonlinear deformers to quickly bend, twist, flare, or even squash a surface, greatly speeding tasks that would otherwise require multiple CV selections, rotations, scales, and transformations. Create a spiral staircase out of a cube with the Twist deformer. Bend a steel spoon with ease using a Bend deformer, or create bell-bottom pants using the Flare deformer. Each of the nonlinear deformers performs a specific task related directly to its name. Nonlinear deformers include Bend, Flare, Sine, Squash, Twist, and Wave (Figure 13.1). Figure 13.1. The nonlinear deformers (from left): Bend, Flare, Wave, Twist, Sine, and Squash. 
The two most common options for the non-linear deformer tools include the following: Envelope You use this option to specify the scale factor of the deformation. You can select values from 0 to 1, and you can enter values from 2 to 2. A value of 2 doubles the overall deformation effect; a negative value inverts the effect. The default value is 1. Low and High Bound (all nonlinear deformers except Wave) Adjust the Low and High Bound when you want part of the surface to remain unaffected by the deformer.
In addition, each of the nonlinear deformer tools has its own distinct options, discussed in the sections that follow. Bend deformer The Bend deformer can be a great time saver when you need to bend geometry but don't want to take the time to move each CV individually. Once a Bend deformer is added to a surface, the user can control the amount of surface arc, thus making the surface appear to bend. The more isoparms (the lines that define the NURBS geometry) that you add to a surface before adding the Bend deformer, the smoother the arc will appear. An additional option for the Bend deformer is Curvature, which determines the amount the object bends. To use the Bend deformer: 1. | Select the object to be deformed.
| 2. | From the Deform menu, select Create Nonlinear > Bend (Figure 13.2).
Figure 13.2. From the Deform menu select Create Nonlinear > Bend. 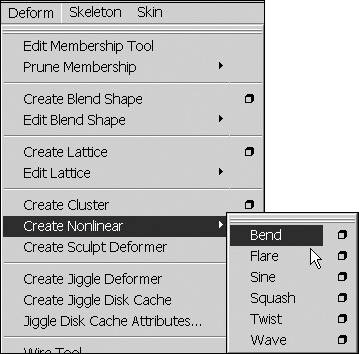
The Bend deformer is added to the selected surface.
| 3. | Click the bend1 title under the Inputs section of the Channel Box to view the Bend properties (Figure 13.3).
Figure 13.3. The Bend properties control how much an object is deformed. 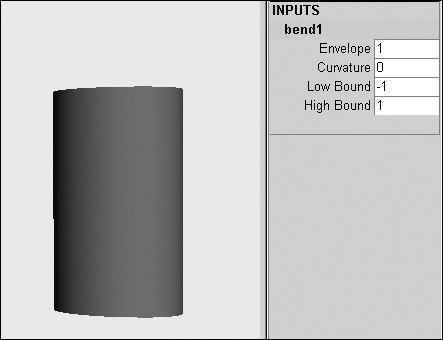
| 4. | Set Curvature to 1.
The object is now bent around its center.
| 5. | Set Low Bound to 0.
The object's bend still starts at its center, but only the top of the object is bent (Figure 13.4).
Figure 13.4. Adjusting the curvature adds bend to the object; adjusting the Low Bound controls the start point of the Bend from the bottom of the object. With a Low Bound of 0, half of the cylinder remains undeformed (shown); with a Low Bound of 1, the entire lower half is deformed. 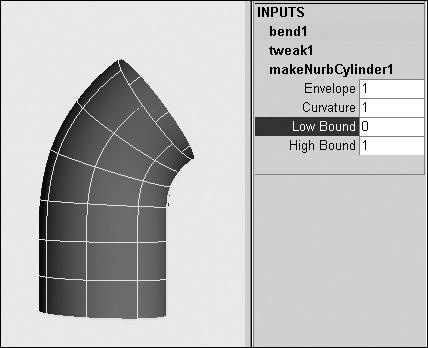
|
 Tip Tip
Flare deformer You can attach this deformer to a surface to taper or flare selected geometryuseful on surfaces like jugs, bellies, and bell-bottoms. Additional options for the Flare deformer include the following: Start Flare X and Z Determines the amount of flare at the start of the Low Bound along the specified axis. End Flare X and Z Determines the amount of flare at the start of the High Bound along the specified axis. Curve Determines the amount of curvature between the Low and High Bound.
To use the Flare deformer: 1. | Select the object to be deformed.
| 2. | From the Deform menu, select Create Nonlinear > Flare.
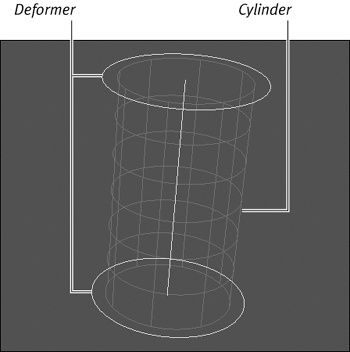
A Flare deformer is added to the selected surface (Figure 13.5).
Figure 13.5. When a nonlinear deformer is added to a surface (Flare is shown here), a special manipulator is created to control the look of the deformation. The original cylinder is gray, the deformer is white. 
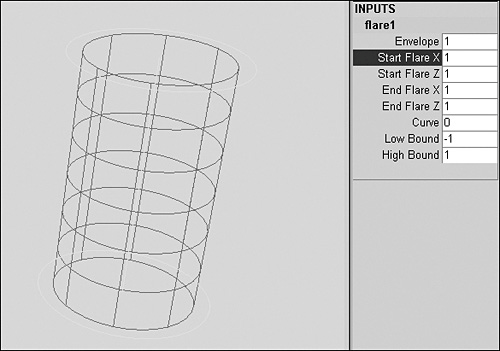
| 3. | Click the flare1 title under the Inputs section of the Channel Box to view the Flare properties.
| 4. | Click Start Flare X (Figure 13.6).
Figure 13.6. The Flare parameters. 
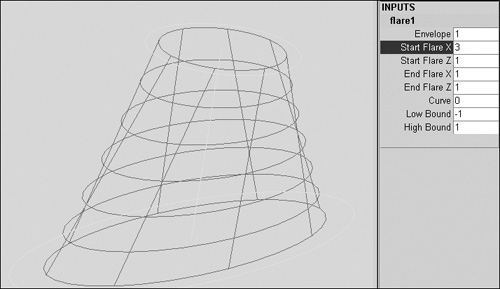
| 5. | Click and drag with the middle mouse button in the Perspective view to flare the base of the object until Start Flare equals 3.
or
If you don't have a three-button mouse, you can type the desired value in the Start Flare X field.
The object is flared along the x axis (Figure 13.7).
Figure 13.7. The object becomes stretched by the Flare deformer. 
|
 Tip Tip
Sine deformer The Sine deformer changes the shape of an object along a specified sine wave, which is a scribble-like line that looks similar to the way a heart monitor line displays a normal heartbeat. Added Sine options include: Amplitude Determines the maximum wave amount. Wavelength Decreasing Wavelength greatens the frequency; increasing it lessens the frequency. Offset Determines the location of the sine wave relative to the center of the deformer handle. Dropoff Determines how the amplitude of the sine wave decays. Negative values decay toward the center of the deformer handle; positive values decay away from the center of the deformer handle.
To use the Sine deformer: 1. | Select the object to be deformed.
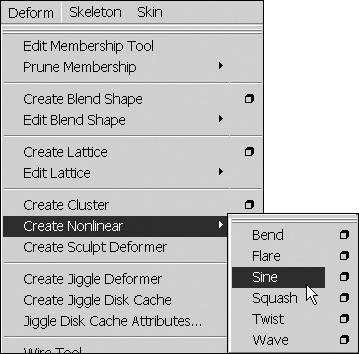
| 2. | From the Deform menu, select Create Nonlinear > Sine (Figure 13.8).
Figure 13.8. Select Sine to add the deformer to the geometry. 
A Sine deformer is added to the selected surface.
| 3. | Click the Sine(n) title under the Inputs section of the Channel Box to view the sine properties.
| 4. | Click Amplitude.
| 5. | Click and drag with the middle mouse button in the Perspective view until Amplitude equals 0.5 or type 0.5 in the Amplitude field.
The surface begins to have a wavy shape.
| 6. | Click Wavelength.
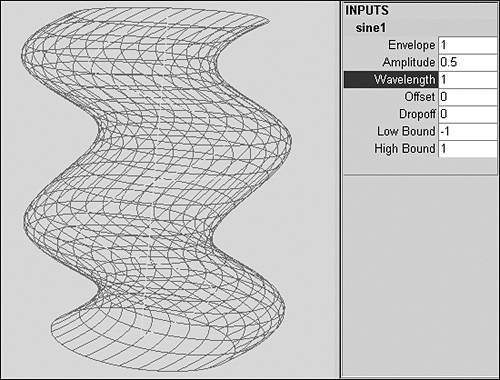
| 7. | To add more curve to the object's shape, click and drag with the middle mouse button in the Perspective view until Wavelength equals 1 or type 1 in the Wavelength field (Figure 13.9).
Figure 13.9. The Sine deformer causes the object to appear wavy. 
|
Wave deformer The Wave deformer is perfect for creating water-droplet rings and small waves over a surface. This deformer works best on highly detailed flat surfaces. Additional Wave options include: Amplitude Determines the maximum wave amount. Wavelength Decreasing Wavelength greatens the frequency; increasing it lessens the frequency. Offset Determines the location of the sine wave relative to the center of the deformer handle. Animating the Offset will make the surface ripple outward. Dropoff Determines how the amplitude of the sine wave decays. Negative values decay towards the center of the deformer handle; positive values decay away from the center of the deformer handle. Dropoff Position Determines the start and end position of the amplitude of the sine wave. Min and Max Radius Determines the minimum and maximum radius of the circular sine wave.
To use the Wave deformer: 1. | Create a NURBS primitive plane.
| 2. | In the Channel Box, change patches U and patches V to 10.
| 3. | From the Deform menu, select Create Nonlinear > Wave.
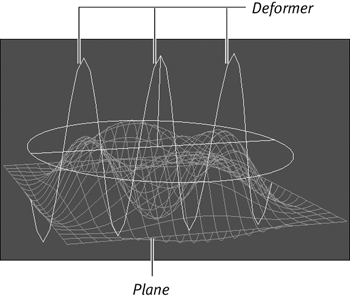
A Wave deformer is added to the selected surface (Figure 13.10).
Figure 13.10. The Wave manipulator controls the Wave deformer's parameters. Deformer is white, plane is gray. 
| 4. | Click the Wave(n) title under the Inputs section of the Channel Box to view Wave properties.
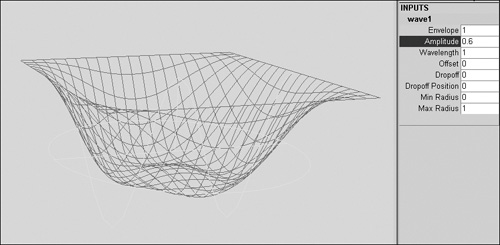
| 5. | Set Amplitude to 0.6.
The object becomes wavy (Figure 13.11).
Figure 13.11. The Amplitude setting determines the maximum wave amount. 
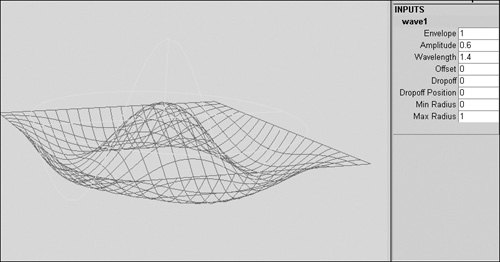
| 6. | Set Wavelength to 1.4.
Fewer waves now define the object's shape (Figure 13.12).
Figure 13.12. By increasing Wavelength to 1.4, we decrease wave frequency. 
|
The Squash deformer The Squash deformer gives the user precise control over a surface's volume when it's being squashed. If you scale a surface vertically along one axis without scaling the other axes horizontally, you create a surface with less physical volume, breaking the illusion of real objects, which keep the same volume when they are squashed. If you want your objects to appear realistic, it's important to keep the volume of the object the same when adding squash and stretch. Additional Squash options include the following: Factor Determines the amount an object can be squashed or stretched. Expand Determines how much an object will expand (in volume) outward while squashing, or inward while stretching. Start and End Smoothness Determines the amount of smoothing (similar to Dropoff) near the low-bound position (Start Smoothness), or near the high-bound (End Smoothness). In a cylinder the high-bound and low-bound position would be the top and bottom of the cylinder, respectively. So if Start Smoothness is altered, the point at the bottom of the cylinder will have a smoother transition into the squash.
To use the Squash deformer: 1. | Create a NURBS primitive cylinder to be deformed.
| 2. | From the Deform menu, select Create Nonlinear > Squash (Figure 13.13).
Figure 13.13. Select Deform > Create Nonlinear > Squash. 
A Squash deformer is added to the selected surface.
| 3. | Click the Squash(n) title under the Inputs section of the Channel Box to view the Squash properties.
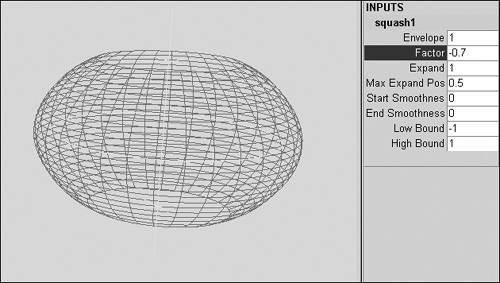
| 4. | Set Factor to 0.7.
The object is squashed vertically (Figure 13.14).
Figure 13.14. A negative Factor setting squashes the object; a positive Factor setting stretches it. 
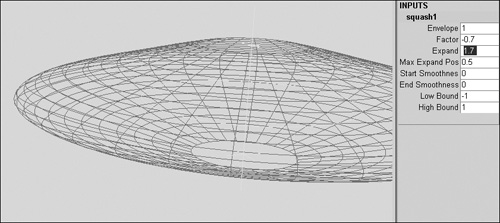
| 5. | Set Expand to 1.7.
The object expands to add volume to the shape (Figure 13.15).
Figure 13.15. If you squash an object, you should expand it to make sure it retains its volume. 
|
 Tip Tip
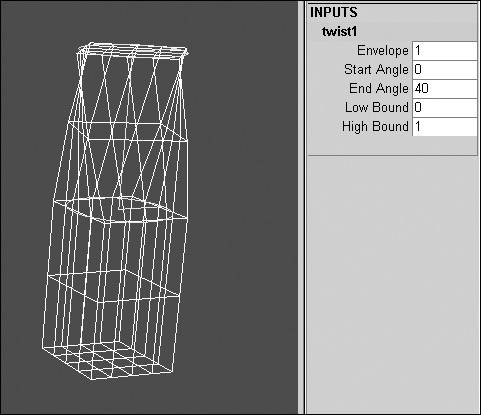
Twist deformer The Twist deformer is often used to twist a cube into a cartoon-style building or to quickly create a twisted metal sculpture. The higher the density of the geometry, the smoother the twist will appear. The Twist deformer includes one option, the Start and End Angle, which determines the degree of twisting from the Low or High Bound position. To use the Twist deformer: 1. | Create a primitive polygonal cube.
| 2. | From the Deform menu, select Create Nonlinear > Twist.
A Twist deformer is added to the selected surface.
| 3. | Click the Twist(n) title under the Inputs section of the Channel Box to view the Twist properties.
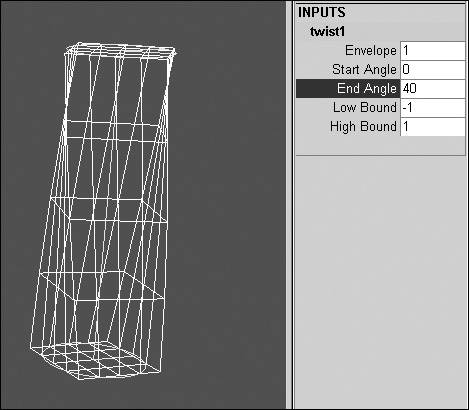
| 4. | Set End Angle to 40.
The entire object twists around the center of the deformer (Figure 13.16).
Figure 13.16. Adjusting End Angle twists the surface's shape. 
| 5. | Set Low Bound to 0.
The twist now starts halfway up the object (Figure 13.17).
Figure 13.17. Adjusting Low Bound to 0 forces the twisting to begin halfway up the deformed surface. 
|
|


 Tip
Tip