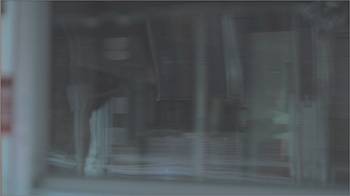
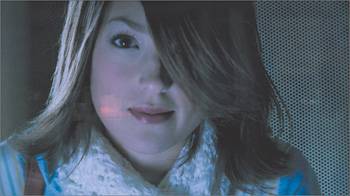
| To finish the shot, let's add a reflection to the scene. 1. | Make a flipbook of the reflection node.
 Hold on a minute. The reflection has a camera move on it, which will need to be stabilized.
| 2. | Set the proxyScale back to the Base setting by clicking the Proxy button on the top menu bar to check the composite at full resolution.
 | 3. | Highlight the reflection clip and select a Stabilize node from the Transform tab.
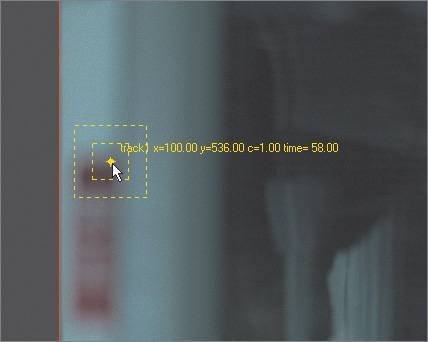
 Be careful when placing the tracker. Pick a place on the frame where reflections aren't whizzing by.
| 4. | Go to frame 58 and place the tracker over the top of the red thingy on the left side of the screen.
 | 5. | Turn limitProcessing on, which will make the tracking analysis go faster.
 | 6. | Click the reverse tracking button.
 As the motion of the clip is analyzed, the screen turns black except for the area around the track, because limitProcessing is active.
| 7. | When the tracker completes its motion analysis, turn on applyTransform.
 | 8. | Turn on the P2 proxy and create a flipbook.
The reflection clip is stabilized, but the stabilization has created a black border around the image. We can fix this by blowing the image up slightly with a Move2D node. Note that the greatest amount of black around the image occurs at frame 58.
| 9. | Close the flipbook.
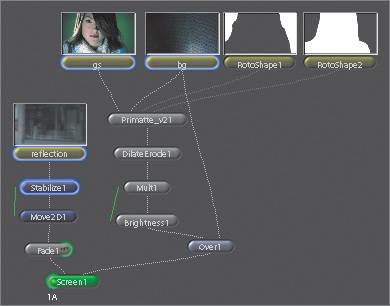
| 10. | Go to frame 58 and add a Move2D node from the Transform tab after Stabilize1.
 | 11. | Use the onscreen controls to blow the image up enough to get rid of the black border; or just type in the parameters. I used the following settings:
Parameter | Value |
|---|
xPixels | 0 | yPixels | 52 | xScale | 1.17 | xScale | 1.17 |
| 12. | Click the Flipbook icon again, and you'll see that the black border is gone. Close the flipbook when you're done.
| 13. | Drag the Time Bar to frame 18.
| 14. | From theLayer tab, add a Screen node after Move2D1, and connect Over1 to the second input.
 Are you sick of hearing that the Screen node is good for adding reflections? Too bad. I can tell you right now that the reflection is too bright. Use a Fade node to lower its intensity.
| 15. | Highlight Move2D1 and select a Fade node from the Color tab.
 Fade is similar to Brightness, but it also affects the alpha channel.
| 16. | Set the Fade value to 0.5.
 | 17. | Make your last flipbook.
Everything looks good in motion. Check the composite one more time at full resolution.
| 18. | Set the proxyScale back to the Base setting to return to full resolution.
 | 19. | Click the Home button beneath the Viewer to see the image at a 1:1 pixel ratio.
| 20. | Look at the various portions of the image by dragging with the middle mouse button.
 OK, that's it. Consider yourself a lean, mean keying machine.
| 21. | Quit Shake.
|
Primatte Tips If you are having problems between the spill suppression, foreground, and background, move the Operator slider back to 0 and redo your initial Center pick. Click the color box and make a much smaller drag of the background area. This way, all subsequent operations will be much finer. Foreground and background scrubs can be as broad as you want. For the other color-picking parameters, including the initial Center scrub, short scrubs are recommended, even as fine as one pixel. You may need to pull several keys (for example, one key for the body, one for hair, another for clothing, and so on). Use Primatte's matte arithmetic settings to replace the foreground matte with the current Primatte matte, or add, subtract, or multiply the mattes. You can always leave the Primatte output on Alpha Only and adjust the matte further with other tools such as DilateErode, Blur, Gamma, and so on, and then apply a Mult afterwards. Primatte does its spill suppression by pulling in color from the background image. The reason for this is that if a person picked up blue spill from a blue field behind them, then they would probably also pick up red spill from a red brick wall. This means that the foreground sometimes will appear slightly transparent, even though the alpha channel is opaque. If you are having problems with this, use Primatte's replaceImage input. The replaceImage input allows you to use any image as the source for Primatte's color correction. Using a blurred version of the background in the replaceImage input is sometimes useful. Also, if a person is wearing a white shirt, you might want to set the replaceMode to use color and change the replaceColor to white.
|