| Once upon a time, it was difficult to make a Web page look just the way you wanted it to look because browsers had very little support for layout. Dreamweaver worked hard to make positioning possible despite the poor browser support, and the primary way Dreamweaver did this was with what it calls layers . The remainder of this chapter covers them. It's important to note that Dreamweaver's layers are not the same thing as the HTML layer tag. The layer tag was implemented in Netscape 4 and only Netscape 4. Neither earlier versions of Netscape, nor later versions of Netscape, and no other browser ever included itso don't even bother with it. Given the capabilities of Dreamweaver 8, and the browsers available at the time Macromedia shipped it, Dreamweaver's layers are in nearly the same shape as that of the HTML layer tag: obsolete, and not for use going forward. However, you may have older sites that were set up with layers, so it's worth learning a little about how they work. Layers for layout You can create a layer by going to the Layout category of the Insert Bar, clicking the Draw Layer button  , and then drawing a box in the document window ( Figure 6.58 ). Each box you draw is absolutely positioned on your Web page, with a fixed height and width and a fixed position from the top and left edges of the page. , and then drawing a box in the document window ( Figure 6.58 ). Each box you draw is absolutely positioned on your Web page, with a fixed height and width and a fixed position from the top and left edges of the page. 
The layers can be selected, moved, and resized by clicking on the border of a layer. Once a layer is selected, you can see its selection handle and resize handles ( Figure 6.59 ). 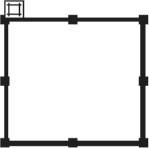
| We might be coming off a little heavy-handed here, but it's from experience: don't use layers. Just don't. If you have a site that uses layers, it's worth taking the time to carefully convert it to use block positioning layout, divs, and CSS. Layers themselves , along with converting layers to tables and vice versa, are remnants of an older, sadder time. Dreamweaver leaves them in for historical reasons, but if you're just starting out, they're the wrong way to go. |
Once you've added your layers to your page, they can be used in the same way divs were described aboveyou can add text, images, or whatever you'd like to your layers. Styles for layers are internal, and each layer has a separate set of rules of its ownusually with meaningful names like Layer1 and Layer2 . If you want to see which layer you're working on, move the cursor over the layer, and a tip appears giving the id, size , and position of that layer ( Figure 6.60 ). 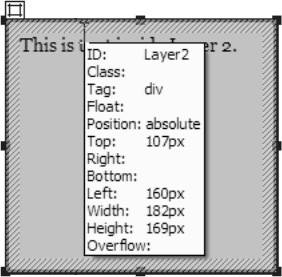
Layers can overlap other layers if you define them to do so ( Figure 6.61 ). If you don't want them to overlap, you can check the Prevent overlaps box in the Layers tab of the CSS panel ( Figure 6.62 ). That panel also contains the visibility indicator: a blank space, or an open or closed eye, on the left side of the panel. If the eye is open , that layer is visible. If the eye is closed, that layer is hidden. If the column is blank, the layer inherits its parent's visibility (layers which have the document as their parent will be visible). The right column of the table is the Z-index of the layer. Wherever two layers overlap, the one with the higher Z-index displays. The numbers don't have to be sequential; for instance, if you want something to always display, give it a huge Z-index such as 5000. 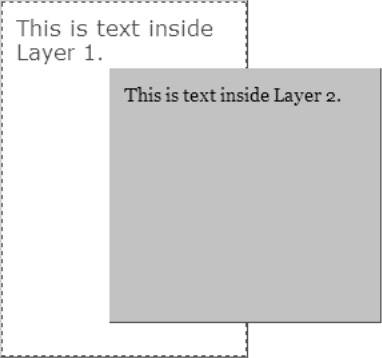

Converting layers to tables You could use layers just like divs, and given that the layer tool actually creates divs, that would be somewhat equivalent. But the real point of layers was to be able to lay out pages visually in the days before divs had widespread browser support. So, that was the next step: converting layers to tables. This is where things get ugly fast. To convert a layer-based page to tables: | 1. | Choose Modify > Convert > Layers to Table ( Figure 6.63 ). The Convert Layers to Table dialog appears ( Figure 6.64 ). 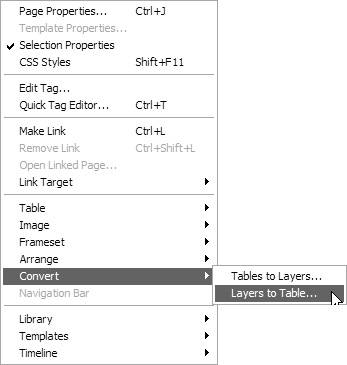  | | 2. | The Convert Layers to Table dialog gives you a number of choices: -
Whether you want your new table to be as close as possible to the original, or as small as possible, which collapses empty cells. If you choose the latter, you have the option of choosing how small cells must be before they're collapsed . -
You can choose if you want to use transparent GIFs. If you do this, the bottom row of your table consists of spacer GIFs, forcing your new table into strictly sized columns . -
You can choose if you want your new table to be centered on the page. -
You're given a choice of whether or not you want to prevent layer overlaps, but it doesn't matter what you pick; Dreamweaver doesn't care. If you turn this option off and turn off the Prevent overlaps choice on the Layers tab of the CSS panel, and then try to convert a page that contains overlapping layers, you'll still get Figure 6.65 , which tells you that you can't convert this page. If that's your situation, move your layers until they no longer overlap ( Figure 6.66 ). 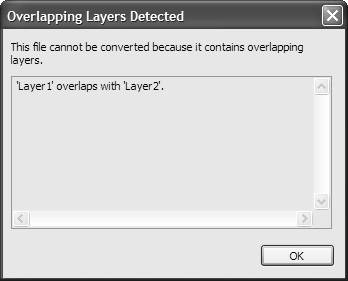 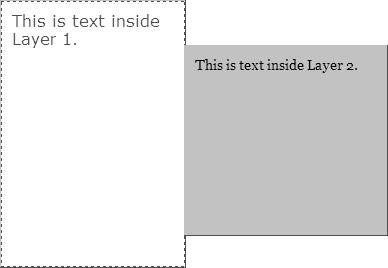 -
You're given a choice of whether or not you want the Layers tab of the CSS panel to show after the conversion. If you turn this on, the Layers tab and CSS panel will be open when the conversion is done. If you turn it off, and the Layers tab was previously open, the CSS panel group collapses. If you turn it off and the Layers tab isn't currently open, nothing happens. -
You also have a choice of showing the grid, and of whether you want to snap your new table cells to that grid. You can choose one, both, or neither. | | 3. | Click OK to accept, and your page will be re-created in tables ( Figure 6.67 ). Except... it doesn't really work correctly. For instance: -
In the original layered version, the left-hand layer had 10 pixels of padding, a dashed red border, and the text was in a large red serif font. In the new tables version, all of that is gone. -
The right-hand layer also had padding and a specific font, and neither of those carried overbut the colored background did. -
If you look at the source code, the rules that were created for the two layers still exist, even though they aren't used any more. 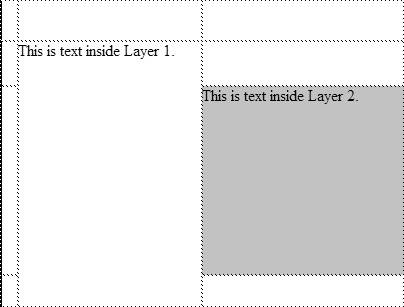 |  Tips Tips -
You can't convert just some of the layers on a page. The conversion process converts all layers on the page. -
We're not sure why anyone would want to check the Show layers panel box. After all, once you've converted from layers to tables, the Layers tab isn't of any further use to you! -
There really is no excuse to create new pages with this method: you can start and end with tables if that's what works for your site, or you can start and end with divs, but there is no reason to start with layers and end with tables.
Converting tables to layers Okay, you're convincedtables aren't the way to do layout any more, and you want to convert all your pages to CSS and divs. Great! And then you remember that back in Figure 6.63 there was another option: Modify > Convert > Tables to Layers. Well, this is going to be easy, you think: after all, layers are just a sort of div, right? Not so fast, there. To convert tables to layers: | 1. | Choose Modify > Convert > Tables to Layers (Figure 6.63). The Convert Tables to Layers dialog appears ( Figure 6.68 ). 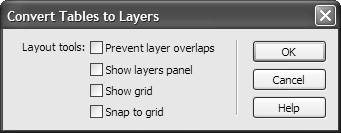 | | 2. | The Convert Tables to Layers dialog is similar to the Convert Layers to Table dialog, but it has considerably fewer options: -
You can choose whether or not to check Prevent layer overlaps, but whether or not you check this, none will be created. -
The Show layers panel choice makes considerably more sense here than it did going the other way around. -
And again, you can choose to take this opportunity to Show grid and Snap to grid. | | 3. | Click OK when you're ready to see the mess that ensues. For instance, the HomeCook site ( Figure 6.69 ) looks fine in tables; after its conversion to layers ( Figure 6.70 ), it appears rather odd: -
The HomeCook text in the header has moved up to the top of the screen, while the tagline below it has stayed in place. -
All the font styles have been lost. -
Font colors have been lost in some places but retained in others. -
The bullet points next to the navigation items are gone, and the navigation no longer goes all the way over to the left margin. -
The colored vertical bar on the right side that contains reviews now has varying widths. And so on. The new version also contains 22 layers, each of which has its own style rule including fixed size and position on the page.  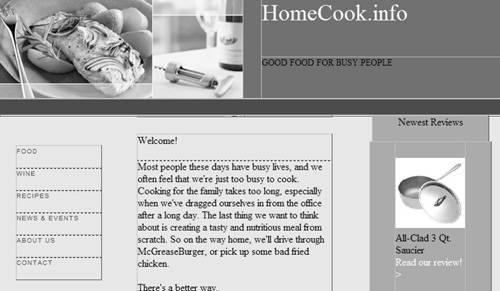 | Tip
 |