If you prefer to stay in Design view but every so often you just want to tweak something, the Tag Inspector is one of the simplest ways to do so. Along with the Tag Editor and Quick Tag Editor (covered earlier), it's a great way to modify existing tags, and it's a easy way to get used to what attributes exist for what tags.
| 1. | If the Tag Inspector currently isn't displaying, choose Window > Tag Inspector from the menu.
|
| 2. | If you're in Design view, click on an element on the page, or choose a tag from the tag selector. If you're in Code view, click anywhere inside a tag. The tag and its attributes appear in the Tag Inspector ( Figure 15.32 ). Be sure the Attributes tab is selected. 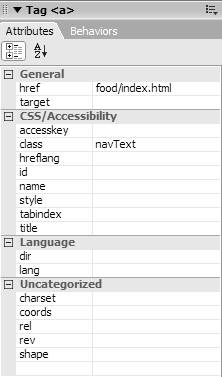 |
| 3. | There are two ways to view the attributes in the Tag Inspector: by category or as a list. -
To view by category, click the Show Category view button  . Categories can be open or closed; to open a closed category, click the + button (Windows) or the right- facing triangle (Mac). To close an open category, click the - button (Windows) or the downward-facing triangle (Mac). When open, the list of attributes that fall into that category are displayed. . Categories can be open or closed; to open a closed category, click the + button (Windows) or the right- facing triangle (Mac). To close an open category, click the - button (Windows) or the downward-facing triangle (Mac). When open, the list of attributes that fall into that category are displayed. -
To view as a list, click the Show List view button  . This choice displays all the tag's attributes in an alphabetical list ( Figure 15.33 ). . This choice displays all the tag's attributes in an alphabetical list ( Figure 15.33 ). 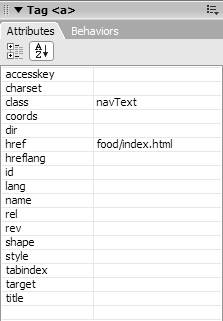 |
| 4. | You can now modify, add, or delete attributes. There are different ways to edit different types of attributes: -
If you're adding or modifying an attribute with a value of a URL ( Figure 15.34 ), you'll see the Point-To-File icon and a browse button to the right of the entry field. Alternatively, you can type into the entry box, which is also the case for most attributes. 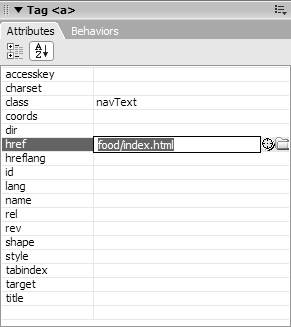 -
If your attribute has particular defined values, clicking in the value column displays a pop-up menu containing the valid values ( Figure 15.35 ). 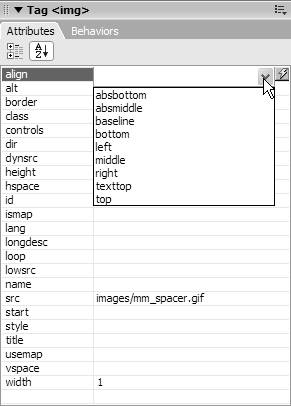 -
If the attribute contains a color , clicking on the small box in the value column brings up the standard color picker ( Figure 15.36 ). 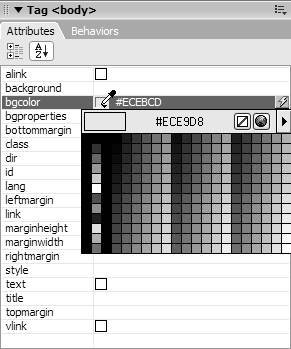 |
| 5. | There's no OK or Accept changes button on the panel; simply clicking away from the attributes or off the panel implements your changes on your page.
|
 Tip
Tip