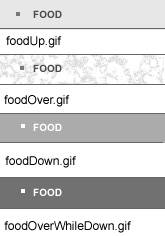
A Dreamweaver navigation bar consists of a set of images that change in response to a user action. Before you use the Insert Navigation Bar command, you must prepare the image sets for each individual image (or button) that will appear in the navigation bar. If you want to use four image states, you'll need four images for each button similar to the four variations on the FOOD button you see in Figure 12.12 .
| 1. | Select the insertion point in the document window where the navigation bar goes.
|
| 2. | Select Insert > Image Objects > Navigation Bar.
or
Select Navigation Bar from the pop-up menu next to the Image icon in the Common tab of the Insert Bar.
|
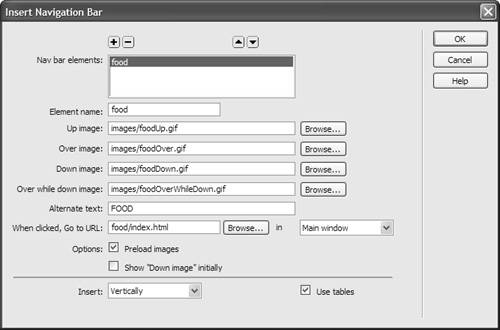
| 3. | The Insert Navigation Bar dialog will open ( Figure 12.13 ), and display the following fields: - Nav bar elements: Don't enter anything here. As you add each element to your nav bar, this list grows automatically.
- Element name : This is the unique name that identifies the object. JavaScript objects must have unique names. On a nav bar, it makes sense to use a name that's the same or similar to the menu choice on the button. Remember, no spaces are allowed in the name.
- Up image: This is the Up (default) version of the image.
- Over image: This is the over version of the image.
- Down image: This image is displayed when the user clicks on the image.
- Over while down image: This version of the image appears when the user moves the mouse after clicking on the image.
- Alternate text: This is what displays for users with non-graphical browsers.
- When clicked, Go to URL: This is the page the user sees when the menu is clicked. Specify the window in which you want the URL to open. If you're using frames (See Chapter 11, "Adding Frames"), put the name of one of the frames here. If you're not using frames , leave it at "Main window."
- Options: Always check Preload images. Show "Down image" initially would be selected on an individual page-by-page basis only if you're using the down version of the image to indicate the current page. When this option is selected, an asterisk appears after the element in the Nav bar elements list.
- Insert: This pop-up menu lets you choose either a horizontal or vertical layout for the nav bar.
- Use tables: If this check box is selected, the nav bar will use a table layout.
 |
| 4. | Click the plus button to add other elements and complete the dialog for each new element.
|
| 5. | When you're done adding elements, click OK to accept your entries.
|
| 6. | Check the default actions in the Behaviors panel to be sure they're the ones you want.
|
 Tips
Tips