Warming Up with Preliminary Troubleshooting Steps
| Before getting started, some naming conventions must be defined when referring to specific devices. These devices are given the same host name and IP address throughout the entire chapter. The following devices are referenced as follows:
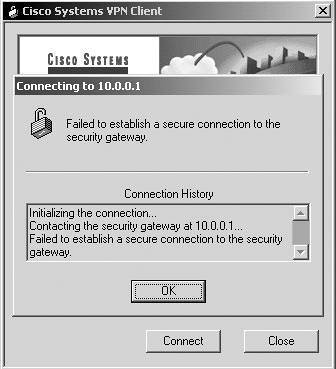
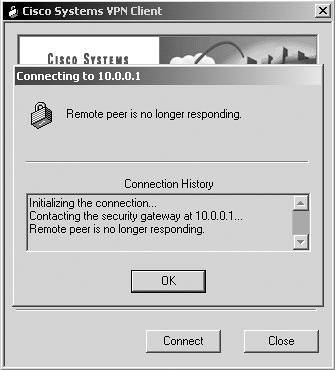
There are three steps you should always take before moving on to the VPN troubleshooting scenarios. If you cannot verify that all these steps are functioning properly, you will not be able to connect with the VPN client. These steps include determining if you have an Internet connection, making sure that the VPN client is working properly, and checking or creating your profiles Step 1: Determine if There Is an Internet ConnectionWhen trying to initiate an IPSec tunnel with no Internet connectivity or a bad route to the concentrator, you receive one of two errors. After clicking the Connect button, you are immediately prompted with either "Failed to establish a secure connection to the security gateway" or "Remote peer is no longer responding." The errors are shown in Figure 22-1 and Figure 22-2. Figure 22-1. Failure to Connect to Gateway Error
Figure 22-2. Remote Peer No Longer Responding
If the error "Failed to establish a secure connection to the gateway" is received, a problem exists with the connection to the Internet. Four things could be wrong:
To check the physical connection of the PC to the gateway device, the first thing you do is to make sure that the PC's network interface card (NIC) has a link light. If the left light is glowing (it is usually the left light for most NICs), it means that there is a physical connection. If it is not, make sure that the cables are properly plugged in. In some cases, the connection might require a crossover cable, instead of a straight-through cable. For a detailed explanation of RJ-45 cable types, see www.cisco.com/univercd/cc/td/doc/pcatrj45__c1.htm. If there is a physical connection, check the status of the IP address, as listed in Table 22-2.
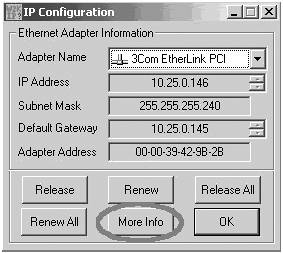
Windows 95/98Figure 22-3 is an example of winipcfg. If you click the More Info button that is circled, you receive information including DNS servers, Windows Internet Naming Service (WINS) servers, Dynamic Host Configuration Protocol (DHCP) servers, and a Media Access Control (MAC) address. The IP address 10.25.0.146 falls under RFC 1918 NAT. For more information on RFC 1918, see Chapter 10, "ISDN Design Solutions." Figure 22-3. Windows 95/98 winipcfgOutput Information
The subnet mask is 255.255.255.240 or /28. The /28 indicates the number of bits allocated for the network. The default gateway is simply the first hop that all the devices on your subnet go to when they need to access anything outside of your subnet. Lastly, the adapter address is the MAC address of the adapter that you are using. Windows NT/2000 IP InformationThe ipconfig output from a Windows NT/2000 DOS prompt is shown in Example 22-1. Example 22-1. Windows NT/2000 ipconfigOutput InformationC:\>ipconfig Windows 2000 IP Configuration Ethernet adapter Local Area Connection: Connection-specific DNS Suffix . : cisco.com IP Address. . . . . . . . . . . . . : 10.25.0.146 ! IP address falls in the RFC 1918 address range. Subnet Mask . . . . . . . . . . . : 255.255.255.240 ! Subnet mask indicates you have 14 addresses in this subnet. Default Gateway . . . . . . . . : 10.25.0.145 ! The first hop that all devices on your subnet go to first. After you verify the physical connection and check the IP address, make sure that the PC resolves the host name of the concentrator. Open a DOS window and use the nslookup command, along with the host name of the concentrator to which you are trying to connect. If it resolves properly, it appears as follows: C:\>nslookup www.cisco.com Server: dns-sjk.cisco.com Address: 171.68.226.120 Name: www.cisco.com Address: 198.133.219.25 If you receive the error "*** dns.company.com can't find www.cisco.com: Non-existent host/domain," it indicates that the VPN client has problems finding the concentrator. Possible causes to investigate are a bad route or a misspelling in the host name or IP address of remote server window, or a local firewall blockage. To test the route, open a DOS prompt window and try tracing to the concentrator's IP address or to the company's firewall using the tracert command. You trace to your company's firewall because most firewalls are configured to block Internet Control Message Protocol (ICMP) traffic from entering the network. If ICMP traffic is blocked, you will never get a ping or tracert through to the concentrator. See the tracert in Example 22-2. When you can reach the concentrator or your company's firewall, you should be able to establish an IPSec tunnel by using the VPN client. If you do not know the IP or host name of the firewall, you can simply try to trace to the concentrator, and most likely you will reach the firewall and receive timeouts because firewalls block ICMP packets by default. The trace shows that because you can route to the company firewall, you should be able to route to the concentrator as long as the firewall is configured to allow IPSec through. Because you can trace to the firewall successfully, you have proven that your PC can route to your company correctly. Example 22-2. Tracing to Your Company's FirewallC:\>tracert firewall.company.com Tracing route to firewall.company.com [65.1.1.2] over a maximum of 30 hops: 1 30 ms 20 ms 10 ms adsl.dsl.01.ISP.net [63.12.101.254] ! Three datagrams round-trip time 2 30 ms 40 ms 40 ms sl-bb22-sj-5-ISP.net [144.232.18.74] ! Hostname and IP of router 3 41 ms 40 ms 30 ms sl-bb20-sj-15-0.ISP.net [144.232.3.2] 4 30 ms 40 ms 40 ms sl-gw-ISP.net [144.232.3.1] 5 30 ms 40 ms 40 ms sl-company.ISP.net [144.218.1.1] 6 31 ms 40 ms 40 ms firewall.company.com [65.1.1.2] ! The firewall is reached Trace complete. The tracert command is a simple and valuable tool. Three datagrams are sent, each with a Time To Live (TTL) field value set to 1. The TTL value of 1 causes the datagram to timeout as soon as it hits the first router in the path; this router then responds with an ICMP time exceeded message (TEM), which indicates that the TTL has expired.For more information on tracert and ping, see Chapter 4, "Troubleshooting Approaches, Models, and Tools." Step 2: Ensure that the VPN Client Is Properly InstalledThe next step is to determine if the VPN client is working properly. To do this, check to ensure that the cvpnd.exe process has started and is currently running. You can immediately determine this if you receive the error "The necessary VPN subsystem is not available," when you open the VPN dialer. To check to see if the cvpnd.exe is running in most Windows versions, simply press Ctrl-Alt-Delete and go to Task Manager. In Task Manager, click the Processes tab, and then click the column called Image Name to sort the process names. If the cvpnd.exe process is not running, two possible problems might have occurred:
The first problem is slightly easier to remedy than the second. To enable the Cisco Systems, Inc. VPN Service in Windows NT/2000, go to Start, Control Panel, Administrative Tools, Services. Then look for the Cisco Systems. VPN Service, right-click it and select Properties. From the Properties window, change the Startup Type to automatic, and click Start to start the service. If the cvpnd.exe is now listed in Task Manager's processes, the VPN client should work correctly. NOTE The Microsoft IPSec policy agent must be disabled in services for VPN to work. The VPN installer is set up to disable it, but there have been cases where it was still enabled. If you tried to start the cvpnd.exe in services and it failed, there is a chance that the cvpnd.exe driver was not installed properly or you might have installed the new version over the old version. NOTE Before installing a new version of the VPN client, always ensure that older versions are uninstalled prior to installation. Some un-installers might not work in a way you expect. To resolve this issue, uninstall the current version; make sure to use the VPN uninstaller that is located in Start, Programs, Cisco Systems VPN Client, Uninstall VPN Client, and then reboot. After the reboot, reinstall the new VPN client, reboot, and test it. Step 3: Check or Create Your ProfilesBefore you can connect to a concentrator, you must have at least one profile pointing to that concentrator. Typically, the network administrator creates the profiles and distributes them to users. The VPN client software is shipped with a sample user profile. The file is named sample.pcf, and its content is shown in Example 22-3. The *.pcf files are usually stored under C:\Program Files\Cisco Systems\VPN Client\Profiles. For specific information on the meaning of each field, see www.cisco.com/univercd/cc/td/doc/product/vpn/client/nonwin35/user_gd/profile.htm. Example 22-3. A Sample User Profile That Might Be Shipped with the Installer[main] Description=sample user profile Host=10.7.44.1 AuthType=1 GroupName=monkeys EnableISPConnect=0 ISPConnectType=0 ISPConnect= ISPCommand= Username=gawf SaveUserPassword=0 NTDomain= EnableBackup=0 BackupServer= EnableNat=0 CertStore=0 CertName= CertPath= CertSubjectName= CertSerialHash=00000000000000000000000000000000 DHGroup=2 ForceKeepAlives=0 The easiest way to create a profile is to open sample.pcf with any text editor. Then modify the necessary entries and save it with a different name in the same directory that is called, for example, NEW_CONNECTION.pcf. Make sure you use the .pcf file extension or the VPN client will not read it. When creating a profile, the following fields must be defined at a bare minimum:
After a profile is created, you have the option of cloning entries from the VPN client. Choose the connection entry that you want to clone and select options, then select clone entry. After you enter the name of the cloned entry, it creates a duplicate .pcf file in the Profiles folder. After it's created, you can modify the properties on the VPN client by choosing options and then properties. |
EAN: 2147483647
Pages: 235