Starting the MySQL Server Automatically
|
|
| Note | There is a much easier way to install MySQL as a service in NT/2000. Execute the following command in the command prompt: C:\mysql\bin> mysqld-max-nt –-install This command will remove the service: C:\mysql\bin> mysqld-max-nt –-remove This will only work on Windows NT/2000 and XP, and mysql will be registered as a service. mysqld-max-nt can be replaced to be other executables, as listed before. There is more information about NT issues in the MySQL documentation in the MySQL Manual, "Starting MySQL on Windows NT or Windows 2000," on the CD-ROM, which can also be accessed online at http://www.mysql.com. |
To get the server to start automatically, we need to edit the Windows registry so that it will load the server as a service when Windows starts. Let's go through this step by step.
| Note | If you do not want to touch your Windows registry manually, we have supplied a file called mysql.reg on the CD-ROM, which, when executed, will add the data into the registry for you, so the server will start automatically. However, we recommend that you still read this section, as it will enable you to understand how it works. |
First we need to load up the Registry Editor, so click on the Start button and then select Run.... A dialog will appear awaiting input; enter regedit into it and click OK.
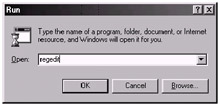
Figure 15-7: The Run dialog
Once you click OK, the Registry Editor application will be visible.
| Caution | Be careful when using the Registry Editor. Do not change anything you do not understand as you can damage your system. |
On the left-hand side of the Registry Editor is a tree view of all the possible sections that can be changed. First expand the HKEY_LOCAL_ MACHINE branch, and then expand the Software branch. This can be seen in the following figure.
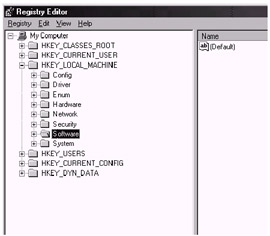
Figure 15-8: The Registry Editor
In the Software branch, find Microsoft and expand it. In this branch you will find Windows. Expand the Windows branch and then finally expand the CurrentVersion branch. Once you have expanded these branches, you should be able to find a folder called RunServices. Click on this folder, and the contents of the right pane should change. The following figure is a screen shot of what you should now be looking at (note that it may differ slightly due to different computer configurations, etc.):
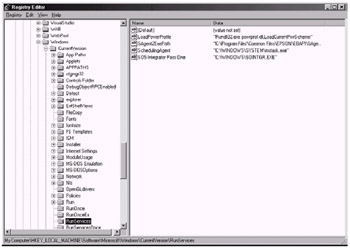
Figure 15-9: The RunServices folder (key)
Next we need to right-click on the right pane and select New followed by String Value from the pop-up menu. This can be seen in the following figure.
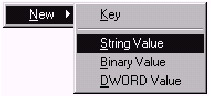
Figure 15-10: Pop-up menu
Once this is done, a new entry will appear below the current list in the right pane. Now you can enter a name if you wish, but this is optional. The important part is to double-click the new entry that was added to the list. When you do this, the following dialog will appear:
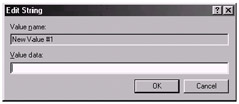
Figure 15-11: The Edit String dialog box
In the Value data box, you need to enter the name of the MySQL server executable, including the full path. So, if you installed it to the default directory (recommended), you would enter the following in the box:
C:\mysql\bin\mysqld-opt.exe
Once entered, click the OK button and then simply close the Registry Editor. Now each time you restart Windows, the MySQL server will start automatically.
Note that if you do not wish MySQL to start automatically at a later date, you can remove this by highlighting the new entry that you just added on the right pane and pressing the Delete key.
|
|
EAN: 2147483647
Pages: 237