Create a Pinhole Camera Effect
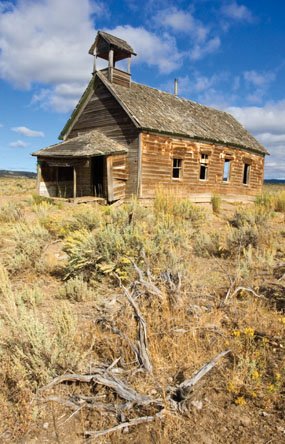
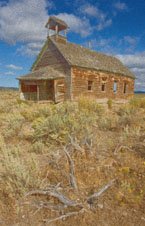
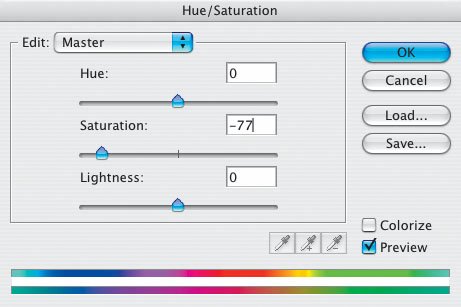
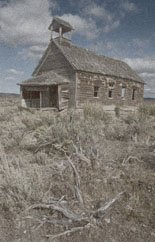
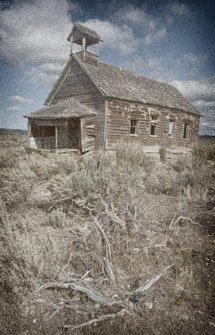
| As a professional travel photographer, I need to shoot with a top-of-the-line digital SLR camera. The images from my camera are super sharp. What's more, due to the camera's sensor and image processor, I get relatively little noise (what we used to call grain in film) in my pictures. I love the detail-packed raw files that my camera delivers. However, I thought it would be fun to try to simulate the effect of the most basic and affordable cameraa pinhole camera (a camera with no true lens or shutter, which you can make out of an oatmeal container)on one of my images. Pictures from pinhole cameras look soft and grainy, due to the pinhole "lens" and the fast film that is needed to record the image. The pictures also have dark edges, due to the light falloff passing through the small hole. I like the pinhole camera effect! Here's how I created it. I'll use a picture I took of an old homestead in Oregon (Figure 3.66). Figure 3.66.Tech info: Canon EOS 1Ds Mark II, Canon 16-35mm lens @ 20mm. Exposure: 1/125 sec. @ f/16. ISO 100. Adding film grain to my photo was easy. I went to Filter > Artistic > Film Grain and played around with the sliders to get the desired effect (more or less grain) (Figure 3.67). Applying the Film Grain filter removed some of the scene's reality, creating a more artistic image (Figure 3.68). However, I wasn't finished. The next step was to remove some of the color (more of the reality) from the scene. I did that by choosing Image > Adjustments > Hue/Saturation and moving the Saturation slider to the left until I got the desired result (Figure 3.69). The image was getting close to the effect I envisioned (Figure 3.70). Figure 3.67.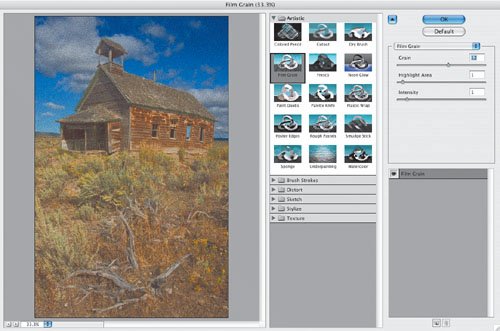 Figure 3.68. Figure 3.69. Figure 3.70. The image looked a bit flat to me. So, I went to Image > Adjustments > Brightness/Contrast and boosted the Contrast a bit (Figure 3.71). I could also have used Curves (press M: Mac or Win) or Levels (press L: Mac or Win) to make a contrast adjustment to the picture. Figure 3.71. In "Draw Attention to a Subject" in Chapter 2, I discussed the technique for darkening the edges of an image. By applying it to this image, I simulated the darker edges I'd get in a picture taken with a pinhole camera (Figure 3.72). Figure 3.72. Pinhole cameras are mostly used for landscapes. But you can have fun applying the digital pinhole camera effect to portraits, too. Here's how the effect transformed a picture I took of a little girl in a remote Embera village in Panama into a more artistic image (Figures 3.73 and 3.74). Figure 3.73.Tech info: Canon EOS 1Ds Mark II, Canon 70-200mm lens @ 200mm. Exposure: 1/125 sec. @ f/5.6. ISO 400. Figure 3.74.Tech info: Canon EOS 1Ds Mark II, Canon 70-200mm lens @ 200mm. Exposure: 1/125 sec. @ f/5.6. ISO 400. If you want the best quality digital file, get a top-of-the-line digital SLR. For the cleanest picture, shoot at the lowest ISO setting. But keep in mind that sometimes a grainy, soft picture may look more artistic than a technically perfect photograph. |


EAN: 2147483647
Pages: 72