Create a Basic Montage
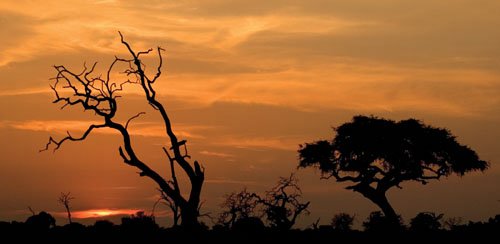
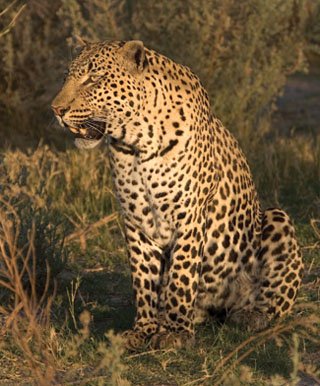
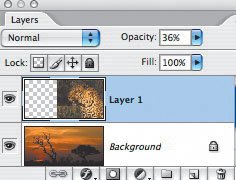
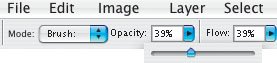
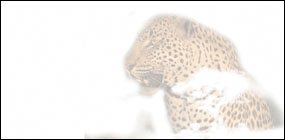
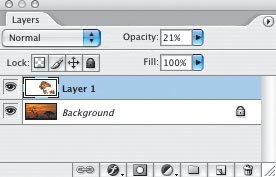
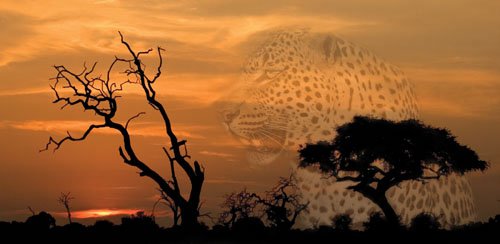
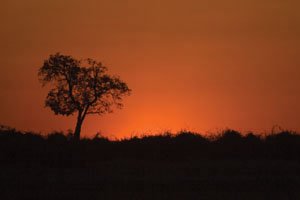
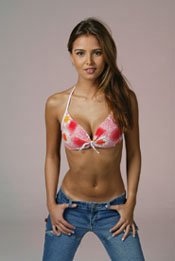
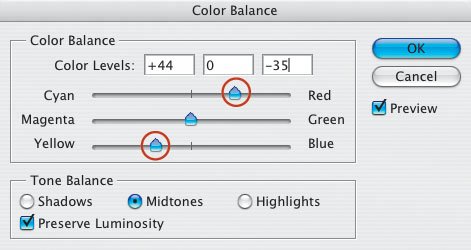
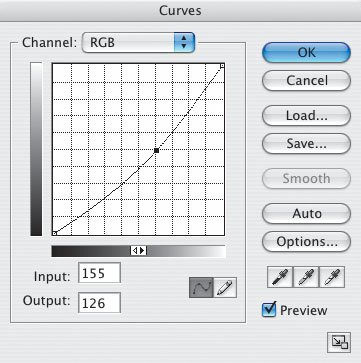
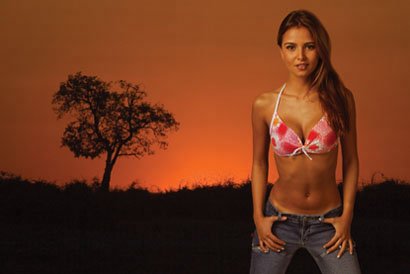
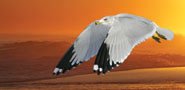
| Creating a montage (a composite of two or more images) is a great way to express your creativity. This lesson looks at some basic montage techniques. I'll discuss more advanced montage techniques in "Create an Artistic Montage" in Chapter 4. I'll make the first basic montage using two pictures I took in Botswana (Figures 3.75 and 3.76). My idea for this montage was to create an image that conveyed the spirit of Botswanawith a faint image of the leopard in the sky. Figure 3.75.Tech info: Canon EOS 1Ds Mark II, Canon 16-35mm lens @ 16mm. Exposure: 1/125 sec. @ f/11. ISO 100. Figure 3.76.Tech info: Canon EOS 1Ds Mark II, Canon 100-400mm IS lens w/1.4X tele converter. Exposure: 1/250 sec. @ f/8. ISO 400. With both images open, I dragged my picture of the leopard onto my sunset picture. Now I had a two-layer document, with the leopard on the top layer (Figure 3.77). Figure 3.77.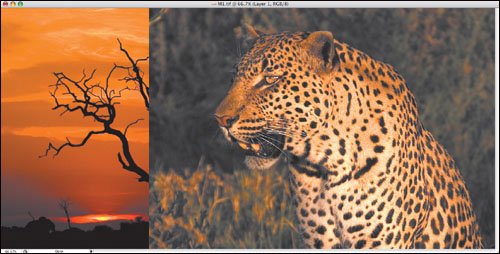 To create only a faint vision of the leopard in the sky, I opened the Layers palette (Window > Layers) and reduced the Opacity to 36% (Figure 3.78). Figure 3.78. Now it was time to erase the area around the leopard. I selected the Eraser tool (press E: Mac or Win) and chose a medium-size brush. For more control over my erasing, I went to the Menu Bar and reduced the Opacity to 39% (Figure 3.79). Reducing the Opacity makes the erasing process happen at a slower rate. Figure 3.79. To check whether I was doing a good job erasing the desired area, I turned off the bottom layer in the Layers palette (by clicking the eye icon). Here you can see that I haven't done the greatest job so far (Figure 3.80). Good thing I checked; more erasing was needed. To make the image of the leopard more subdued, I reduced the opacity of the top layer to 21% (Figure 3.81). Here's my final "Spirit of Botswana" montage (Figure 3.82). Figure 3.80. Figure 3.81. Figure 3.82. That's about as basic as it gets when it comes to making a montage. Let's look at a few more important steps in montage creation. Here's another picture I took in Botswana, and a picture I took in another wild place: Miami's South Beach (Figures 3.83 and 3.84). Figure 3.83.Tech info: Canon EOS 1Ds Mark II, Canon 16-35mm lens @ 20mm. Exposure: 1/60 sec. @ f/4. ISO 200. Figure 3.84.Tech info: Canon EOS 1D Mark II, Canon 28-135mm IS lens @ 100mm. Studio strobes. Exposure: 1/60 sec. @ f/8. ISO 100. Following the same technique of opening the two images and dragging one on top of the other, my new document looked like this (Figure 3.85). Again, I wanted to eliminate the background. I could have used the Eraser tool, but a quicker method is available when the background is plain: using the Magic Wand tool (press W: Mac or Win). The Magic Wand tool selects areas of an image based on color, when you click that color. Figure 3.85.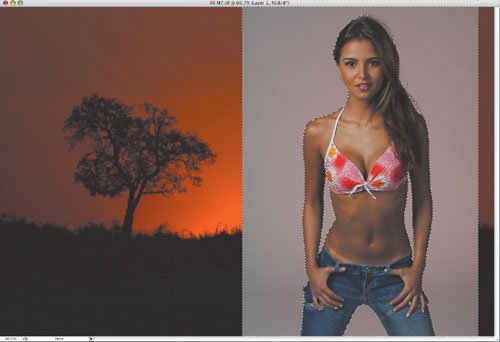 This tool requires you to make some important choices. First, you need to set the Tolerance on the Menu Bar (Figure 3.86). Set too low a Tolerance, and only areas with small variations in color (from your original color) will be selected. Set too high a Tolerance, and you'll select areas with large variations in color. For my model image, I set the Tolerance to 30. Figure 3.86. Anti-Alias is another choice. For a smoother transition between the selected and unselected areas, I chose Anti-Alias. Next, you must decide whether to check or uncheck Contiguous. Checking it picks only the selected colors that are connectedin this case, between the model's arm and her body. Choosing not to check it selects all the similar colors in the image. I chose Contiguous for more control. After all that work, my montage looked like this (Figure 3.87). What's wrong? The color temperature of the light doesn't match in the two pictures. The sunset picture is very warm, and the model shot is cool. Plus, the model image is brighter than the sunset image. Here's how I fixed the color. Figure 3.87. Tip For a smoother look between the two images, use the Eraser tool, and trace the outline of the inserted subject. That technique makes your montage look more natural. To warm up the image, I went to Image > Adjustment > Color Balance (press Command-B: Mac or Ctrl-B: Win) and increased the Red and Yellow tones in the image (Figure 3.88). Then, I chose Image > Adjustment > Curves and pulled down the Curve line (Figure 3.89). Figure 3.88. Figure 3.89. That's more like it! The color and brightness values of both images match, yielding a natural-looking montage (Figure 3.90). Figure 3.90. I can't overstress the importance of trying to match the colors of the different images in a montage. Here's another example of how a matched-colored montage looks more realistic than a montage in which the colors of the different images don't match (Figures 3.91 and 3.92). Sure, the montage with the white seagull shows the true color of the bird; but when placed in a sunset scene, the white features take on a warmer cast (deeper shades of red and yellow). Figure 3.91.Tech info (for both figures): Canon EOS 1D Mark II, Canon 100-400mm IS lens @ 400mm. Exposure: 1/500 sec. @ f/5.6. ISO 200. Figure 3.92.Tech info (for both figures): Canon EOS 1D Mark II, Canon 100-400mm IS lens @ 400mm. Exposure: 1/500 sec. @ f/5.6. ISO 200. |


EAN: 2147483647
Pages: 72