Liquify Reality
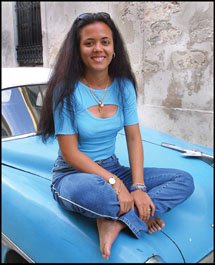
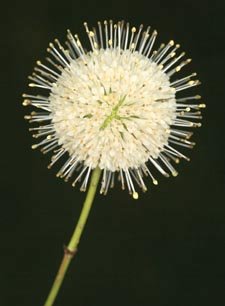
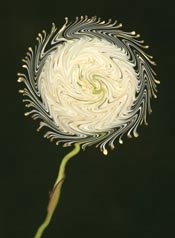
| Salvador Dali, the 20th century's best-known surrealist artist, is famous for his painting of melting clocks. Those melting clocks were the inspiration for this lesson. As you'll see, you can use the Liquify filter (Filter > Liquify) to melt objects in a photograph for a surrealistic look. Before I turn up the heat and start the melting, however, I'd like to share with you a more practical use of the Liquify filter: making a subject in a picture look thinner and more fit. Some folks call the following technique the "Photoshop Diet," which usually gets a few laughs at Photoshop World (a bi-annual gathering of Photoshop pros and fans). In reality, however, it's a practical effect that fashion photography retouchers use to make even top models look better. To illustrate the technique, I'll use a picture I took of a young woman in Cuba, who didn't need to go on a diet (Figure 3.93). Figure 3.93.Tech info: Canon EOS D30, Canon 70-200mm lens @ 100mm. Exposure: 1/250 sec. @ f/5.6. ISO 200. When you select the Liquify filter (press Shift-Command-X: Mac or Shift-Ctrl-X: Win), you get the Liquify dialog box, which includes a Preview window and Liquify tools and controls (Figure 3.94). At the upper left of the Tool Bar is the Forward Warp tool, which is the default. This tool lets you liquify pixelsmelting them, twirling them, bending them, and stretching them. In this screenshot, I've circled the brush I used to reduce the woman's waistline; I did this by clicking her waistline, holding down my right mouse button, and moving the brush inward. Figure 3.94.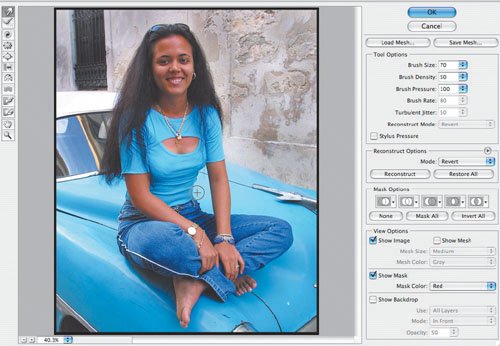 Here's the effect of applying the Photoshop Diet to the woman's waist, arms, legs, and neck (Figure 3.95). Figure 3.95. OK, let's get to the melting effect. I'll use a picture of a flower I took in my backyard (Figure 3.96). In the Liquify dialog box, I moved the Forward Warp tool in a circular motion around the flower and then in a back-and-forth motion on the flower's stem (Figure 3.97). Here you can see the result of those quick mouse movements (Figure 3.98). Figure 3.96.Tech info: Canon EOS 1D, Canon 50mm Macro lens, Canon Macro Ring Lite MR-14EX. Exposure: 1/60 sec. @ f/22. ISO 100. Figure 3.97.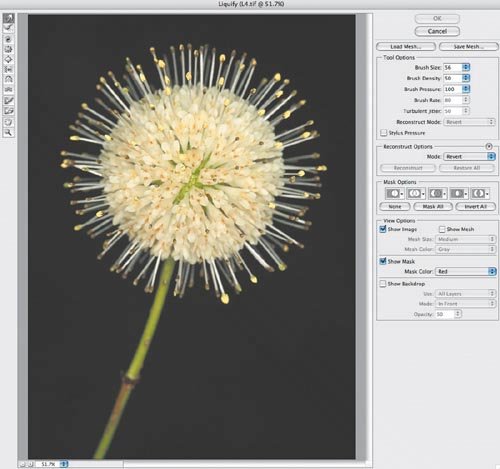 Figure 3.98. Talk about melting! In the next example, I used the Liquify filter to melt a hotel sign in Miami's South Beach, which is "hot, hot, hot" even in the winter due to the wild nightlife (Figures 3.99 and 3.100). Figure 3.99.Tech info: Canon EOS 1D, Canon 16-35mm lens @ 20mm. Exposure: 1/125 sec. @ f/8. ISO 400. Figure 3.100.Tech info: Canon EOS 1D, Canon 16-35mm lens @ 20mm. Exposure: 1/125 sec. @ f/8. ISO 400. |


EAN: 2147483647
Pages: 72