Reviewing Presentations
No matter which method you use, there are four main steps to a review cycle:
How you use PowerPoint's reviewing features depends on both the method you choose to handle the physical review and your goals for the review process. You might only want to send your presentation to one person for review. In that case, you need to decide whether you want to use PowerPoint's advanced reviewing tools (such as the Revisions task pane) or whether you would rather just have your reviewer add comments where necessary and send the presentation back to you. If, on the other hand, you want to formally track reviews or incorporate several reviewers' comments and revisions, it's helpful to use tracking tools and the Revisions task pane. In any case, PowerPoint's review features are both powerful and flexible enough to suit most requirements. Sending a Presentation for ReviewThe first step in collaborating on a PowerPoint presentation is to send the presentation out for review. Depending on the method you use to handle reviews, how you do this varies slightly. To send a presentation for review using Outlook, follow these steps:
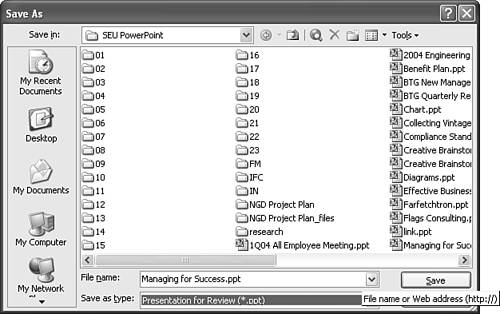
To create a review copy of your presentation that you can send using another email program, place on a network server, or copy to a disk, follow these steps:
From here, you can send your presentation to reviewers using your preferred methodemail, network server, or disk. Performing the ReviewWhat happens during the actual review depends on a number of things: the methodology the author communicated to the reviewers, the amount of change required, the kind of review (quick glance versus detailed content analysis), and each reviewer's preferences. In PowerPoint, reviewers can either make changes to the presentation itself or add comments about individual slides in the presentation. If a reviewer revises the actual presentation, the author will be able to use the Revisions task pane to determine what changes were made. If the reviewer uses comments, they appear as yellow boxes on the screen. When a reviewer changes the actual content of a presentation, PowerPoint tracks these changes. Table 7.1 lists the kinds of changes PowerPoint tracks, in addition to the actual text itself. Table 7.1. Review Changes PowerPoint Tracks
Using the Reviewing ToolbarThe Reviewing toolbar offers features that are useful both to reviewers and to authors reconciling reviews. Depending on the stage of the review cycle and the review activity you're performing, some of the Reviewing toolbar buttons might be unavailable or hidden. The Reviewing toolbar displays automatically during certain reviewing activities, such as adding comments or reconciling reviews. You can also open it manually by choosing View, Toolbars, Reviewing. Table 7.2 lists the buttons on the Reviewing toolbar and explains how they're used. Table 7.2. Reviewing Toolbar Buttons
Adding Comments to SlidesWhen you want to write a note to the author explaining changes you think should be made, use comments. NOTE Comments aren't the same as notes. You add comments within a presentation to provide input on specific slides. You usually delete comments after you read them and update your presentation. Notes are information you keep with your presentation to provide additional information as you speak. To add a comment to a slide, click the Insert Comment button on the Reviewing toolbar or choose Insert, Comment. If it isn't already open, the Reviewing toolbar appears when you insert a comment. A yellow box appears at the top-left corner of your slide; your name appears as the reviewer. Figure 7.4 illustrates a sample comment box. Figure 7.4. Comments provide a way to get feedback on your presentation. NOTE You can't add a comment in Slide Sorter view. PowerPoint places all general comments in the upper-left corner of the slide. If you add more than one comment to the slide, it appears on top of the existing comment, covering most of it. You can move the comment from its default location by selecting it and dragging it with the mouse. You can also attach a comment to a selected element on the slide. For example, you could create a comment about the overall content that appears in the top-left corner and then attach individual comments to selected text or a selected graphic object as well. Enter your comments in the yellow box, which expands to fit the length of your comment. To change the reviewer name, choose Tools, Options, and enter a new name in the User Information group box on the General tab. Reviewing CommentsIf you don't plan to use the Revisions task pane to review comments in a presentation, you can use the Reviewing toolbar to move from comment to comment, evaluating each comment as you progress. To review comments, click the Markup button on the Reviewing toolbar if comments don't appear.
In general, comments should be apparent because of their yellow color. Still, in a long presentation, it can be easier to jump to the next comment rather than look at each slide. To do this, click the Next Item button on the Reviewing toolbar. NOTE To jump back to a previous comment and look at it again, click the Previous Item button. NOTE When you reach the end of a presentation, clicking the Next Item button brings you back to the presentation's first comment. After you read a comment, you might want to delete it. To do so, select it and click the Delete Comment button on the Reviewing toolbar. Sending Back the ReviewAfter entering all comments and changes, the reviewer sends the presentation back to the author for final reconciliation. A reviewer who received a presentation through Outlook can send it back by choosing File, Send To, Original Sender from within PowerPoint. If the reviewer uses a version of PowerPoint other than PowerPoint 2003 or PowerPoint 2002 to perform the review, choose File, Send To, Mail Recipient (as Attachment) to return the presentation to the author. Unless instructed otherwise , reviewers receiving a presentation as an email attachment, on a network, or on a disk should save the presentation and return it to the author in the same way it was received. Reconciling ReviewsIf you're the author of a presentation, the final step includes merging the reviews, checking the comments and changes of all reviewers, accepting or rejecting their suggestions using the Revisions task pane or Reviewing toolbar, and saving your final presentation. TIP No one right way exists to handle the review and reconciliation process. You can use a combination of features on the Revisions task pane List and Gallery tabs and on the Reviewing toolbar to complete your presentation. Comparing and Merging PresentationsIf you're using Outlook to do revisions, open the email that contains the reviewed presentation, double-click it, and click Yes in the prompt dialog box that asks whether you want to merge this presentation. PowerPoint merges this presentation with the original. If you're using another email program, a network server, or a disk to handle reviews, follow these steps:
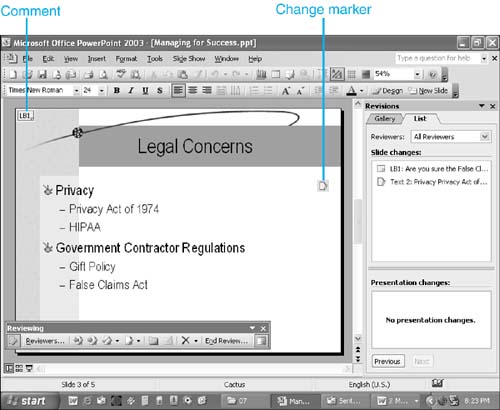
Using the Revisions Task Pane to Reconcile ReviewsThe Revisions task pane lets you view and reconcile the comments and changes of multiple reviewers. It should appear automatically when you compare and merge presentations, but you can also open it manually by choosing View, Toolbars, Revisions Task Pane. Figure 7.6 illustrates the Revisions task pane. Figure 7.6. Use the Revisions task pane to look at reviewers' changes and accept or reject them. The List tab displays color-coded comments and changes for each reviewer. To see those for specific reviewers, select them from the Reviewers drop-down list. The default is to display the comments of all reviewers. On the List tab, you can click an individual comment to view it and then click the Delete Comment button on the Reviewing toolbar to remove it from your presentation. Depending on the contents of the comment, you might want to make additional changes to your presentation. If the comment is informational only ("Great presentation"), you can continue to the next review item. On the List tab, you can also click a change marker to display its contents and click in the check boxes if you want to accept the changes. You can also hover the mouse over a change marker on your slide to view the proposed change. Then click on that change marker to display the menu with check boxes for accepting changes (or in some cases, an individual change). To move to the next slide, click the Next button on the pane. To go back to a previous slide, click Previous. On the Gallery tab, you view thumbnails of the changed slides by reviewer. On this tab, you can click the check box next to the name of a reviewer to apply all changes suggested by that reviewer. You can click the down arrow next to the thumbnail to view a list of other options, including the ability to apply changes, unapply changes, view only a specific reviewer's changes, preview animation, or tell PowerPoint that you're done with that reviewer. |
 For details on creating notes,
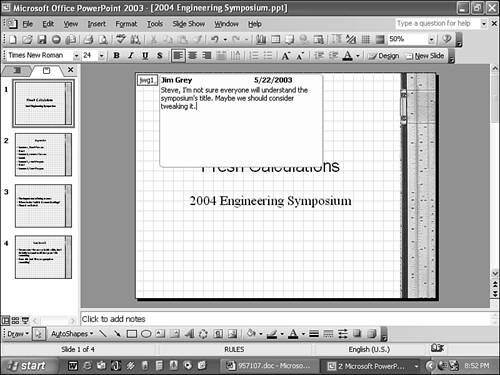
EAN: 2147483647
Pages: 261