Specifying Colors
| You can apply color to objects, text, and lines using three different Drawing toolbar buttons. The Fill Color, Font Color, and Line Color buttons all work in basically the same way, with slight differences based on the selected object. To apply the default color, click the button directly. To apply a different color, click the arrow next to the button and choose a color from the palette that appears. You can also specify color in the Format dialog box. Specifying Fill Color Figure 14.7. You can add colors or patterns to fill an object. You can do one of the following in this palette:
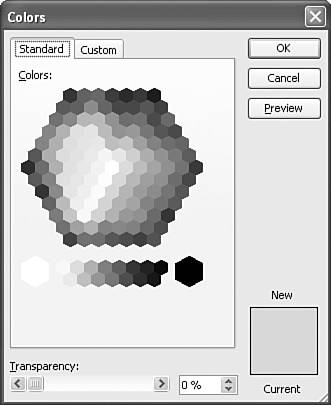
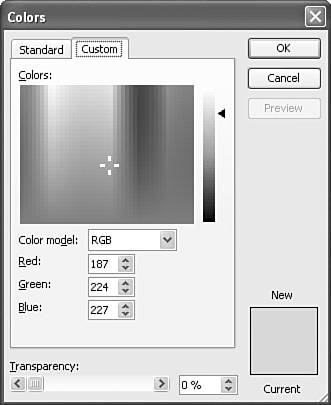
Using the Colors Dialog BoxClick More Fill Colors on the palette to open the Colors dialog box, illustrated in Figure 14.8. Figure 14.8. Choose from many common colors in the Colors dialog box. To choose a new color,click it in the palette on the Standard tab. The color appears in the New section of the preview box to contrast with the Current color. NOTE You can set transparency (making the color appear transparent) by dragging the Transparency scrollbar or by entering a specific transparency percentage. The higher the percentage, the more transparent the color, allowing things behind the object to show through. Click the Preview button to preview what the color will look like in your presentation. Click OK to keep the color or Cancel to return to the original color. Using a Custom ColorTo add a custom color, click the Custom tab on the Colors dialog box, shown in Figure 14.9. Figure 14.9. Create a custom color to suit your exact needs. You can create a custom color in two ways. One way is to click and drag the crosshair in the Colors area until you find the color you want. The other way is to choose either RGB or HSL in the Color model field, and then adjust the color's hue, saturation, and luminance (for HSL) or level of red, green, and blue (for RGB). Click the Preview button to see how the color looks on your slide. Click OK to keep the color or Cancel to discard it. NOTE Hue represents the actual color, saturation represents the color's intensity, and luminance represents the color's brightness. In general, the lower the number, the lighter or less intense the color. Red, green, and blue represent the amount of each of these primary colors in the color you're creating. Specifying Fill Effects Figure 14.10. Choose from gradient, texture, pattern, and picture effects. Applying a Gradient FillA gradient creates a smooth transition from one color to another using gentle blending. To apply a gradient, click the Gradient tab on the Fill Effects dialog box. In the Colors group box, choose one of the following:
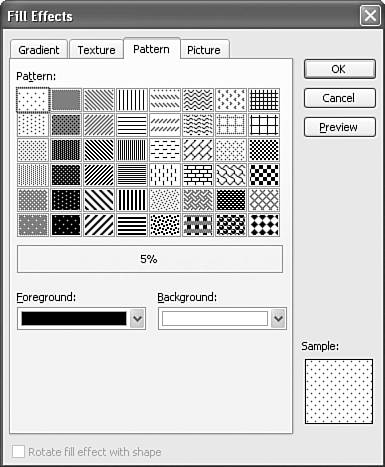
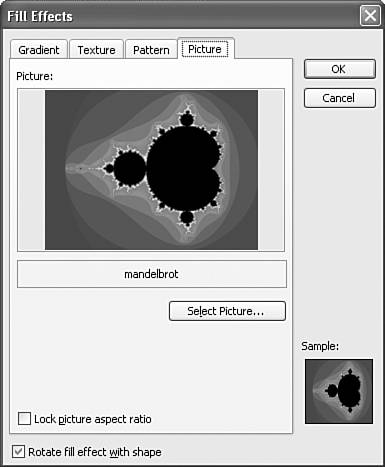
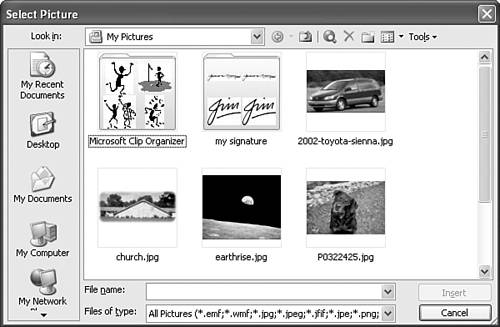
Next, set the transparency by dragging the Transparency scrollbars or by entering specific transparency percentages. Finally, use the Shading Styles area to choose how to apply the gradient. Options include Horizontal, Vertical, Diagonal Up, Diagonal Down, From Corner, and From Center. Click an option in the Variants group box; it displays in the Sample box. Click Preview to see the gradient in your presentation. Click OK to keep the gradient or Cancel to discard it. Applying a Textured FillTo apply a texture, click the Texture tab on the Fill Effects dialog box and scroll down the available textures until you find one you like. Click it and click OK. Figure 14.11 shows the Texture tab. Figure 14.11. Textures can add visual depth to an object. If you have a graphic file on your computer that you'd like to use as a texture, click the Other Texture button to open the Select Texture dialog box. Navigate to where you keep the graphic file, click the file, and click the Insert button. The graphic appears among the textures in the Fill Effects dialog box. Click the graphic and click Preview to see what it looks like in your slide. Click OK to use the graphic as a texture, or click OK to discard the change. Applying a Patterned FillTo apply a pattern, select the Pattern tab on the Fill Effects dialog box (see Figure 14.12). Figure 14.12. PowerPoint provides many different pattern effects. Choose foreground and background colors and then select from the many available patterns. CAUTION If you plan to print your presentation, be sure to verify how your chosen pattern looks when printed. Certain patterns are too dense to print well on some printers. NOTE The default foreground and background colors coordinate with your object's color. Click Preview to preview the fill effect. Click OK to keep the fill or Cancel to discard it. Applying a Picture FillYou can even fill an object with a picture. Click the Picture tab on the Fill Effects dialog box, which Figure 14.13 shows. Figure 14.13. Use your own image, such as a logo, as a fill. Click the Select Picture button to open the Select Picture dialog box, shown in Figure 14.14. Figure 14.14. Choose a picture of your own to apply as a fill. Find and select your graphic image and click Insert to return to the Fill Effects dialog box. Click OK to apply the fill or Cancel to discard it. CAUTION Some pictures just don't look good as fills. Look at yours carefully . If it doesn't look good, press Ctrl+Z to undo it, and then apply some other fill. Specifying Line Color Figure 14.15. Format or remove lines in the Line Color palette. Choose from the following options:
NOTE Unless you create a very thick line, patterns in a line probably won't be visible. Specifying Font Color Figure 14.16. Specify the color of your text here. You can choose a color in two ways:
If you don't want to use one of the compatible colors, be sure that the color you choose is clear and readable on your slide. |
 For more information about color theory,
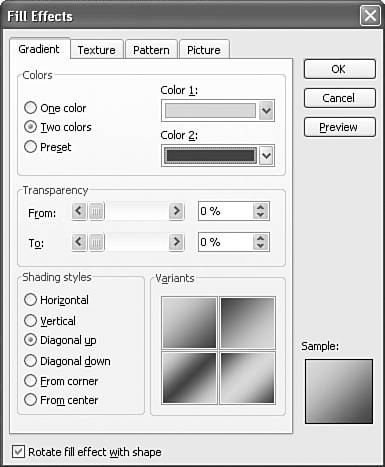
EAN: 2147483647
Pages: 261