Connection Manager Administration Kit
The CMAK included with Windows 2000 Server (and the earlier version included with IEAK 5) is used to customize Connection Manager service profiles for the installation packages you create. Using the CMAK, you can create and manage custom Connection Manager service profiles that enable your Internet Explorer 5 users to connect to your Internet or intranet services. Microsoft Connection Manager is the client dialer and connection software tool that uses the service profiles created with the CMAK. In other words, the service provider or corporate network administrator creates a service profile, packages it with Connection Manager, and deploys it onto users' client desktop machines—enabling users to connect to the corporate intranet or to the service provider's Internet Web site and access its services.
In particular, the CMAK can be used to do the following:
- Create and manage dial-up and virtual private network (VPN) Connection Manager service profiles for connecting to ISPs and corporate networks
- Configure custom programs to run automatically when a user connects to your service
- Import existing connection settings and modify them
- Configure system policies and restrictions for connections
- Enable users to use the Internet Connection Wizard on their machines to sign up for your service
Like the IEAK, the CMAK is implemented as a wizard that takes you through a series of steps to create a new Connection Manager service profile. Preliminary planning is important here, just as it is for the IEAK; you need to ensure that you have any branded graphics, access numbers, scripts, or other items ready before running the wizard. The online CMAK Guide states that creating a new Connection Manager service profile involves six different phases. We will cover these phases only briefly here and only in regard to corporate deployments of installation packages.
![]()
MORE INFO
For more information on using the CMAK, refer to the online CMAK Guide or see the Microsoft Internet Explorer 5 Resource Kit (Microsoft Press, 1999).
For a corporate deployment of Internet Explorer 5, the six phases of the process look like this:
- Phase 1: Planning Create phone book and region files for your service providers and decide what type of connection you want and how you want it to be customized. The online CMAK Guide includes a planning worksheet that is very helpful for this task.
- Phase 2: Developing custom elements Create any custom graphics or other items needed for your profile.
- Phase 3: Running the CMAK Wizard The wizard creates a new service profile for the connection; this wizard is discussed later.
- Phase 4: Preparing for delivery You can deliver the connection to users either as part of an IEAK installation package or as a separate package.
- Phase 5: Testing Test your deliverables before letting users download them.
- Phase 6: Providing support Develop a strategy for supporting your users after the service profile has been delivered.
Installing CMAK
As mentioned earlier in this chapter, the version of CMAK included with the IEAK does not support the Windows 2000 platform but only legacy Microsoft Windows platforms. If you plan to deploy Connection Manager connections to client machines running Windows 2000 Professional, you need to use the version of CMAK included with Windows 2000 Server. To install the CMAK and Phone Book Services (PBS) on Windows 2000 Server, open Add/Remove Programs in Control Panel and select Add/Remove Windows Components. Then select Management and Monitoring Tools, click Details, and select Connection Manager Components.
Using the CMAK Wizard
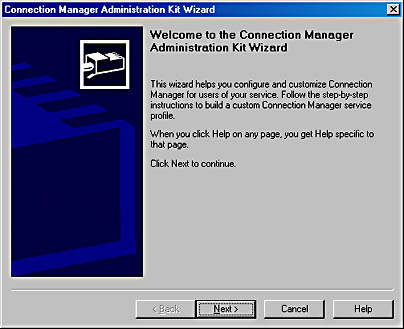
Figure 29-8. The first screen of the Connection Manager Administration Kit Wizard.
Once installed, the CMAK Wizard (Figure 29-8) can be started either from within the IEAK Wizard (see step 21 in "Stage 3: Customizing Setup" earlier in this chapter) or directly from the Start menu by selecting Connection Manager Administration Kit from the Administrative Tools folder on the Programs menu of Windows 2000 Server. To create a new Connection Manager service profile for a typical corporate networking scenario, start the CMAK Wizard and follow these steps:
- Service Profile Source Specify whether you want to create a new service profile or edit an existing one.
- Service And File Names Specify a name for your service (for example, Scribes Connection Services) and a filename to be used for your service profile folder and files.
- Merged Service Profile Lets you merge the settings of a number of existing service profiles into the one you are creating or editing.
- Support Information Lets you specify a line of support information for your profile. For example, you could enter Call 1800SCRIBES for customer support or something similar.
- Realm Name Lets you specify a realm if one is needed. The realm is automatically appended to the user name during connection establishment, using a separator character that you specify. Microsoft Internet Authentication Service Commercial Edition, available in Microsoft Commercial Internet System, supports the use of realm names for remote authentication purposes.
- Dial-up Networking Entries Specify the dial-up networking entries associated with the phone numbers in the address book. You can either specify DNS and/or WINS addresses or let the server assign these IP addresses to the client during connection establishment.
- VPN Support Allows you to enable a virtual private networking connection for this service profile. If you enable this feature, you can either specify DNS and/or WINS addresses or let the server assign these IP addresses to the client during connection establishment.
- Connection Actions Specify actions that will occur before connection establishment, after connection establishment, or before connection termination. In succeeding screens of the wizard, you specify the actual programs or scripts to be run and any parameters needed by them. For example, after connection establishment you might want to automatically download any phone book updates.
- Auto Applications Specify additional programs or scripts that will run during a communications session. For example, you might want to open your e-mail client program automatically once a connection is established.
- Logon Bitmap Specify the bitmap to be displayed in the logon dialog box. For example, you might use your corporate logo here.
- Phone Book Bitmap Specify the bitmap to be displayed in the Phone Book dialog box.
- Phone Book Specify whether you want to include a phone book in this service profile.
- Phone Book Updates Specify how your clients will receive updates to their phone books, typically by connecting to a Connection Point Services server that is specified by a URL. If you do not include a phone book in your service profile, you must specify one here that can be downloaded later by clients.
- Icons Specify icons to be used to represent Connection Manager on the client machines. Use a corporate logo icon if desired.
- Status Area Icon Menu Lets you customize the shortcut menu that appears when users right-click the status area icon.
- Help File Specify a Help file to be used by your users. You can either use the default one or specify a custom one that you have created for your users.
- Connection Manager Software Your users must have Connection Manager 1.2 installed on their machines in order to use the service profile you are creating. If they don't have it, you can indicate here that the Connection Manager software itself is to be included with your service profile. Users can then download the package, install Connection Manager, and have it configured by the profile you have created for them.
- License Agreement Specify a text file containing the license agreement you want your users to accept (if desired).
- Additional Files Specify other programs and files to be included in the service profile you are creating that are not specified elsewhere in the wizard.
![]()
REAL WORLD Connection Point Services
The Connection Point Services (CPS) component of Windows 2000 provides support for creating, maintaining, and updating phone books. Connection Point Services consists of two components:
- Phone Book Services (PBS) This extension to Internet Information Services (IIS) version 5 enables users to connect to a server and download updates to the Connection Manager profiles on their client machines. Queries from Connection Manager are handled by the WWW Publishing Service on IIS.
- Phone Book Administrator (PBA) This tool lets you create and edit multiple phone books, specify service types for points of presence (POPs), and publish new phone book information to the PBS, using the FTP Publishing Service on IIS.
Deploying CMAK Packages
When you are done with the CMAK Wizard, click Finish to build your customized Connection Manager service profile. Makecab.exe will run within a command-prompt window to generate and compress the connection package. A final screen will display the location of the self-installing executable service profile, which by default is located in C:\Program Files\Cmak\Profiles\Service_ Directory\Service_Profile, where Service_Directory and Service_File are the directory and file, respectively, specified in step 2 of the CMAK Wizard.
If you started the CMAK Wizard from within the IEAK Wizard, you can then continue with the IEAK Wizard, and your Connection Manager service profile will be packaged together with the Internet Explorer 5 installation package you are creating. If you started the CMAK Wizard from the Administrative Tools folder, you can copy your service profile package files to a Web site or network share and deploy the package as you would an Internet Explorer 5 package, or you can select it later from the IEAK Wizard when creating an Internet Explorer 5 package. If users on the Internet will download the service profile package separately, it should be signed with Microsoft Authenticode technology.
To install the new connection, users simply click on the link of the appropriate Web page, where they can choose either to download the self-extracting file and run it later or to open it from its remote location, which installs it immediately on their machines. At the end of installation, users can optionally add a shortcut to their desktops for the new connection. The connection will also appear in the Network And Dial-up Connections folder, accessed from Control Panel. Figure 29-9 shows the dialog box for a new connection, which is opened by double-clicking on the connection shortcut.
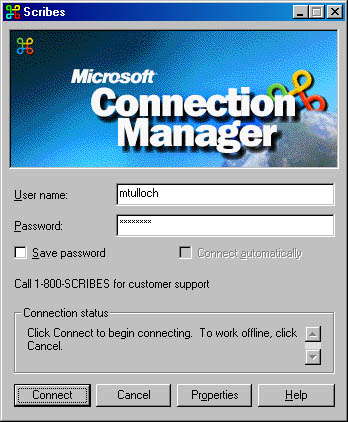
Figure 29-9. A new Connection Manager connection created using the CMAK Wizard.
EAN: 2147483647
Pages: 366