Creating New Virtual Directories
|
| < Day Day Up > |
|
If you want to create a new Web site or a series of Web pages on the internal network, the best way to do this is to create a new virtual directory in Internet Information Services. A virtual directory is a directory name or alias that corresponds to a physical directory on the server. Virtual directories appear as subfolders on a Web site but in reality can point to a folder located anywhere on the network.
Creating New Web Sites
It’s usually more convenient to create new virtual directories in an existing site such as the Windows SharePoint Services site (http://companyweb) or the Default Web Site instead of creating a completely new site in IIS. Creating new sites requires managing host headers as well as manually adding alias (CNAME) records to the DNS reverse lookup zone, which is a nuisance and unnecessary for most small businesses. If you need to create a new site, right-click the Web Sites container in the Internet Information Services console, choose New, Web Site from the shortcut menu to start the Web Site Creation Wizard—just remember to create the alias record in DNS corresponding to the Web site’s host header.
To create a new virtual directory, complete the following steps:
-
Open the Server Management console, expand the Advanced Management container, and then expand Internet Information Services.
-
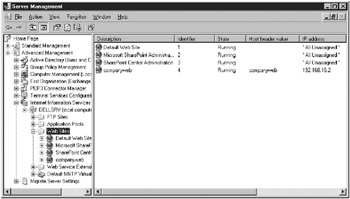
Expand the SBSSRV (local computer) container (assuming your server is named SBSSRV), and select the Web Sites container (Figure 18-1).
-
In the details pane, right-click Default Web Site, and choose New, Virtual Directory from the shortcut menu. The Virtual Directory Creation Wizard appears.

Figure 18-1: The Server Management console showing the Web Sites container.Tip You can also publish from Microsoft FrontPage directly into a new virtual directory without first creating the directory in IIS if you publish with a user account that has the appropriate permissions.
-
On the first page of the Virtual Directory Creation Wizard, click Next.
-
On the Virtual Directory Alias page, type a folder name and then click Next.
-
On the Web Site Content Directory page, specify the path to the real folder that will contain the Web site content (for example, c:\inetpub \training), and then click Next.
Tip Placing content in a subfolder of the c:\inetpub folder is usually the most convenient approach because this folder already has the proper NTFS permissions applied to it, and the Windows Small Business Server default and http://companyweb sites are located here as well.
-
On the Virtual Directory Access Permissions page, clear the Run Scripts check box (unless you plan on using scripts or dynamic Web pages in the virtual directory). Click Next and then click Finish.
|
| < Day Day Up > |
|
EAN: 2147483647
Pages: 224