Using the ToolBar Control
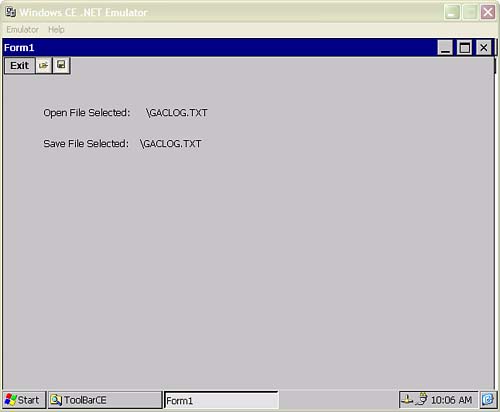
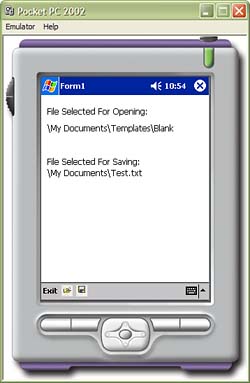
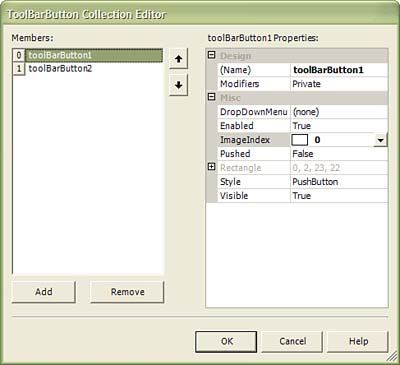
Using the ToolBar ControlNavigating a menu with a stylus can soon become tedious , especially if the user is selecting the same menu item over and over again. The ToolBar control can reduce the number of clicks that a user must perform in order to execute menu options. Because the ToolBar control consists of images, adding a ToolBar can make your application more visually appealing. The ToolBar is a graphical bar that consists of images that represent buttons. These buttons are usually shortcuts to commonly used application functionality. On the .NET Compact Framework, the ToolBar control cannot contain text. You must use an ImageList control to populate the ToolBar control. The ToolBar control can appear in different locations, depending on whether the application is built for the Pocket PC or Windows CE. If it is a Windows CE application, then the ToolBar will appear along the top of the application form and to the right of any menu options (see Figure 3.15). For Pocket PC applications the ToolBar appears along the bottom of the form and to the right of any menu options (see Figure 3.16). Figure 3.15. An application that showcases the ToolBar control running on the Windows CE .NET emulator. Figure 3.16. An application that showcases the ToolBar control running on the Pocket PC 2002 emulator. Adding a ToolBar Control to an ApplicationAdding a ToolBar control to an application can be done using the Visual Studio .NET Form Designer. Follow this list of steps to create a ToolBar control in your application:
Table 3.5. ToolBarButtonStyle Members and Their Descriptions
Handling a ToolBar 's ButtonClick EventWhen a user clicks a button on the ToolBar control, a ButtonClick event is fired . You can handle this event to execute the action assigned to the button that was clicked. The event handler for the ButtonClick event receives a ToolBarButtonClickEventArgs object. The ToolBarButtonClickEventArgs.Button property is a reference to the ToolBar button that was clicked. The following example demonstrates how bring up the OpenFileDialog control when the correct ToolBar button is clicked: C# private void toolBar1_ButtonClick(object sender, System.Windows.Forms.ToolBarButtonClickEventArgs e) { if(e.Button == this.toolBarButton1) { OpenFileDialog dlg = new OpenFileDialog(); if(dlg.ShowDialog() == DialogResult.OK) { this.lblOpenFile.Text = dlg.FileName; } } else if(e.Button == this.toolBarButton2) { SaveFileDialog dlg = new SaveFileDialog(); if(dlg.ShowDialog() == DialogResult.OK ) { this.lblSaveFile.Text = dlg.FileName; } } } VB Private Sub toolBar1_ButtonClick(ByVal sender As System.Object, ByVal e As System.Windows.Forms.ToolBarButtonClickEventArgs) Handles toolBar1.ButtonClick If e.Button Is toolBarButton1 Then Dim dlg As OpenFileDialog dlg = New OpenFileDialog Dim res As DialogResult res = dlg.ShowDialog() If res = DialogResult.OK Then label3.Text = dlg.FileName End If ElseIf e.Button Is toolBarButton2 Then Dim dlg As SaveFileDialog dlg = New SaveFileDialog Dim res As DialogResult res = dlg.ShowDialog() If res = DialogResult.OK Then label4.Text = dlg.FileName End If End If End Sub |

EAN: 2147483647
Pages: 206