Production Studio Integration
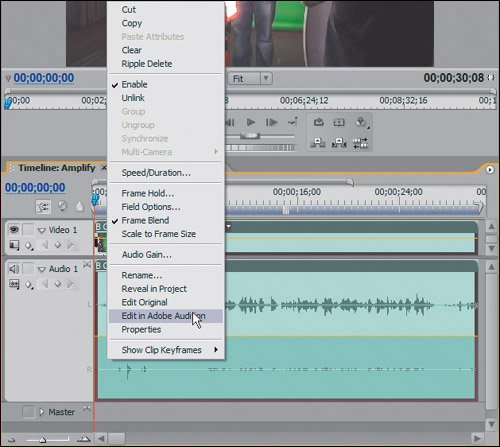
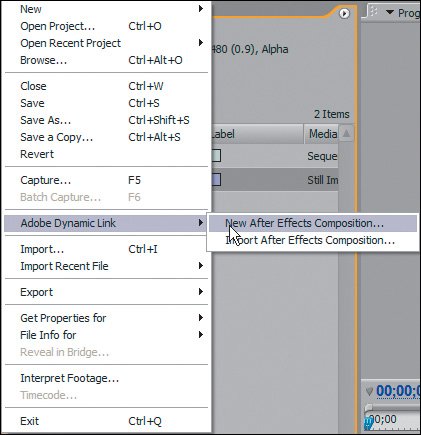
| Bridge's benefits are clear, but what about Production Studio? Is it worth the upgrade? If you do a lot of work with Audition or After Effects as well as Premiere Pro, the answer is probably yes. Production Studio gives you the power of Premiere Pro's Edit in Adobe Audition feature for seamless transfer and editing of audio clips between Premiere and Audition, as well as Adobe Dynamic Link, which takes Premiere Pro and After Effects integration to a new level. With Dynamic Link you can create an After Effects composition from inside of Premiere Pro or import an existing After Effects composition into Premiere Pro and work in both applications simultaneously; the referenced comp from After Effects updates and displays accurately inside of Premiere Pro. After I show you how to quickly and easily edit your audio files inside Adobe Audition 2.0 using Edit in Adobe Audition, I'll walk you through a practical example of using Dynamic Link to add animated text to a Premiere Pro sequence. Editing in Adobe AuditionIn past versions, if you were in Premiere Pro and wanted to edit or adjust the audio portion of a file in Adobe Audition, you had to export the audio as a separate file, edit it in Audition, save the Audition adjustments, and finally import the files back into Premiere. The 2.0 versions replace this cumbersome process with one simple menu choice: Edit > Edit in Adobe Audition. With an audio/video or audio-only file selected in Premiere Pro 2.0's Timeline or Project panel, choose Edit > Edit in Adobe Audition to extract the audio from the file and open a temporary copy of that audio in Audition automatically. The original file in not overwritten or changed. When you finish modifying the audio in Audition, simply save it and the saved changes are dynamically updated to the referenced file in Premiere Pro. Because Premiere Pro makes a copy of the file when you select Edit in Adobe Audition, the most practical method of taking advantage of this feature is from a clip instance in the timeline. To make things clearer, the next sections demonstrate two tasks that typically demand quality results. Using Edit in Adobe Audition for these will make your editing life easier and audible results better. If you have Audition 2.0 (or if you've installed the tryout version of Audition from this book's DVD), you can with these short lessons; otherwise the pictures will tell the storyand may convince you to look more closely at Audition or Production Studio. Notes You'll find a tryout version of Audition located in the Software Tryouts folder on the book's disc. The Amplify EffectOne of the most frustrating issues with displaying an audio waveform in Premiere Pro's timeline is that the amplitude of waveform often is not as dramatic or visually dynamic as you might desire (Figure 12.11). Even if you were to increase the gain of an audio file inside of Premiere Pro, the waveform display does not expand as the decibels of the audio are increased. Using the Edit in Adobe Audition feature, you can increase and amplify the audio and waveform with a few quick steps. Figure 12.11. Even with Audio 1 expanded, the waveform information for the audio portion of the clip B Cam 01.avi is quite small. In general, this means that the audio is not that loud to begin with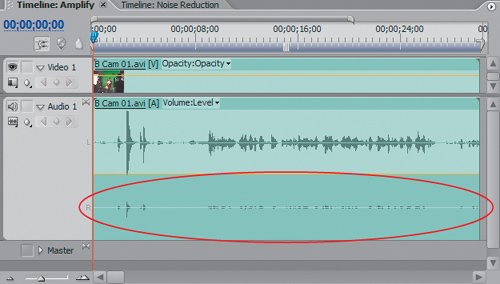
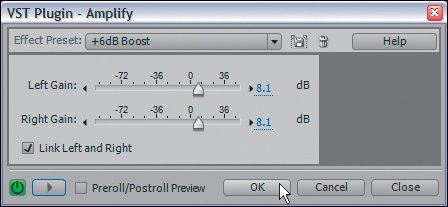
Figure 12.13. With your file open in Audition, select Amplify from Audition's Effects menu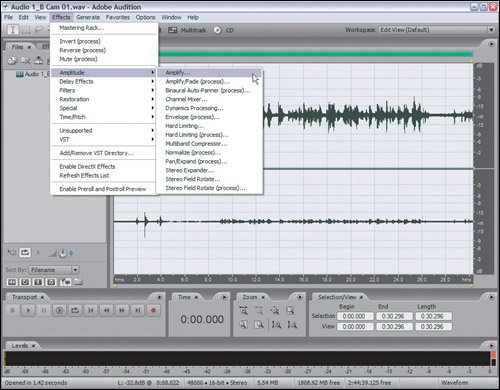 Figure 12.14. In the Amplify dialog, make your gain adjustments to your audio file Figure 12.15. After you apply and save the Amplify effect in Audition, the PEK file associated with the audio clip updates and Premiere Pro displays the modified waveform. Compare this waveform to that in Figure 12.13, and you can see the clear benefit of using this workflow to enhance your audio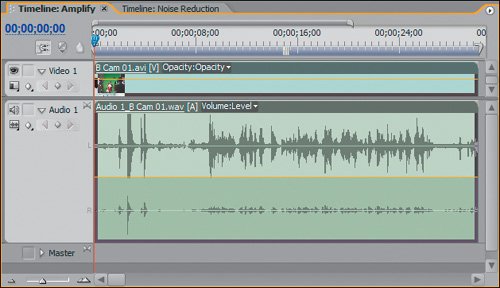 Although your gain adjustment settings will differ from file to file, the steps are the same. With the file open in Audition, you quickly can apply an Amplify effect to the file to increase the gain of the audio. This effect updates the audio of the file, thus causing the waveform to expand. Saving the effect adjustment writes the changes into the file. When Premiere is opened, the snapshot of the audio waveform information (PEK file) updates and the waveform expands to display the changes. This lesson is very simple, but you can use it time and again to create more robust audio waveforms for use inside of Premiere Pro. The next short lesson builds on this project and shows you how to reduce excess noise from files. Noise ReductionOne audio effect that is sorely missing in Premiere Pro is a simple straightforward noise reduction tool. Audition, being the solid audio editing application that it is, has excellent Noise Reduction, Hiss Reduction, and Click/Pop Removal effects. For a quick example of how to reduce the noise in a file, follow these steps:
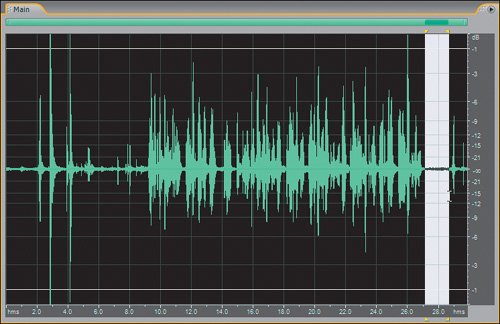
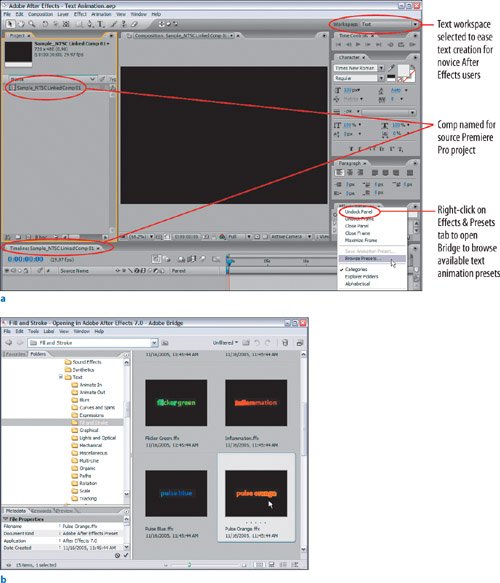
Figures 12.17a through d. The profile Audition creates will reference the selection of audio beneath the dialog (a). Once the profile is captured, it displays graphically in the Noise Reduction dialog (b). Clicking Select Entire File (c) processes the effect to be processed on the entire clip, not just the previously selected short area. Look at the final waveform's amplitude (d); you can see it is completely flat in sections where it previously had a low but audible amount of sound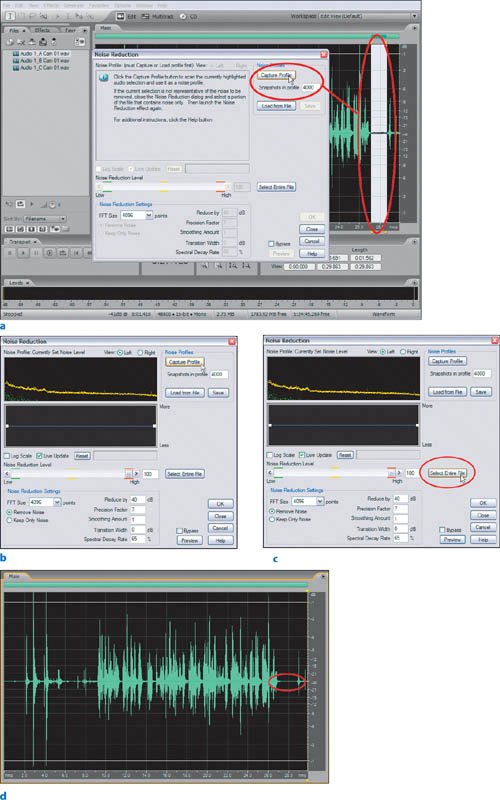 By capturing a noise profile of the selected area, Audition intelligently identifies the audio that should be there and the "noise" that shouldn't. Clicking Select Entire File applies the Noise Reduction profile to the entire clip so that the effect removes the noise from the entire file, not just the section you captured as the profile. Notes If you do not have Adobe Audition 2.0 (or choose not to install the tryout version of the book's disc) you can simply open the Project Edit_in_Audition_FINISH.prproj file from the APPST2 Lesson Files/Chapter 12 folder and compare the FINISH sequence audio to that of the original. In my opinion, Noise Reduction and the other restoration effects make Adobe Audition 2.0 a necessity for your video editing system. It's not too difficult to learn how to run these simple effects that can clean up clips beyond what's possible in most audio and video applications. Audition's restoration features are second to none, and with Premiere Pro 2.0's Edit in Adobe Audition feature, they are easy to access and apply to any editing workflow. After Effects and Dynamic LinkAs I mentioned earlier, Adobe Dynamic Link provides tighter integration between Premiere Pro and After Effects for Production Studio owners, allowing you to create an After Effects composition with a placeholder inside of Premiere Pro that updates dynamically as you update the composition. In former versions you had to copy and paste from Premiere Pro to After Effects or vice versa. Now you can import an After Effects composition directly into Premiere Pro and have it appear as a clip in your Project panel. Because the general steps of using Dynamic Link to create or import composition are the same no matter what the content of the composition, this lesson is a generic step-by-step that highlights the important moments of the workflow. Notes Only Adobe Production Studio provides access to the Dynamic Link feature inside Premiere Pro. It will not help you if you purchased Premiere Pro and After Effects as stand-alone programs.
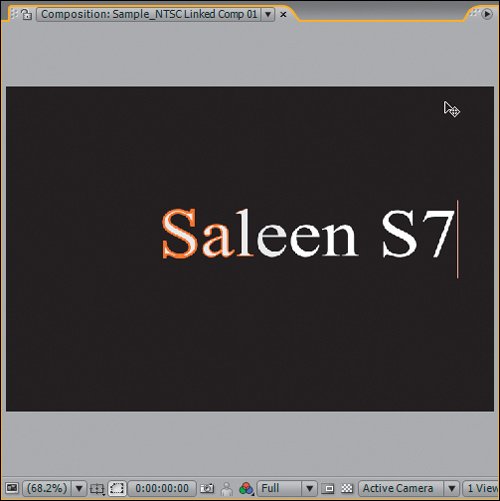
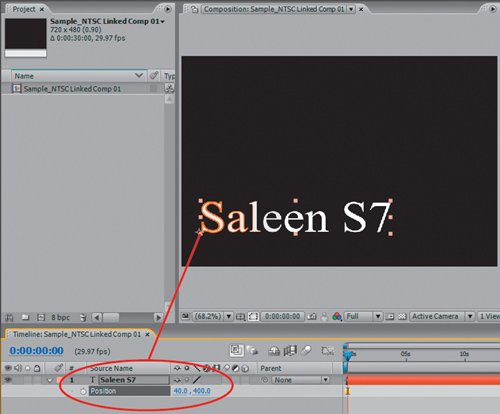
Figure 12.23. Here you can see the icon and Project panel item created by the Dynamic Link feature. With the file added to the timeline, you can see that the animated text created with the comp in After Effects appears inside of Premiere Pro's Program Monitor. Because the Text Animation file is built as text with an alpha channel, the Sample Project's video plays underneath the animated title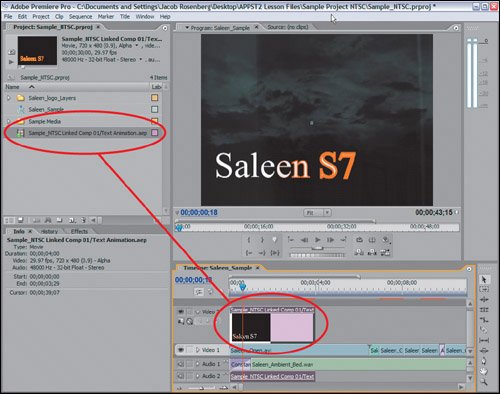 When creating a Dynamic Link composition, Premiere Pro creates a project item that directly references the Dynamic Link composition from After Effects. The Dynamic Link clip is in essence a placeholder for the After Effects comp. When the After Effects comp updates, the Premiere Pro Dynamic Link file updates to reflect those changes. You can edit and manipulate the Dynamic Link clip as you would any other clip in Premiere Pro. To make this example more fluid you could add a Dissolve Transition to the beginning and end of the clip in the timeline after you trim the clip to the proper duration. This lesson serves as a teaser for what you can do with Dynamic Link. A second Dynamic Link feature enables you to import an existing composition from a previously created After Effects project. To do this:
|
EAN: 2147483647
Pages: 200