Viewing Keyframes in the Timeline
| To view your keyframes in the Timeline panel, make sure you have Show Keyframes active from the display mode in the track header. A drop-down menu will then appear within the boundary of each clip. Click on the menu to see the effects associated with the clip. The submenus of each effect list all the associated parameters that make up your effect. Select a parameter to display its associated keyframes within the boundary of the clip in the track (Figures 8.22a, b, and c). The limitation of timeline keyframe viewing is that you can see only one keyframe parameter at a time; however, you can make your video track much taller than your new velocity and value graphs in the Effect Controls panel. Figures 8.22a, b, and c. 8.21a shows the drop-down menu and the display choices. 8.21b shows the same Position keyframes from the previous figure with the Temporal Interpolation value exhibited by the curved lines. In 8.21c, you can see that I am now adjusting the Bezier handle associated with the velocity coming from the second keyframe to the third. The bottom of the track is always a zero value; the higher you go up the track, the more the value increases. Take note of the feedback that is revealed in the bar below the panel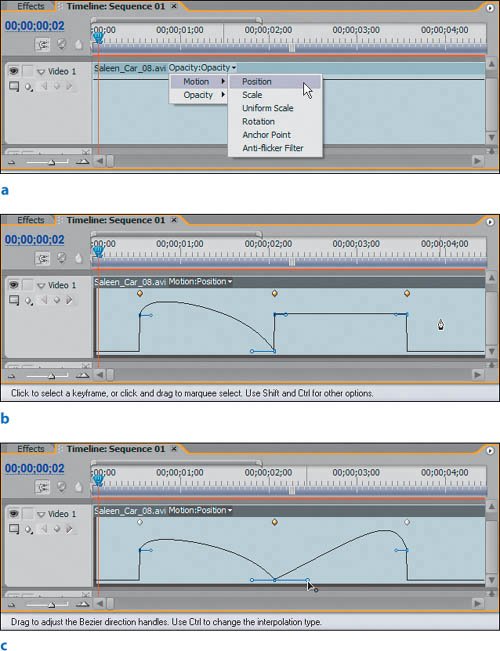 The Pen ToolTo make selections and adjustments to the keyframes displayed in the Timeline panel, press P while the timeline is active to change your cursor into the Pen tool. Although you can make a few specific keyframe selections with the standard cursor tool, the Pen tool has many more important features. To add keyframes to an effect parameter with the Pen tool, first make sure that the parameter has keyframing turned on in the Effect Controls panel. Back in the Timeline panel, hold the Ctrl key and click the Pen tool on the displayed wire to add a keyframe to the displayed parameter (Figure 8.23). Figure 8.23. With the Pen tool, you can add a keyframe to the active parameter by holding down the Ctrl key and clicking on the connector line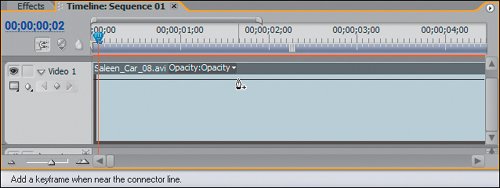 Notes One-dimension keyframes, such as Position (X and Y) and anchor points for Motion, cannot display Bezier keyframe handles in the timeline, because their values cannot be reflected within the single track. You also can modify displayed keyframes: Select the keyframe with the Pen tool and drag it up to increase the value of the parameter. Dragging the keyframe down reduces the parameter's value. Dragging a keyframe horizontally changes its position within the boundary of the clip. Clicking and dragging over a group of keyframes with the Pen tool performs a range selection of the keyframes. With multiple keyframes selected, you can move or delete the entire selection (Figures 8.24a and b.) Range selection is one of the Pen tool's most powerful features. Figures 8.24a and b. As you can in the Effect Controls panel, you can marquee select in the timeline (a). You then can shift and move the selected group of keyframes (b); notice the tool tip that displays the amount of time shift being applied to the keyframe shift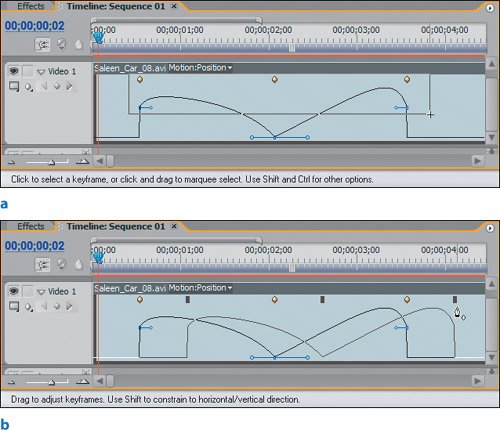 |
EAN: 2147483647
Pages: 200