Standard Effects and Fixed Effects
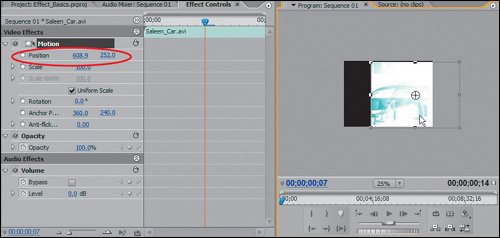
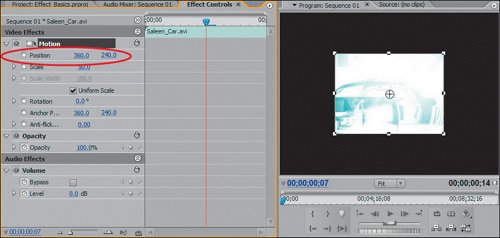
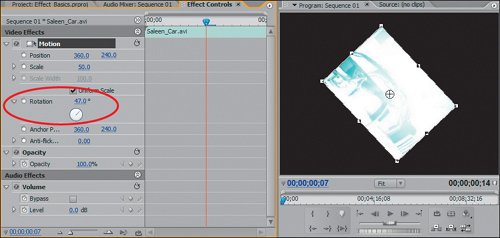
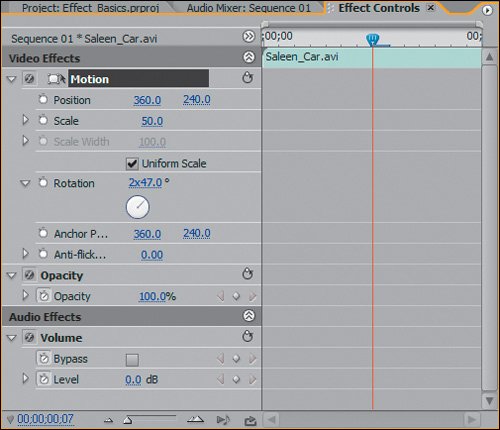
| Before you dive too deep into adjusting effects in the Effect Controls panel, you need to understand the two types of effects you can adjust: Standard effects and Fixed effects. Standard effects are the effects that Premiere provides in the Effects panel's folders. You must manually apply them to your clips by dragging and dropping. Fixed effects are the basic properties that a clip has by default when it is placed on a track in the timeline. Video clips have two Fixed effects: Motion and Opacity. Audio clips have one: Volume (Figure 8.2). Figure 8.2. The selected clip has linked audio and video, so the three Fixed EffectsMotion, Opacity, and Volumeare immediately adjustable in the Effect Controls panel. Notice how the name of the selected clip and the open sequence is visible in the Effect Controls panel, as well as a display of the clip in the area to the right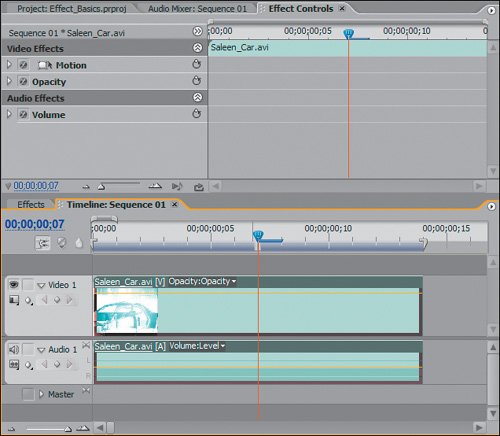 Notes If you're familiar with Adobe After Effects, the Effect Controls panel's design and implementation may seem familiar to you. In designing Premiere Pro, Adobe tried to bridge the few gaps between After Effects and Premiere. Because Adobe designed a number of Premiere Pro features similar to their After Effects counterparts, if you're familiar with one program, you will be comfortable with effect work in both. With 2.0, the inclusion of Value and Velocity graphs for individual effect parameters closes the effect gap even more between the two applications. Video Fixed Effects: MotionWhen you add a video clip in the timeline, you are placing it over a black, empty frame of space, whose size is defined by your Project Settings. You can use the Motion Fixed effect to reduce, enlarge, or move your clip within that frame of space. Combine the Motion effect with keyframes and you can pan and zoom around an image. The basic Motion parameters are
Figure 8.8. The Anti-flicker Filter is a new Fixed effect attribute that allows you to reduce any unwanted flickering or shimmering that might appear when animating still images in the timeline. Increasing the filter value reduces the presence of the flickering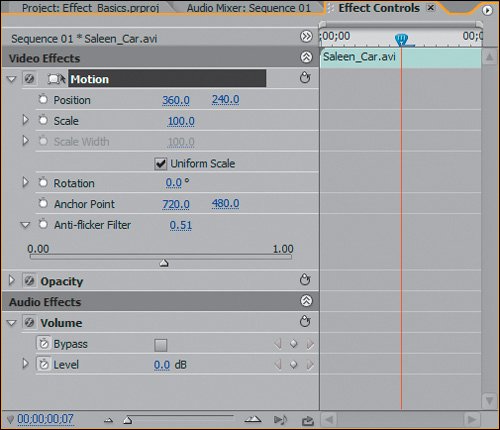 You can adjust the parameters for Motion, and other Fixed effects, in the Effect Controls panel (more on this coming up). Video Fixed Effects: OpacityThe Opacity effect enables you to adjust the transparency of a clip so that you can see through it to varying degrees. In previous versions, Opacity was used to fade up titles, graphics, stills, and video clips on any track other than Video 1. Because Premiere Pro can use transitions on all tracks to fade in and out, you can now use Opacity for custom fades and overall opacity adjustments (Figure 8.9). Figure 8.9. The two Opacity keyframes assigned in the Effect Controls panel are also visible in the timeline. Notice how the timeline keyframes have height positions that reflect their value going from 0 to 100% (a fade in). When you twirl down the Opacity effect listing not only can you see the ramp of the opacity, but you can also adjust the velocity of the ramp (more on this later). The keyframe value underneath the Edit Line in the Effect Controls panel has a value of 100. That is the same keyframe and Edit Line position as in the timeline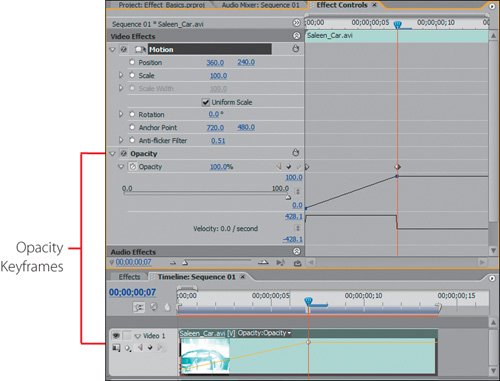 Audio Fixed Effects: VolumeThe single Fixed effect for audio clips is Volume, which has two parameters: Level and Bypass. Level adjusts the actual level of your audio clip either increasing it or decreasing it. Bypass enables you to turn off your level adjustments and use the default volume of the audio clip. Adjusting an audio clip's Volume parameters affects the dB rating of the clip instance in the timeline. When keyframing is turned off, you are adjusting the overall volume of the entire clip. Turn keyframing on to dynamically fade up and fade down the volume levels of your audio clip (Figure 8.10). Figure 8.10. With the Edit Line on top of the first volume keyframe position, you can see that the start volume level is -0dB, which is the default normal level. This is a simple volume fade. To bypass any keyframed fade and play the audio at its original volume, you can turn on the Bypass Volume parameter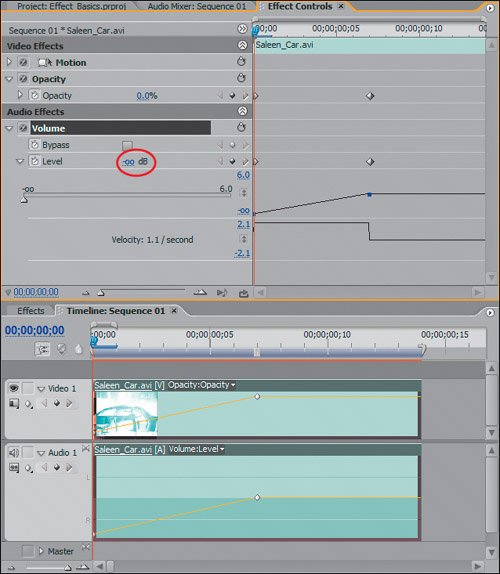 Audio Standard EffectsThe Audio Effects master folder in the Effects panel contains separate Mono, Stereo, and 5.1 subfolders, all of which contain the same Standard effects, customized by channel type. When adding these effects to your timeline, be sure to use the proper audio channel type. For example, mono clips would need Mono effects, stereo clips need effects from the Stereo folder, and 5.1 clips need those from the 5.1 folder. If you are ever unable to drop an audio effect on a clip, most likely you are trying to add an effect type that doesn't match the clip type. Notes As you may remember, you can modify a clip's gain before adding it to the timeline. Because clip gain is separate from clip volume, you will not see an adjustment to the displayed clip volume if you have adjusted the clip gain. |

EAN: 2147483647
Pages: 200