Editing Basics
| In former versions of Premiere, it was easy to get confused and accidentally change the flow or sync of your timeline. Every editing task you perform in Premiere Pro, however, has some sort of interface response, so you know what you are doing as you do it. To understand what is going on, look at the cursor and the bottom of the application window. The cursor (Selection tool) updates and changes its appearance based on which tool you are using (see Figure 6.1). At the bottom of the application window, text suggestions will help guide you through your editing decisions. The text line offers ideas for tools and keystrokes that perform tasks associated with what you are doing. As you go through this chapter, pay attention to the feedback. Try to anticipate what it will say and what the results will be if you were to perform a suggested task. Figure 6.1. With the Selection tool hovering over the edge of a clip, it automatically turns into the edge trimming tool Six actions are the fundamentals of editing in the timeline:
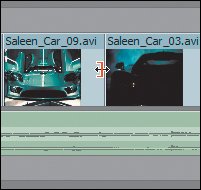
You'll hear these words often in this chapter. Your fingers also will become very familiar with two keys: Ctrl and Alt. These two keys are the modification keys that toggle not only the state of the selected tool, but also the editing mode when you are dragging and dropping media. Because the Insert, Overlay, Lift, and Extract functions are just a modification key away, you can very easily perform complex edits. From shifting the order of edited shots to keeping your edit free of unnecessary gaps and empty spaces, these editing functions are quite powerful. Learn the rules, then expect results. This is the key to being comfortable with the workflow. Knowing the tools and their exact behavior makes the editing process that much easier. You should also be aware of a major change from previous versions: Premiere Pro no longer supports A/B editing, in which the edit combines two subtracks of video into one Master track. Instead it offers single-track editing. This approach may take some getting used to, but once you free your mind from its AB shackles and see the new light, it's beautiful! Single-Track EditingBecause Premiere Pro is a single-track editing application, all of your edits between clips occur on a single video track in the timeline (Figure 6.2). Because of the single-track design, Premiere Pro offers a number of tools to modify your clips after they have been placed. If you come from an AB background, you may have a few puzzling moments, but it's very likely that all of your problems can be solved by finding the right tool to use. When you get to the advanced editing techniques in Section V, you will learn the proper tool for specific problems and explore various editing methods. Figure 6.2. Premiere Pro is based on a single-track editing model. No longer is there a visual A and B roll in Premiere Pro; there's only a single track of video where transitions appear as virtual Band-Aids, joining two clips together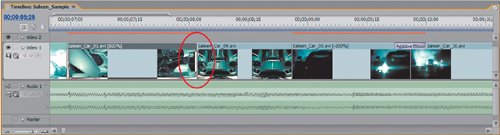 For example, the Ripple Edit tool enables you to easily trim In and Out points while keeping the surrounding clips adjacent to the adjusted clip (Figure 6.3). The Slip tool is helpful because you can slide the In and Out points within the boundaries of the clip instance that is already placed in the timeline. Figure 6.3. When you trim the tail of a clip with the Ripple Edit tool, the adjacent clip remains butted up against the newly adjusted clip. The Ripple Edit tool automatically deletes the blank space created by the edit and slides the media left so that there is no space between the cuts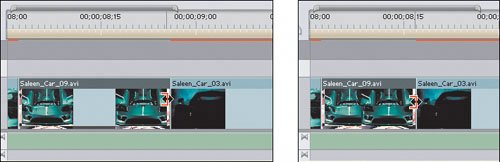 |
EAN: 2147483647
Pages: 200