Adjusting Curves
Now you ll adjust the curves of each color for precise control over the distribution of ink in the highlights, midtones, and shadows:
-
Start with the shadows: In the Duotone Options dialog box, click the PANTONE 289 C curve thumbnail to display the Duotone Curve dialog box. The values you ll enter in the next few steps are shown in Figures H6.3 a, b, and c. Clear any presets from fields that aren t listed here.

Figure H6.3: Duotone curves for (a) PANTONE 289, (b) PANTONE 436, and (c) PANTONE 467 -
In the percentage fields, enter the following values: For 0%, enter 15 . For 20%, enter 16.3 to reduce the amount of darker ink in the lower midtones. For 50%, enter 33.8 to slightly reduce the coverage in the midtones. For 80%, enter 90 to boost the coverage in the shadows. For 100%, enter 100 ; you ll keep the darkest ink at full intensity in the deepest shadows.
-
For PANTONE 436 C, enter the following values to distribute the color in the midtone range: For the 0% field, enter . For 60%, enter 37.5 to reduce the coverage of the medium ink in the darker midtones. For 100%, enter 56.3 to keep coverage light in the deep shadow areas. For PANTONE 467 C, enter the following values: For the 0% field, enter 8.8 to distribute this ink into the brightest highlights. For 20%, enter 21.3 to bend the curve and slightly increase the highlight in the face. For 30%, enter 49.4 to increase the coverage of light ink in the light midtones. In the 70% field, enter 13.8 . In the 100% field, enter 11.3 to almost eliminate ink coverage in the shadow areas and help prevent muddying from over-coverage. Click OK. After you re finished, your Duotone Options dialog box should look like Figure H6.4.
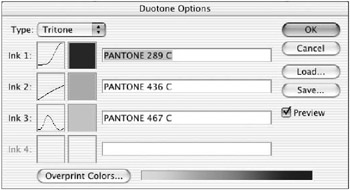
Figure H6.4: The Duotone Options dialog box after setting the Duotone curves -
Save.
Adding Color to the Sun
The sun can use a spot of color to give the image that extra sparkle. Follow these steps:
-
Choose the Magnetic Lasso tool
 . Drag it around the edge of the sun to make a selection, as in Figure H6.5.
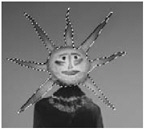
Figure H6.5: The sun selected -
Display the Channels palette (Window ’ Channels). From the Channels palette menu, choose New Spot Channel. The Spot Channel Options dialog box appears.
-
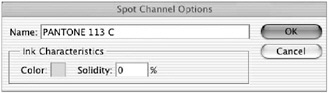
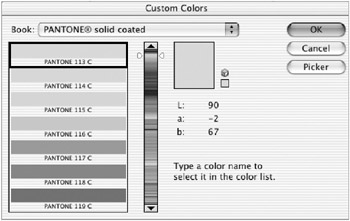
Click the color swatch. The Color Picker appears. Click the Custom button on the Color Picker. For Book, Choose PANTONE Solid Coated. Enter 113 on the keypad to choose PANTONE 113 C. Click OK. The new spot channel appears in the Channels palette (see Figure H6.6), and the sun turns a cheerful yellow.
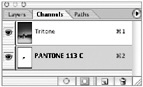
Figure H6.6: The Channels palette showing the spot color channel -
Save the image.
Adding Type
You ll add some type as a new spot color channel, using PANTONE 113 C:
-
Click the Channels palette to activate it.
-
Target the PANTONE 113 C spot color channel.
-
Choose the Type tool
 . In the Options bar, I chose 72-point Hurculaneum, but you can choose any font you like. Center the cursor above the sun on the image and click your mouse. You ll notice that when you enter type on the spot color channel, a red mask is displayed, as in Figure H6.7.
Figure H6.7: The type entered on the spot color channel displays a type mask. -
Enter the words SUN GOD . In the Options bar, choose the Warp text feature
 and warp the text into an arc by using the defaults (again, see Figure H6.7).
 -
Commit the type by clicking the check mark in the Options bar. The type converts to a selection (see Figure H6.8) that you will use to create a trap and a knockout. Save.
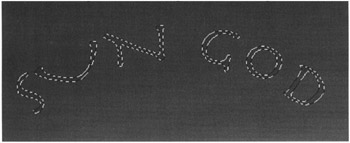
Figure H6.8: The type selection -
Target the Tritone channel. Choose Select ’ Modify ’ Contract. Enter 1 pixel in the box and click OK. Making sure the background color is white, press Delete to fill the type selection with white. This knocks out the other colors from behind the yellow type. Figure H6.9 shows a close-up of the text knocked out of the background with the trap, and Figure H6.10 (which also appears in the color section as Figure C52) shows the final version of the Duotone with the spot color and knocked-out type.

Figure H6.9: A close-up of the text with the knockout and the trap
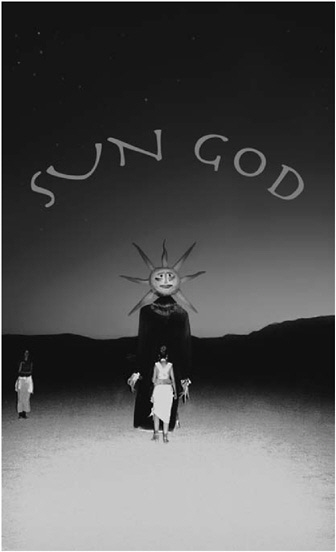
Figure H6.10: The final version of the image with the type
| Note | The spot color channel can be directly output only from Photoshop, as it will not be recognized from the Duotone mode EPS file when imported into layout or illustration software. The Duotone mode file can be duped, split into Multichannel, and then saved as EPS DCS 2, so that the imported image will contain the Tritone separations and the spot color. |
Converting to Multichannel
To see the content of the separated channels, it s a good idea to convert the image to Multichannel mode. You can look at the channels to get a better understanding of how Duotones and spot colors distribute ink when they are printed. Follow these steps:
-
Choose Image ’ Mode ’ Multichannel. In the Channels palette, the three Tritone channels are separated and named for their PANTONE colors, and the one spot color channel is at the bottom of the list, as in Figure H6.11.
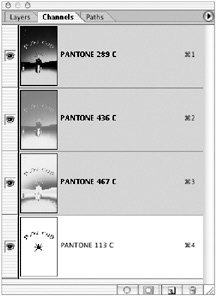
Figure H6.11: The Channels palette after conversion to Multichannel mode -
Choose Photoshop (Macintosh) or Edit (Windows) ’ Preferences ’ Display And Cursors ’ Color Channels In Color.
-
Click the visibility icon of each channel, one at a time, to observe the densities of each color as it will be printed on paper.
EAN: 2147483647
Pages: 355