Using Spot Color Channels
Using Spot Color Channels
Spot colors are additional inks used in a print job other than black or process colors. The inks can be independently printed or overprinted on top of the grayscale or CMYK image. Each spot color requires a plate of its own. Spot colors are printed in the order in which they appear in the Channels palette, from top to bottom. Spot color channels are totally independent of the color mode of the image. They are not part of the composite channel in a grayscale, RGB, or CMYK or Lab image. Spot color channels are also independent of layers ”you cannot apply spot colors to individual layers .
Here are some of the characteristics of spot color:
-
Spot color channels are like layers in that they are independent of and separate from the Background image.
-
Spot colors are unlike layers in that they cannot be merged with the image and continue to remain as spot colors.
-
Spot color channels are like color channels in that they exist only in the Channels palette.
-
Spot color channels are unlike color channels because, by default, they print separately from the rest of the image.
Creating Spot Colors
There are three ways to apply spot colors. You can overlay them on top of an image so that they mix with the underlying color and tint it. You can apply it as a solid color, or you can knock out the tonal image and replace it with the spot color. In this step-by-step exercise, you ll overlay the spot color over a grayscale image:
-
Open the grayscale image frying_panx.psd (see Figure 18.7) in the ch18 folder on the CD. Save it to your disk.
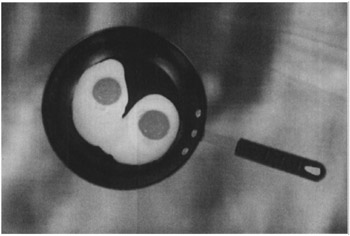
Figure 18.7: The frying pan image -
Choose Window ’ Channels to display the Channels palette (see Figure 18.8). Load Alpha 1, which is a selection of the egg yolks, by dragging it to the Load Channel icon
 .
. 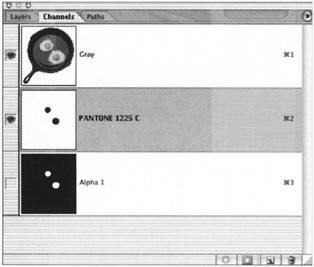
Figure 18.8: The frying pan with the spot color channel in the Channels palette -
From the Channels palette menu, choose New Spot Channel. The New Spot Channel dialog appears, and your selection fills with red (the default spot color).
-
Click the color swatch to bring up the Color Picker. Choose Custom Colors and choose a premixed ink, such as PANTONE 1225 C. The spot color channel will be named automatically with the name of the selected ink, as shown in Figure 18.9.
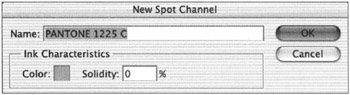
Figure 18.9: The New Spot Channel dialog box showing the name of the selected ink -
Choose a solidity percentage (see the Solidity vs. Opacity sidebar) and click OK.
After your new spot color channel has been created, it resides in the Channels palette just below the separate channels of the color mode you re working in. In a grayscale image, the first spot color channel is under Black; in an RGB image, it s under the Blue channel. You cannot move spot color channels above the color channels, unless you convert your image to Multichannel mode. Likewise, alpha channels are under the spot color channels in the stacking order. As with Duotone mode, spot color channels print in the order in which they re listed in the Channels palette.
Viewing Spot Colors
If you re viewing the image in the composite view, and your spot channel is active, the foreground color becomes the channel s spot color, with white as the background color. The foreground color swatch, however, will appear black, white, or a shade of gray depending on the brightness of the selected color. If you re viewing the spot color channel independently of the composite, the foreground color is white and the background color is black. You can edit a spot color channel exactly as you would an alpha channel: use painting tools, selection tools, filters, type, placed artwork, and so forth, to impose the image you want to print.
| Note | Special rules apply to type in spot color channels. In fact, in Photoshop CS, type behaves in spot channels the way that type used to, before Adobe made it editable. In other words, when you apply type to a spot color channel, the text shows up as a selection outline on the channel; then you fill it. After you deselect it, it s no longer editable ”except in the ways you would normally edit a selection. |
Knocking Out Spot Colors
If you don t want your spot color to print over another spot color or a part of the underlying image, you can create a knockout. A knockout prevents ink from printing on part of the image so the spot color can print directly on the paper. No blending of ink occurs in the overlapping area. Activate the channel that you want to knock out. Choose Select ’ Load Selection, and load the spot color channel in question. Choose Select ’ Modify ’ Contract (or Expand) to adjust the fit of the knockout. (See Hands On 6, Duotones and Spot Color following this chapter to try this.)
| |
Entering a value in the Solidity box lets you control the viewing density of the spot color channel. The Solidity control is for visual reference only. It s there to help you visualize what an ink might look like when printed in a tint value from 0% to 100%.
Solidity is not to be confused with Opacity. Opacity affects the amount of color applied to an image with the painting tools, or the transparency of an image on a layer. Solidity is a visual reference and does not affect the image unless you merge the spot colors with the other color channels. It then applies the tint value of the color to the image and is no longer a spot color.
If you want the spot color ink to print as a tint, you have to create a gray (instead of black) selection in the spot color channel. Spot color inks always print full intensity unless your selection mask in the spot color channel itself contains a gradation or tint. Printing inks are usually transparent. When printed over the image, the spot color will mix with colors underneath it.
| |
You can create a trap by slightly reducing or enlarging the selection outline to enable a small outline of both inks to overprint. This way, no white space appears between two colors when the job is printed. After you have adjusted your selection to fit, press Delete (Mac) or Backspace (Win) to eliminate the underlying image. Now the spot color can imprint without mixing with an underlying color except at the edges of the trap.
| Note | Lighter-colored inks are usually spread, meaning that the knockout hole stays the same size , while the original spot color shape that prints over the hole is expanded slightly. Darker inks choke , meaning that the spot color shape stays the same size, while the knockout hole is contracted slightly to form the trap. |
You can also select a portion of the image, copy it, and then attribute a spot color to it by using its tonal qualities. You will use this technique on the Froggy image to create a different spot color effect.
To create a spot color from a tonal area on the image with a knockout:
-
Open the image froggy.psd in the ch18 folder on the CD. Save it to your disk as froggy_knockout.psd .
-
Choose Window ’ Channels to display the Channels palette. Load Alpha 1 by dragging it to the Load Channel icon, to select the spots on the frog s back.
-
Choose Edit ’ Copy to copy the content of the selection to the Clipboard.
-
Choose Select ’ Modify Contract to create a 1-pixel choked trap, as seen in Figure 18.10.
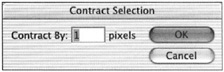
Figure 18.10: Contract Selection dialog box -
Press D to set the default black-and-white foreground and background colors. Press your Delete key to create the knockout, as in Figure 18.11. Deselect.
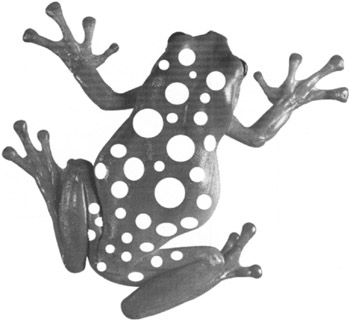
Figure 18.11: The frog with the knockout -
Load Alpha 1 again. From the Channel Options pull-down menu, choose New Spot Channel. Choose a PANTONE color for the channel.
-
Press
 /Ctrl and click on the spot color channel to select it. When viewed close-up, the selection should slightly overlap the knockout, as in Figure 18.12.
Figure 18.12: The selection showing the trap -
With the spot color channel targeted , choose Edit ’ Paste Into to paste the tonal image of the frog s skin into the selection. The image should look like Figure C29c in the color section.
| Note | Figures C29a, C29b, and C29c in the color section show examples of the Froggy image with various applications of spot color. |
Other Uses for Spot Color
Spot color can also be used to create varnish plates and dies. Varnishes are simply unpigmented inks. Apply them to highlight areas of an image or to coat the image with a glossy surface. Dies are shaped forms used to cut paper. Remember those birthday cards that have an oval hole cut to reveal George Washington s face on the dollar concealed within? That s die-cutting. Precise shapes can be created by using spot color channels; those shapes can then be printed as negatives , which are then used to create the die.
EAN: 2147483647
Pages: 355