| When you use smooth bind to create a skin, Maya automatically calculates which points should be influenced by which bones and to what extent. The generated result is likely to work well in some areas but not so well in others (Figure 11.34). Fortunately, Maya provides several tools for you to edit a smooth skin. Figure 11.34. When the shoulder joint of this smooth-bound wolf is rotated, it moves part of the torso as well as the shoulder. 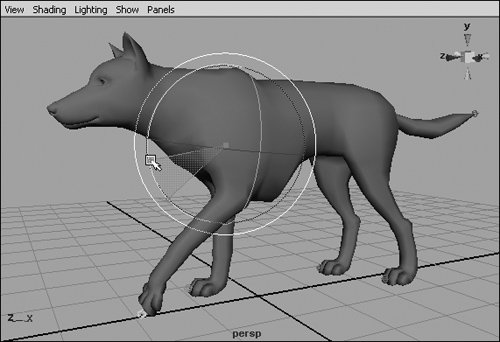
The degree to which a particular point is influenced by a particular joint is referred to as the joint's weight. A weight of 1.0 means the point is influenced exclusively by that joint, whereas a weight of 0.0 means the joint has no influence. A point with a weight of 0.5 for two different bones is influenced equally by both (Figure 11.35). All the weights on a point must add up to 1.0, so if you change the weight of one bone, Maya automatically adjusts the other weight(s) for that point. Figure 11.35. The highlighted points at the center of this cylinder have a weight of 0.5 for both the first and second joints, so the points are equally influenced by both joints. 
You can adjust weights numerically in the Component Editor, similar to the way you adjust the weights of a rigid skin. You can also paint weights on a skin with the Paint Weights tool. Painting gives you an intuitive way to modify weights. It also provides visual feedback on the strength of a particular bone's weight across the surface; the paint shade darkens progressively from white to black as the weight varies from 1.0 to 0.0. If your model is symmetrical, as most characters are, you can mirror any skin weights that you modify from one side to the other. Doing so saves you the extra time of making identical changes to both sides. As with a rigid skin, you can select a smooth skin and apply Go to Bind Pose or Detach Skin from the Skin menu (Figure 11.36). Go to Bind Pose puts the skeleton back where it was when you first bound the skin, and Detach Skin removes the connections between the skeleton and the skin. Figure 11.36. The Detach Skin and Go to Bind Pose functions apply to both rigid and smooth skins. 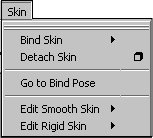
To edit smooth skin weights in the Component Editor: 1. | Select the skin you want to modify. You can create a smooth skin by following the steps described in "To bind skin using smooth bind," earlier in this chapter.
| 2. | In component mode, select the points whose weights you want to modify (Figure 11.37). You can switch to component mode by pressing  . .
Figure 11.37. Because they're weighted to both the head and neck, the wolf's ears are left behind when the head joint is rotated. They should be weighted entirely to the head. 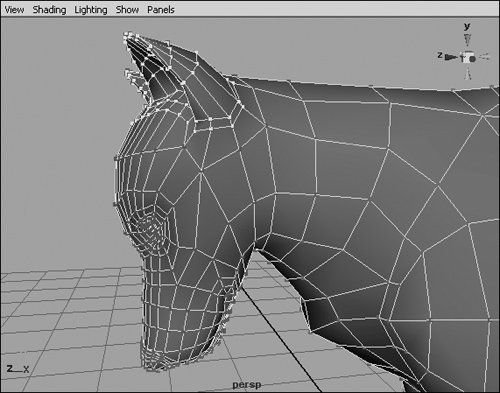
| 3. | Choose Window > General Editors > Component Editor.
| 4. | In the Component Editor, click the Smooth Skins tab.
| 5. | Click the top field under the name of the joint whose weights you want to modify, and then drag down to highlight all the weights (Figure 11.38).
Figure 11.38. Here the weights for the head joint are highlighted. Entering 1.0 in the last field will change all of the weights to one. Maya will automatically reduce the other weights for these points to zero. 
| 6. | Enter the new value for the weights.
All the weights for the selected points become the new value (Figure 11.39).
Figure 11.39. Now the ears are weighted entirely to the head joint, so they move with the rest of the head. 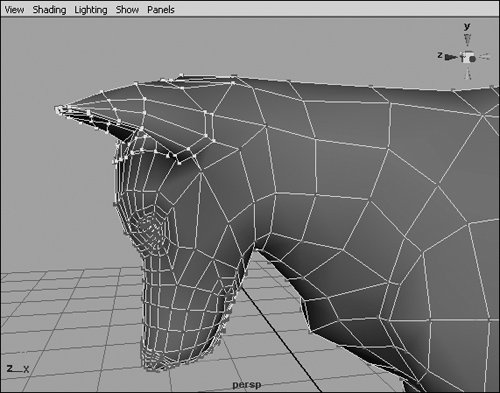
|
To paint skin weights on a smooth skin: 1. | Select the skin you want to modify. You can create a smooth skin by following the steps described in "To bind skin using smooth bind," earlier in this chapter.
| 2. | Choose Skin > Edit Smooth Skin, and select the box next to Paint Skin Weights
The Paint Skin Weights tool is activated, and its settings are displayed in the Tool Settings window (Figure 11.40).
Figure 11.40. Unlike some Maya tools, the Paint Skin Weights tool's settings are vital to its use. 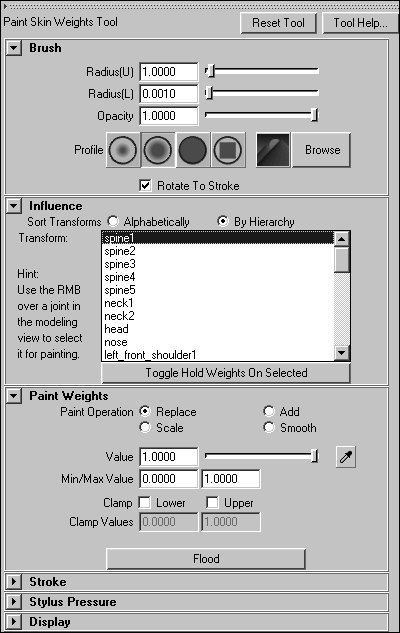
| 3. | If it isn't already selected, choose Smooth Shade All from your view's Shading menu.
This setting lets you see the weights on your model (Figure 11.41).
Figure 11.41. The lighter patch on the model's shoulder and part of the torso represents the weights of the left shoulder. 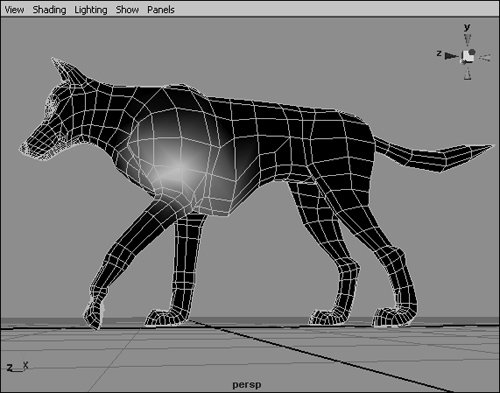
| 4. | In the tool settings dialog box, select the joint for which you want to paint weights, and, if necessary, choose a different Paint Operation and/or Value to paint with.
| 5. | Adjust the brush size by holding down  and dragging from right to left with the middle mouse button. and dragging from right to left with the middle mouse button.
| | | 6. | Using your chosen settings, paint the area you wish to change.
If you're painting weights for a joint that has been moved, the surface adjusts dynamically to reflect the changes (Figure 11.42).
Figure 11.42. Here we have set the value to 0.0 and painted to remove the shoulder's effect on the torso. Because the torso is black, we know the weight is 0.0; but rather than move back into place, the torso geometry has moved slightly forward. This indicates that it's still partially weighted to an incorrect joint, most likely the leg. 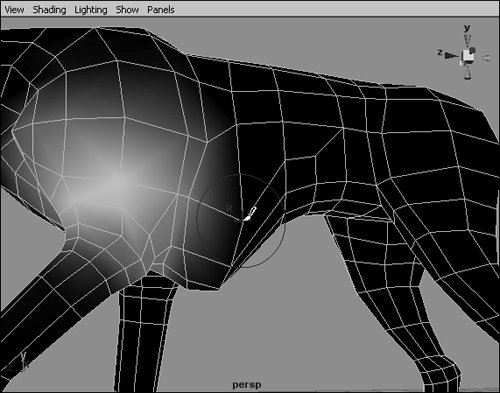
| 7. | To continue painting weights on other joints without accidentally affecting the weights of the selected joint, click Toggle Hold Weights On Selected (Figure 11.43).
Figure 11.43. By holding the weight of the shoulder, you can paint out the weight of the leg without Maya automatically assigning some of the recalculated weights to the shoulder. 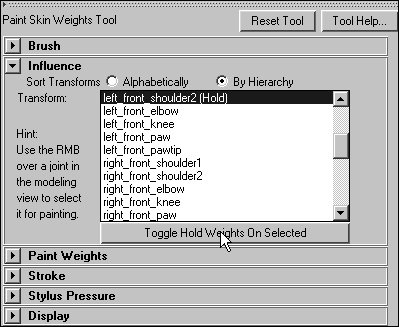
| 8. | Repeat steps 47 until the surface deforms the way you want it to (Figure 11.44).
Figure 11.44. Painting the torso with a value of 0.0 for both the shoulder and leg removes its unwanted deformation. Painting the torso with a value of 1.0 for the closest spine joint would have a similar effect. 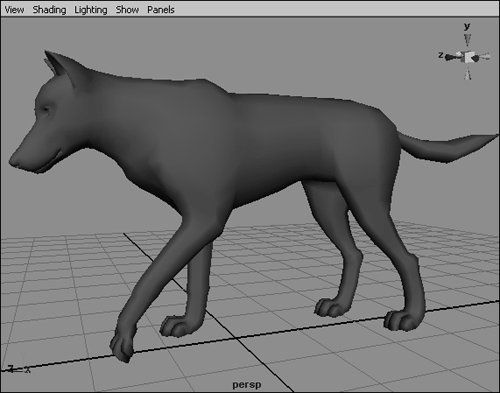
|
To mirror skin weights on a smooth skin: 1. | Select a joint from the skeleton of the skin you want to modify. You can create a smooth skin by following the steps described in "To bind skin using smooth bind," earlier in this chapter, but you will need to use a symmetrical mesh and skeleton for this task (Figure 11.45).
Figure 11.45. Because the unwanted weighting on the right side of the wolf is identical to the problem you fixed on the left side, the mirror command can save time. However, the skeleton must be returned to its bind pose first. 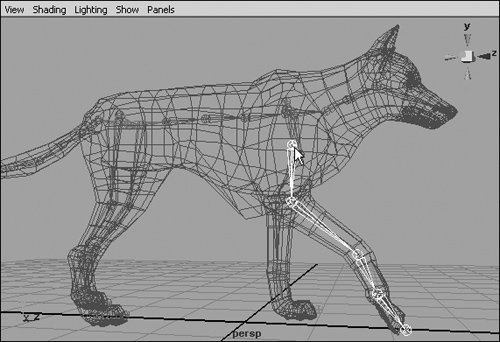
| 2. | Select Skin > Go to Bind Pose.
The skeleton returns to the position it was in when you bound the skin to it. This is necessary for the weights to mirror correctly.
| 3. | Select the skin.
| 4. | From the Skin > Edit Smooth Skin menu, click the box next to Mirror Skin Weights.
The Mirror Skin Weights Options dialog box is displayed (Figure 11.46).
Figure 11.46. The Mirror Skin Weights Options dialog box lets you pick the plane and direction on which to mirror the weights. 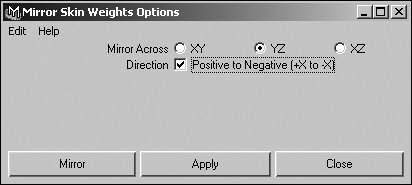
| 5. | Select the plane you want to mirror across (the plane that divides your character into two symmetrical halves).
| 6. | If you made your changes on the positive side of the axis you're mirroring on, select the Positive to Negative check box. If they're on the negative side, deselect it.
| 7. | Click Mirror to mirror the skin's weights. The skin deforms the same way on both sides (Figure 11.47).
Figure 11.47. After mirroring the weights, the unwanted weighting is removed from the right side of the wolf's torso. 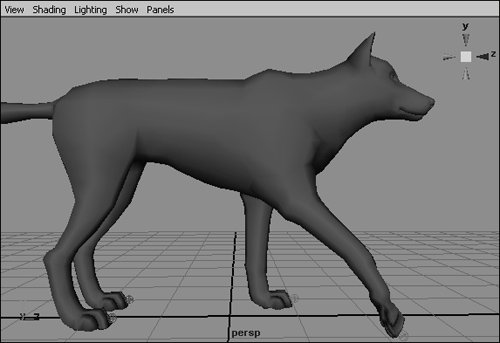
|
|