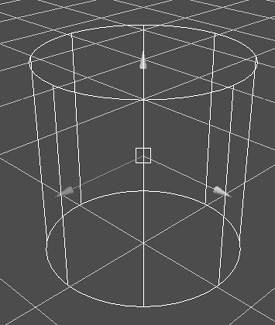
| Maya provides multiple tools for moving, rotating, and scaling objects and components. Each of these tools has axes that you can grab and move to transform an object. These axes, called manipulators (Figure 5.3), are used to translate (move), rotate, or scale the object. Manipulators make it easy to constrain objects along a particular axis: You simply click and drag the colored line for the axis along which you want to constrain the object. The colors remain consistent for each tool. RGB colors coincide with the X-Y-Z axes (Figure 5.4): The manipulator's X axis is red; the Y axis is green; and the Z axis is blue. If you forget an axis' color, simply check the View axis in the lower left-hand corner of each pane (Figure 5.5). The axis selected on the manipulator is always yellow. Figure 5.3. The Move, Rotate, and Scale manipulators. 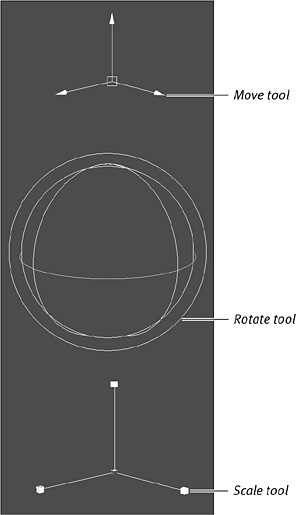
Figure 5.4. RGB colors match the X-Y-Z axes. 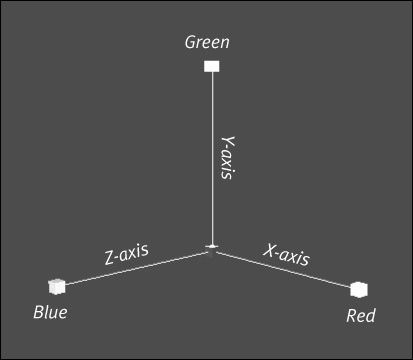
Figure 5.5. Check the View axis in the lower-left corner of each pane to remind yourself which color is associated with each axis. 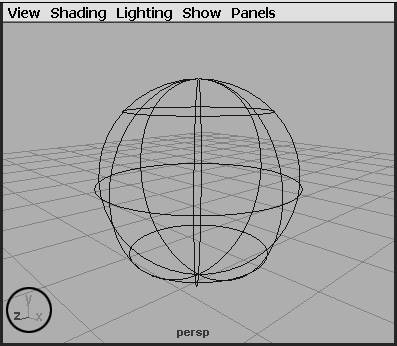
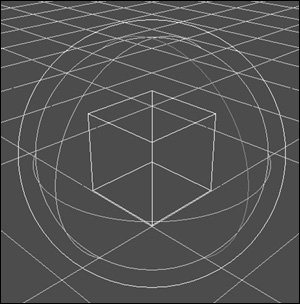
In addition to constraining an object along an axis, you can freely manipulate the object by clicking and dragging the square in the middle of the Move and Scale tool manipulators, or by clicking and dragging anywhere inside of the Rotate manipulator (Figure 5.6). Figure 5.6. You can freely translate an object by selecting the center of the Move tool's manipulators, scaling proportionally with the center of the Scale tool's manipulator, or clicking and dragging anywhere in the sphere of the Rotate tool to rotate freely. 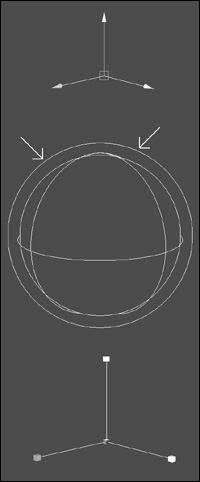
Each of the tools in the toolbar, with the exception of the Lasso tool and the Soft Modification tool, has an associated shortcutall of which are easy to remember because they coincide with the       keys on the keyboard. You can just press a tool's key to turn on its manipulator. keys on the keyboard. You can just press a tool's key to turn on its manipulator. The       keys and the manipulators they turn on are as follows (Figure 5.7): keys and the manipulators they turn on are as follows (Figure 5.7): Figure 5.7. The manipulation tools and their shortcut keys. 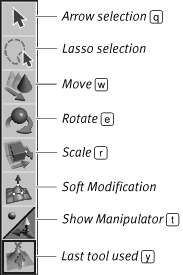
 Arrow selection tool Arrow selection tool
 Move tool Move tool
 Rotate tool Rotate tool
 Scale tool Scale tool
 Show Manipulator Show Manipulator
 Last tool used Last tool used
 Tip Tip
To translate an object or component using the Move tool: 1. | Select an object or component by clicking it.
| 2. | Press  or click the Move tool icon or click the Move tool icon  in the toolbar. in the toolbar.
The Move manipulator will now be visible on the object or component (Figure 5.8).
Figure 5.8. The Move manipulator is used to move the object around the scene. 
| 3. | Click and drag the manipulator's arrow in the direction you want the object to move (Figure 5.9).
Figure 5.9. Click and drag the axis to which you want the object constrained so that you can maintain precise control over the surface's position. This is particularly useful in the Perspective view. 
This translates the object along the selected axis.
or
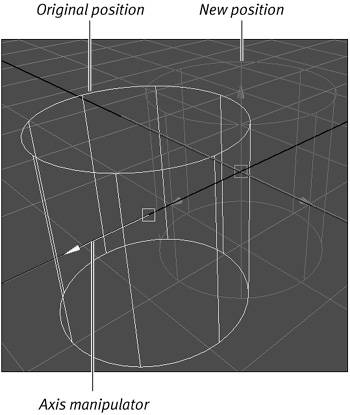
Hold down  , and then with the middle mouse button, click and drag in the direction you want the object to move (Figure 5.10). , and then with the middle mouse button, click and drag in the direction you want the object to move (Figure 5.10).
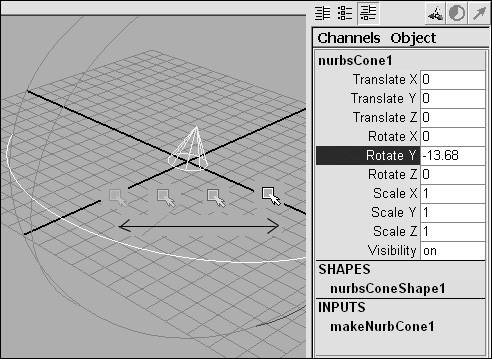
Figure 5.10. By dragging left and right with the middle mouse button, you can change values interactively. Here, a translation value is changed; therefore, the object is moved. 
This selects the appropriate manipulator axis and translates the object in that direction. This is particularly useful if you've just created an object at the origin but moved the camera away from the grid. You can pull the object into your camera view if you know the direction of the origin.
|
 Tips Tips
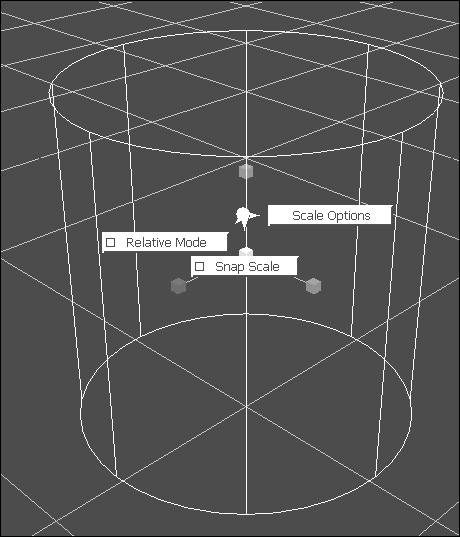
You can also hold down  to activate grid snap. In addition, if you drag with the middle mouse button anywhere on the grid, the object will snap to that location. to activate grid snap. In addition, if you drag with the middle mouse button anywhere on the grid, the object will snap to that location. You can use the  and and  keys to enlarge or shrink the manipulators. keys to enlarge or shrink the manipulators. From anywhere in a view pane you can hold down the keyboard shortcut for the Move ( ), Rotate ( ), Rotate ( ), or Scale ( ), or Scale ( ) tool and click to bring up that tool's Marking menu (Figure 5.11). Maya's Transform Marking menus include shortcuts to many of the tools' options. ) tool and click to bring up that tool's Marking menu (Figure 5.11). Maya's Transform Marking menus include shortcuts to many of the tools' options. Figure 5.11. The Scale tool's Marking menu includes shortcuts for scaling proportionally as well as along an axis. 
To scale an object or component: 1. | Click an object or component to select it.
| 2. | Press  or click the Scale tool icon or click the Scale tool icon  in the toolbar. in the toolbar.
The Scale manipulator should now be visible on the object or component (Figure 5.12).
Figure 5.12. You use the Scale tool's manipulator to scale an object proportionally or along a single axis. 
| 3. | Click the small square of the axis on which you want to scale the object or component, and drag in the direction you want the object to scale (Figure 5.13).
Figure 5.13. Click and drag a Scale tool's axis to scale it along a particular axis. 
or
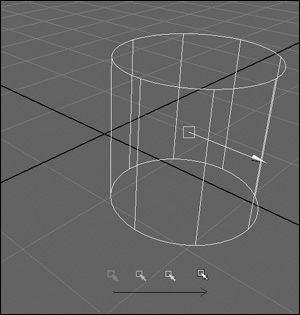
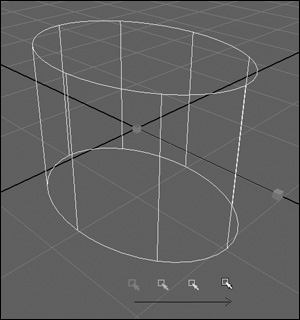
While pressing  , click and drag with the middle mouse button anywhere in the pane in the direction in which you want the object to scale (Figure 5.14). , click and drag with the middle mouse button anywhere in the pane in the direction in which you want the object to scale (Figure 5.14).
Figure 5.14. This cylinder is being scaled along the X axis by clicking and dragging with the middle mouse button. 
This selects the appropriate manipulator axis and scales the object in that direction.
|
To rotate an object or component: 1. | Select an object or component by clicking it.
| 2. | Press  or click the Rotate tool icon or click the Rotate tool icon  in the toolbar. in the toolbar.
The Rotate manipulator is now visible on the object or component (Figure 5.15).
Figure 5.15. The Rotate manipulator is used to rotate the surface on one or more axes. 
| 3. | Click the circle of the axis you want to rotate the object or component around, and drag in the direction you want the object to rotate (Figure 5.16).
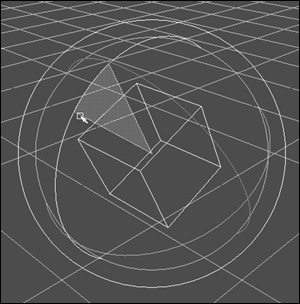
Figure 5.16. Click and drag the axis circle to which you want the object constrained. A gray pie slice shows you how many degrees you have rotated the object. 
|
 Tips Tips
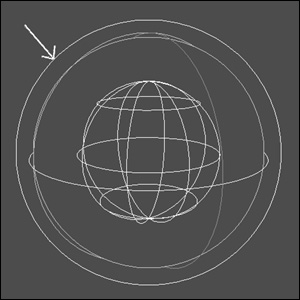
You can click anywhere within the Rotate manipulator sphere, and click and drag to rotate the object without being constrained to any axis. Once the axis you want to use is yellow on the manipulator, you can click and drag anywhere in the pane with the middle mouse button to rotate the object around that axis without touching the axis or the object. The light-blue outer ring rotates the object or component around an axis that always faces the camera view (Figure 5.17). Figure 5.17. The light-blue outer ring rotates the object or component. 
To translate, rotate, or scale an object or component using the Channel Box: 1. | Click an object or component to select it.
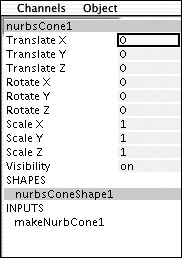
| 2. | In the Channel Box, click once in the field next to the attribute you want to change (Figure 5.18).
Figure 5.18. Click the field name of the attribute you want to change (in this case, Translate X). 
| 3. | Type a new value in the selected field.
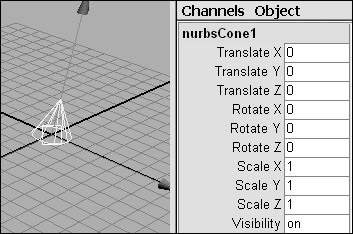
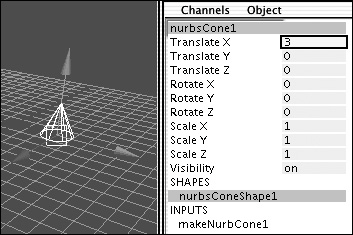
The object reflects the value change (Figures 5.19 and 5.20).
Figure 5.19. The position of the cone with Translate X set to 0. 
Figure 5.20. Changing the Translate X value to 3 moves the cone three units in the positive x direction. 
or
Click to select the Attribute's name, and then move the mouse over a view pane. Hold down the middle mouse button and drag left or right to interactively change the value of the selected attribute (Figure 5.21).
Figure 5.21. You can use the middle mouse button to interactively change values anywhere in a pane. 
|
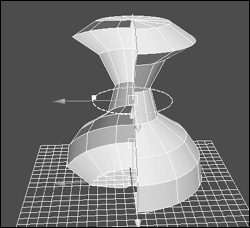
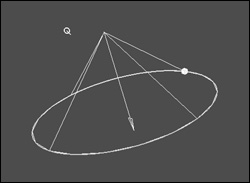
Using the Show Manipulator tool The Show Manipulator tool  lets you access the Input node of an object (known as its construction history) to alter a surface or curve. This tool is most useful for surfaces that originated from curves because the manipulator provides shortcuts to altering the Input node attributes (Figure 5.22). (For more information, see Chapter 7.) lets you access the Input node of an object (known as its construction history) to alter a surface or curve. This tool is most useful for surfaces that originated from curves because the manipulator provides shortcuts to altering the Input node attributes (Figure 5.22). (For more information, see Chapter 7.) Figure 5.22. The additional manipulator on the Show Manipulator tool controls additional Revolve attributes, saving you from going to the Channel Box. In this example, the revolve was changed to less than 360 degrees by moving the manipulator at the center of the object. 
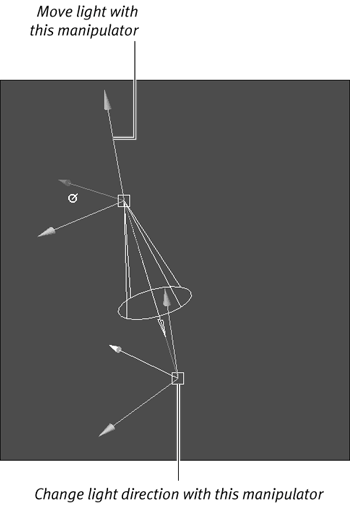
Another great use of the Show Manipulator tool is to direct a spotlight or camera. When used on a spotlight, the light will have two manipulators instead of oneone to move the light, and one for the light to point at, which makes adjusting lighting easier. The Show Manipulator tool most commonly appears with two manipulators. In the case of a spotlight, one manipulator translates the camera, while the second indicates where the spotlight will be aimed. Follow the steps below to create a spotlight and aim it using the Show Manipulator tool. To aim a spotlight using the Show Manipulator tool: 1. | From the Create menu, select Lights > Spotlight.
| 2. | Click the Show Manipulator icon  in the toolbar. in the toolbar.
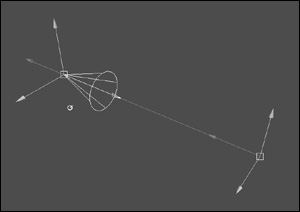
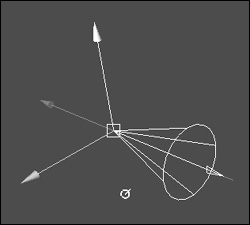
The spotlight now has one manipulator at its base and another in front of the light (Figure 5.23).
Figure 5.23. Two manipulators appear, giving you more precise control over what objects the spotlight is pinpointing and the direction in which the light is aimed. 
| 3. | Select the manipulator at the base of the spotlight (Figure 5.24).
Figure 5.24. Select the manipulator attached to the spotlight to translate the light. 
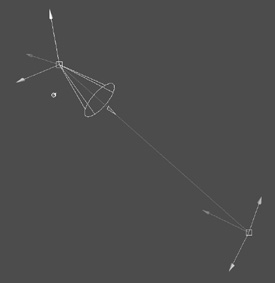
| 4. | Move the manipulator up the Y axis.
The spotlight moves with the manipulator but continues to point at the second manipulator (Figure 5.25).
Figure 5.25. You can move the manipulators separately or together (which you would do when you want to maintain the same relationship between the manipulators). 
| 5. | Select the manipulator in front of the spotlight.
| 6. | Move the manipulator along the Z axis.
The spotlight remains in place but continues to point at the manipulator (Figure 5.26).
Figure 5.26. To place a light directly on an object, you can group one of the show manipulators to it: The spotlight will then always shine on that object. 
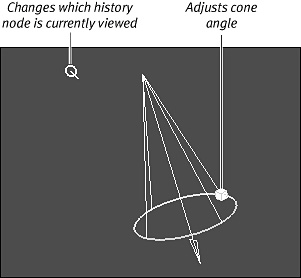
| 7. | Click twice on the light blue ring.
The manipulators change into a ring around the cone of light. Each time you click the ring, it takes you through the cone's History nodes (Figure 5.27).
Figure 5.27. Most objects will display a blue ring from which you can access that object's input nodes. 
| 8. | Click and drag on the square atop the circle that surrounds the cone.
The cone angle will change interactively as you drag the mouse (Figure 5.28).
Figure 5.28. The cone angle controls the width of the light beam. 
|
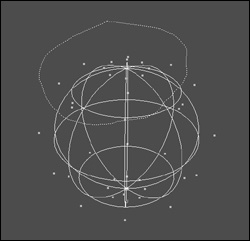
To use the Lasso Selection tool to select a set of components: 1. | Create a primitive NURBS sphere.
| 2. | Press  . .
| 3. | Click the Lasso selection icon  in the toolbar. in the toolbar.
| 4. | Drag in a circle around the CVs you would like to select (Figure 5.29).
Figure 5.29. The Lasso Selection tool will close itself after the mouse is released. 
| 5. | Release the mouse.
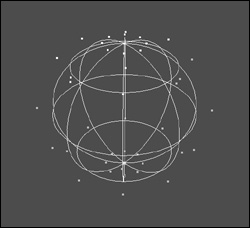
The CVs within the circle become selected (Figure 5.30).
Figure 5.30. The top CVs become selected because they were within the selection circle. 
|
|


 Tip
Tip