The ScrollBar component lets you add horizontal and vertical scroll bars to dynamic and input text boxes. You can display large amounts of text in a movie without having to display it all at once. You have already seen the ScrollBar component in your movies, even though you might not have realized it. It is part of the ListBox, ComboBox, and ScrollPane components .
In this exercise you will add a new symbol to display the details for an animal. The description for each animal is relatively long, so you will add a ScrollBar component to a dynamic text box inside the new symbol. You will also add some more ActionScript to display the details about each animal. Before you start this next exercise, open map3.fla if it isn't still open from the last exercise.
-
Open assets.fla from the Lesson09/Assets folder as a library. Open the map3.fla library (Window > Library), and drag copies of the Detail Clip and Close Clip symbols from the assets.fla library to the map3.fla library.
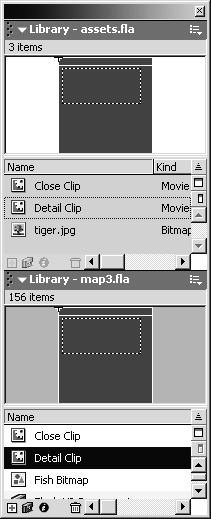
To open a file as a library, choose File > Open as Library, locate the file, and click the Open button. The assets.fla file contains two symbols (Close Clip and Detail Clip) and a bitmap (tiger.jpg). The bitmap is part of a Guide layer inside the Detail Clip movie clip, so it will be added to the map3.fla library when you add the Detail Clip symbol.
You will use the attachMovie method of the MovieClip object to add instances of the Close Clip and Detail Clip symbols to the movie, as you did with the Menu Piece movie clip in Lesson 7. You can check the Linkage settings for these two symbols by right-clicking (Windows) or Control-clicking (Macintosh) the symbol names in the map3.fla library and choosing Linkage. The Identifiers for the Close Clip and Detail Clip symbols are closeClip and detailClip . You should also see that both symbols have the "Export for ActionScript" and "Export in first frame" options selected.
Close the assets.fla library when you're finished. Click the assets.fla library's Options menu control, and choose Close Panel.
-
Open the Detail Clip movie clip in symbol-editing mode.Select the text box in the Text Box layer,and set its Instance Name to t and Variable to description .

NOTE
Make sure you open the Detail Clip symbol from map3.fla, and not from assets.fla.
The Detail Clip movie clip is very simple. It has three layers : Text Box, Image Placeholder, and Background. You can use the skills you've learned to create your own Detail Clip in place of this one, but be sure to read through this entire step before you attempt to do so.
The Text Box layer contains a text box just over 200 pixels wide and almost 95 pixels high. This text box is dynamic and will display white Verdana text. The Line Type is set to Multiline, so any text that exceeds the width of the text box automatically wraps to the next line. The "Render text as HTML" button is selected for this text boxFlash can render some HTML tags in input and dynamic text boxes, and when you click this button, Flash knows it should render text as HTML for a particular text box.
Select the text box in the Text Box layer, and set its Instance Name to t. It's very important that you give this text box an instance name, as the ScrollBar component you're going to add in the next step must know which text-box instance it will work with. Set the Variable for this text box to description .
NOTE
The following HTML tags are supported in Flash: <A>, <B>, <FONT COLOR >, <FONT FACE>, <FONT SIZE >, <I>, <P>, and <U>. Flash also recognizes the following HTML attributes: LEFTMARGIN, RIGHTMARGIN, ALIGN, INDENT, and LEADING.
The Image Placeholder layer is a Guide layer and will not be exported with the Flash movie. In this movie, the Image Placeholder layer simply indicates where the image will appear. This layer is not required if you plan to make your own version of the Detail Clip symbol.
The Background layer contains some vector graphics, which were drawn using Flash's drawing tools. These graphics consist of two rectangles, both of which are surrounded by a white outline. The layer should be locked when you open the symbol, but you can unlock it and modify the graphics to suit your taste.
-
Make sure you have the Text Box layer selected, and drag an instance of the ScrollBar component onto the text box in that layer.
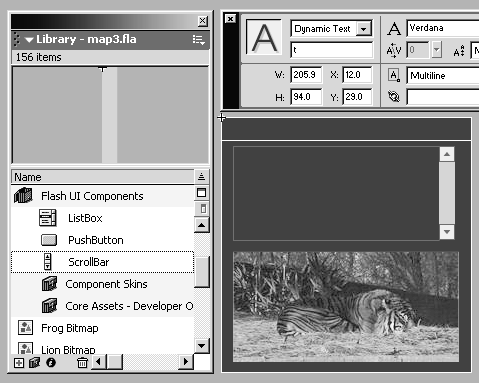
You can drag the instance of the ScrollBar component from the Flash UI Components folder in the map3.fla library. It was automatically added to the movie when you added the instance of the ListBox component earlier in this lesson.
When you drop an instance of the ScrollBar component onto a dynamic text box, the ScrollBar component automatically snaps to the right side of the text box.
-
Select the instance of the ScrollBar component, and look at the Property inspector.

Notice that Flash automatically set the Target TextField parameter for this instance of the ScrollBar component to t . Leave the Horizontal parameter at the default setting of false .
-
Choose Edit > Edit Document. Select frame 1 of the Actions layer, and add the getDetail function:
function getDetail(lb) { } 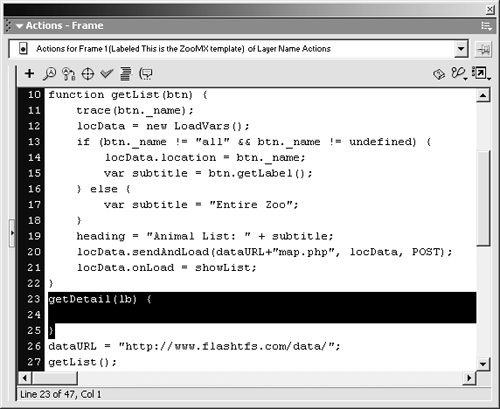
Add this code after the getList function, but before the dataURL variable.
The Change Handler you assigned to the animalList instance of the ListBox component was getDetail . That function will be called any time you select an item in the list box. The lb parameter for the getDetail function is the dot-syntax path of the ListBox component that calls the function. Flash automatically passes this value to the function when it's called. You can add the following ActionScript to the getDetail function to test this out:
trace(lb);
NOTE
Make sure to set the parameter for the getDetail function to lb and not 1b . That should be a lowercase l followed by a lowercase b. It stands for list button.
-
Add the following code to the getDetail function:
var idNum = lb.getSelectedItem().data; _root.attachMovie("detailClip", "detailClip", 1); detailClip._x = 310; detailClip._y = 60; detailClip.description = "<b>"+locData["common"+idNum]+"</b><br>"; detailClip.description += "<i>"+locData["latin"+idNum]+"</i><br><br>"; detailClip.description += locData["description"+idNum]; 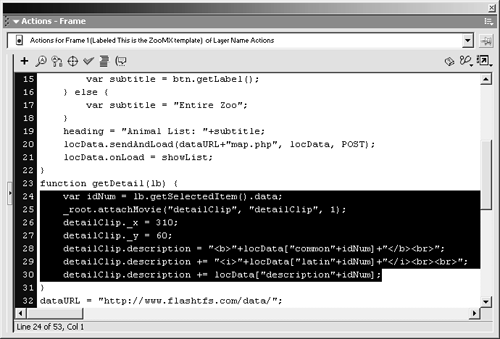
The getDetail function should look like the following:
function getDetail(lb) { var idNum = item.getSelectedItem().data; _root.attachMovie("detailClip", "detailClip", 1); detailClip._x = 310; detailClip._y = 60; detailClip.description = "<b>"+locData["common"+idNum]+"</b><br>"; detailClip.description += "<i>"+locData["latin"+idNum]+"</i><br><br>"; detailClip.description += locData["description"+idNum]; } This code may look complicated at first glance, but it's actually very simple.
The first line sets up a new local variable, named idNum , with a value of item.getSelectedItem().data . As you may recall from the last exercise, every instance of the ListBox component is actually a copy of the built-in FListBox object. The getSelectedItem method of the FListBox object returns the currently selected item from the list as an object, with label and data properties. In this case, you want the value of the data property. If you select the first item in the list, the value for this property will be because when the showList function added all of the items to the list box (using addItem ), it set the data parameter for the first item to (see "Displaying Dynamic Content," step 2):
for (var i=0; i<this.numAnimals; i++) { trace(this["common"+i]); animalList.addItem(this["common"+i], i); } The next line of code attaches a copy of the Detail Clip movie clip to _root , using the attachMovie method. _root is a special property that specifies the main timeline of a movie. The main timeline of the movie can use the methods of the MovieClip object. This code sets the instance name of the attached movie clip to detailClip and gives it a depth of 1. If you don't remember how to use the attachMovie method, refer back to Lesson 7.
NOTE
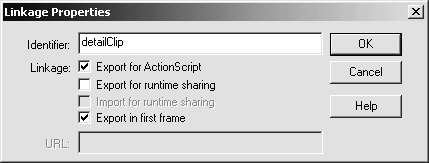
The first parameter of the attachMovieClip object is the Identifier for the movie clip you want to attach. The Identifier for the Detail Clip symbol is detailClip (see figure below). Refer to step 1 of this exercise to see how to check the Identifier value.
After Flash attaches an instance of the Detail Clip symbol, the next two lines of code set its _x and _y properties. The movie-clip instance will be positioned at 310, 60 on the main timeline.
The last three lines of code specify a value for the description variable in the attached detailClip instance:
detailClip.description = "<b>"+locData["common"+idNum]+"</b><br>"; detailClip.description += "<i>"+locData["latin"+idNum]+"</i><br><br>"; detailClip.description += locData["description"+idNum];
First the value of the description variable is set to "<b>"+locData["common"+idNum]+"</b><br>" . This takes the string "<b>" , adds the value of locData["common"+idNum] , and then adds the string "</b><br>" . The value of locData["common"+idNum] is the value of "common"+idNum in the locData object, which contains all the variables you loaded from the map.php file on the server. If you select the first item in the list, you would be selecting the value of the common0 variable in the locData object. The variables starting with common contain the values for the common name of each animal in the list. So this code adds the common name for the selected animal in bold.
Next the value of "<i>"+locData["latin"+idNum]+"</i><br><br>" is added to the value of the description variable. This is done using the addition assignment operator ( += ), which takes the current value of the description variable and adds the value following the operator. The value added is the string "<i>" , plus the value of locData["latin"+idNum] , plus the string "</i><br><br>" . This value adds the Latin name for the selected animal in italics, followed by two <br> tags.
Finally, the value of locData["description"+idNum] is added to the value of the description variable. This adds the description for the selected animal. The descriptions for the animals may be relatively long, which is why you added an instance of the ScrollBar component to the text box with the variable name description .
-
Add this code to the getDetail function:
detailClip.attachMovie("closeClip", "closeClip", 1); detailClip.closeClip._x = 230; detailClip.closeClip._y = 4; detailClip.closeClip.onPress = function () { detailClip.removeMovieClip(); } 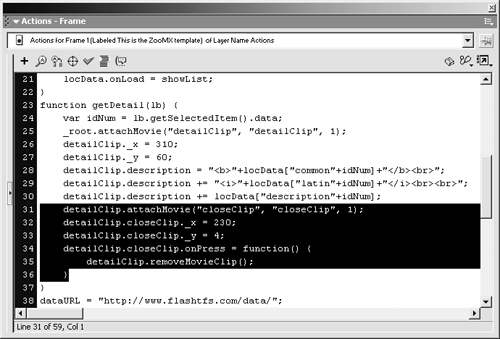
Add this code following the ActionScript already in the getDetail function. The getDetail function should look like this after you've completed this step:
function getDetail(lb) { var idNum = lb.getSelectedItem().data; _root.attachMovie("detailClip", "detailClip", 1); detailClip._x = 310; detailClip._y = 60; detailClip.description = "<b>"+locData["common"+idNum]+"</b><br>"; detailClip.description += "<i>"+locData["latin"+idNum]+"</i><br><br>"; detailClip.description += locData["description"+idNum]; detailClip.attachMovie("closeClip", "closeClip", 1); detailClip.closeClip._x = 230; detailClip.closeClip._y = 4; detailClip.closeClip.onPress = function () { detailClip.removeMovieClip(); } } This code attaches an instance of the Close Clip movie clip inside the detailClip instance you added to the main timeline. It then sets the _x and _y properties for the Close Clip instance, which has an instance name of closeClip , and assigns a function to its onPress event. When the onPress event is triggered, the removeMovieClip method, which is a built-in method of the MovieClip object, removes the detailClip instance. You can only use the removeMovieClip method to remove dynamically attached or duplicated movie-clip instances.
-
Choose Control > Test Movie. Save the movie as map4.fla.
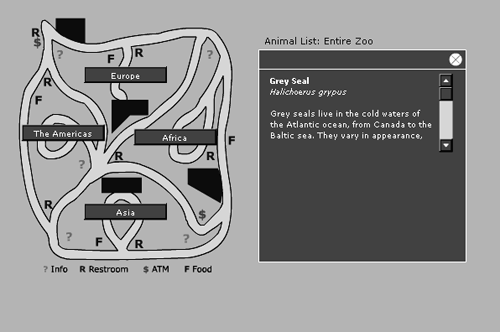
When you click an item in the list box, a window should appear, covering the list box, with the details for the animal you selected. You can close the window by clicking the Close Clip instance in the top-right corner of the window.
Notice the large space at the bottom of the window. You are going to add a dynamically included JPEG image in this space in Lesson 11.
You're almost finished with the map. You might notice that when you select an animal, attaching an instance of the Detail Clip symbol, you can still click other items in the list through the Detail Clip instance. You don't want this to happen, so in the next exercise you'll disable the ListBox component instance when the Detail Clip movie clip is opened.
Close the Test Movie window, and save your file as map4.fla in the FlashTFS folder on your hard drive when you've finished testing.


