| QuickTime Broadcaster (QTB) is included with Mac OS X Server, but exists outside Server Admin as a separate application that resides in the Applications directory. QTB is a live encoder application whose primary job is to capture and compress live audio and or video content to a streaming server via the Real-Time Streaming Protocol (RTSP). The Source options in both the Video and Audio tabs are the main considerations for this type of task. QuickTime Broadcaster was covered briefly in Chapter 2, "Server Tools." To learn how to set up a basic live broadcast, refer to the task "To set up a simple live broadcast" in Chapter 2. This chapter discusses using QuickTime Broadcaster with QTSS. The following task assumes you're running QuickTime Broadcaster and QTSS on the same Mac OS X Server. You should first have completed the earlier task "To enable a QTSS." You should also have a camera, microphone, or some other supported AV input device connected. If iChat launches when you plug in the device, quit iChat. To use QuickTime Broadcaster and QTSS to stream live content 1. | Open QuickTime Broadcaster, which is located in your server's Applications directory (Figure 12.56).
Figure 12.56. Launch QuickTime Broadcaster. 
| 2. | Click Show Details to expand the window.
Live Stream Precautions Rebroadcasting copyrighted content is prohibited by law. Be sure to check with all parties involved prior to streaming any live audio or video. |
| | | 3. | Click the Network tab, and complete the following information (Figure 12.57):
- Leave Transmission set at Automatic Unicast for the type of task being done here.
- Host Name is automatically filled in with either the fully qualified domain name or the IP address of your server.
- File is the name of the Session Description Protocol (SDP) file used to identify the stream. It's a good idea to use only lowercase letters and numbersno spaces or other characters.
- Username and Password can be used to restrict access to the stream.
- Buffer Delay allows for a buildup of data but causes a bigger delay in the delivery of live content.
- Broadcast over TCP permits the stream to travel over the TCP protocol, guaranteeing the stream delivered by QTB arrives at the streaming server.
- Annotations are used to further identify the broadcast stream. At a minimum, enter a title for your stream to clearly identify it to your viewers.
Figure 12.57. Set the Network settings in preparation for the broadcast. 
| 4. | Click the Video tab, and tweak the video input Source details to match the broadcast (Figure 12.58).
Figure 12.58. View and set the Video settings for the broadcast. 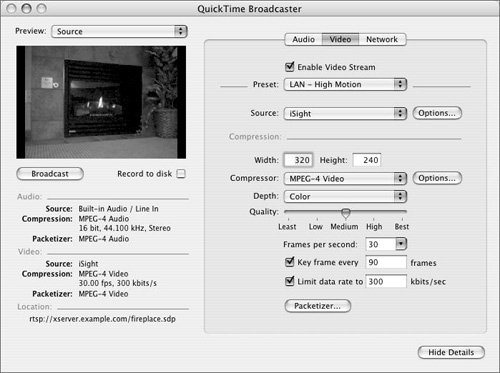
| | | 5. | Click the Audio tab, and tweak the audio input Source details to match the broadcast (Figure 12.59).
Figure 12.59. View and set the Audio settings for the broadcast. 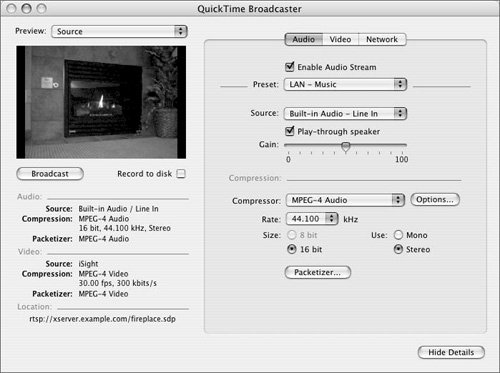
| 6. | Choose File > Save Broadcast Settings in case you wish to use these settings for another broadcast session (Figure 12.60).
Figure 12.60. Save the broadcast settings for later use. 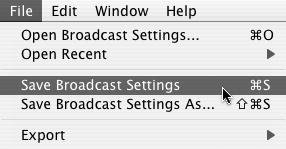
| 7. | If you've finished tweaking the settings, click Hide Details to reduce the size of the window.
| 8. | Click Broadcast under the video feed to begin the broadcast (Figure 12.61).
Figure 12.61. Click the Broadcast button to begin the broadcast. 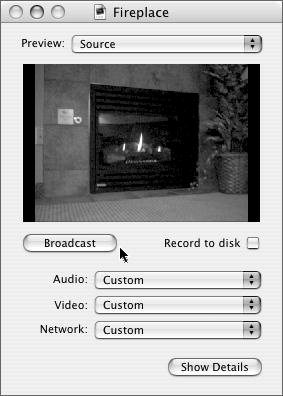
|
 Tip Tip
Prior to beginning the broadcast, you can choose the "Record to disk" check box. When enabled, QTB will (by default) save a hinted copy of the stream on the local hard drive so it can be streamed at a later date. Check the QTB preferences (under Recording) to see where these files are saved.
Viewing your broadcast When your broadcast is set up, you should view it on as many machines as possible over different connection speeds to check for variances in quality. For the following task, QuickTime Broadcaster should already be running on your server and reporting audio, video, and CPU usage stats in its main window. To prepare to view a live broadcast 1. | Locate the stream address in the QuickTime Broadcaster window under Location (Figure 12.62).
Figure 12.62. Locate the link of a running broadcast. 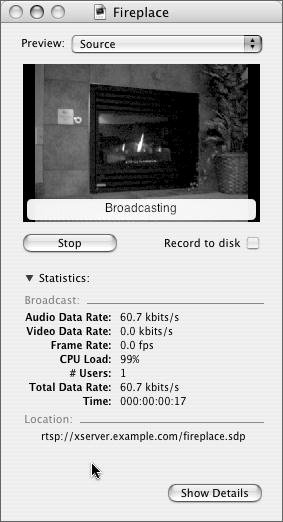
| 2. | Open the QuickTime Player application in the Applications directory on another computer connected to the same network.
| 3. | Select File > Open URL (Figure 12.63).
Figure 12.63. Use QuickTime Player to view the broadcast. 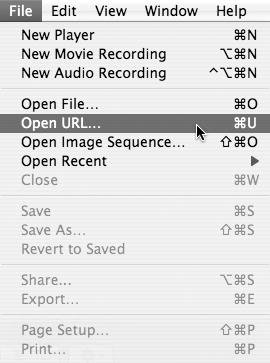
An Open URL dialog appears.
| | | 4. | Type in the stream address from step 1, and click OK (Figure 12.64).
Figure 12.64. Enter the information from the QuickTime Broadcaster Location in the Open URL QuickTime Player dialog. 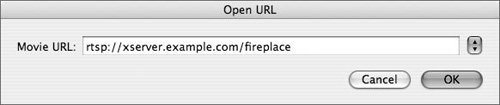
| 5. | View your stream in the QuickTime Player window (Figure 12.65).
Figure 12.65. View your video stream using the QuickTime Player from Mac OS X Client. 
| 6. | Choose Window > Show Movie Info to open the Movie Info window.
Any annotations you added before the broadcast will appear at the top of this window (Figure 12.66).
Figure 12.66. Select Window > Show Movie Info to view the properties entered in the QuickTime Broadcaster Network tab as they appear in the final broadcast. 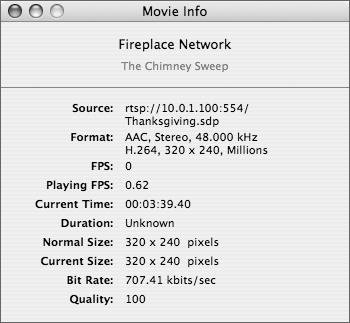
|
Tip The Compression settings for both audio and video can be very complex and require background knowledge about color, video, compression, audio and video codecs, and more. When you're changing these settings, it's generally best to test thoroughly on several machines receiving the stream to ensure a quality broadcast.
|