Establishing a Secure Website Using SSL
| Most of the information on the Web is not sensitive; in fact, accessibility is perhaps the biggest single basis for its incredible popularity. But the Web is also increasingly serving private and sensitive information, including e-commerce, medical records, filing taxes, and Web-based e-mail. In the vast majority of cases, these transactions are encrypted with a protocol called Secure Sockets Layer (SSL). Secure websites rely on certificates to provide two central tenets of their security:
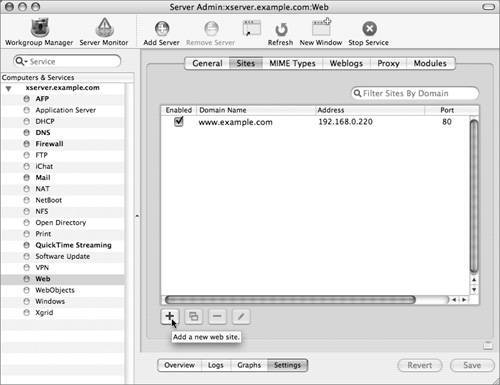
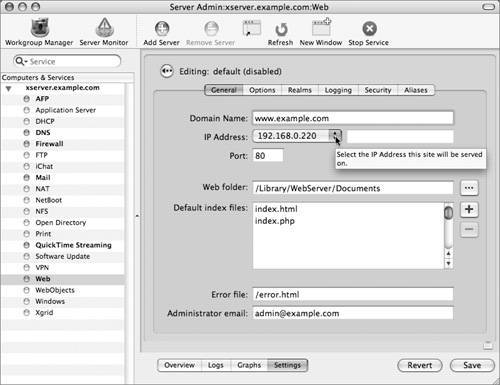
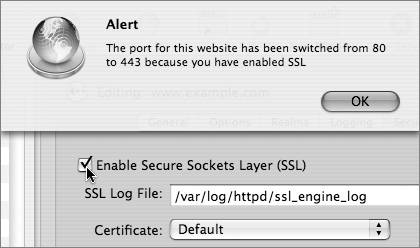
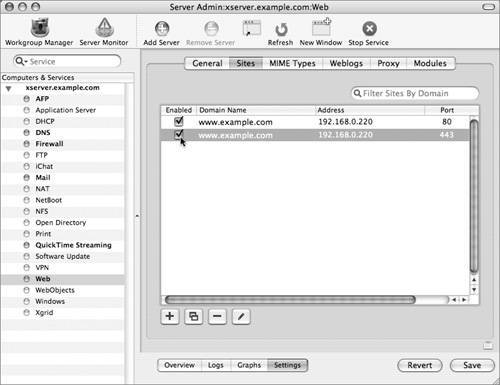
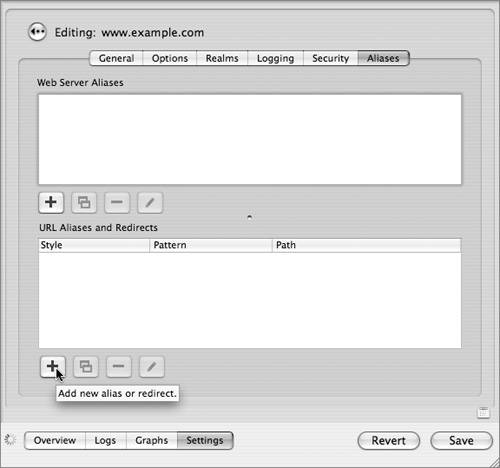
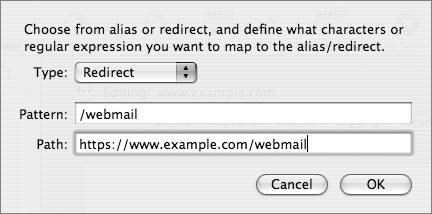
Viewing CertificatesUnencrypted Hypertext Transfer Protocol (HTTP) traffic typically travels over port 80: When you type in an HTTPS URL, you are telling your browser to initiate a secure (SSL) connection to port 443 of the Web server. The browser and server negotiate the strongest cipher they have in common, and then the server sends the browser its X.509 certificate. If the browser can't verify the identity of the secure website, it will display a dialog allowing you to examine the certificate. To view the certificate, click the Show Certificate button. 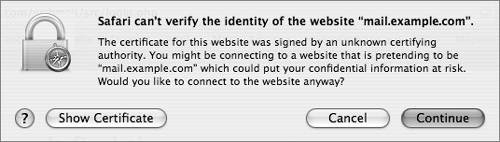 If it is a server you trust (your own, for example), you can select the "Always trust these certificates" checkbox, after which you'll need to authenticate to add the certificate to your keychain. The next time you go to that site, the certificate will be trusted. Your browser then uses the certificate as an encryption key for the secure connection. 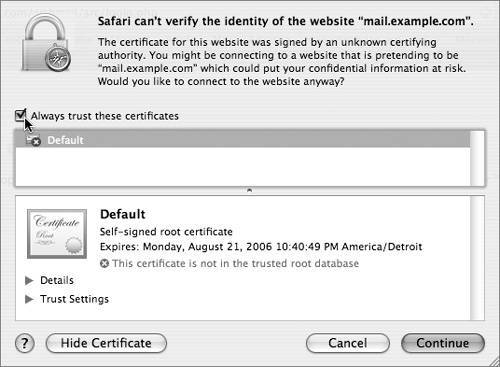 Setting Up a Secure WebsiteThe following steps walk you through setting up a secure Web mail server site. If you'd like to have WebMail running on your server, you must have the IMAP mail server set up and running properly. Basically, there is just a one-checkbox difference between Webserving mail and not!
We've seen in other lessons the usefulness of certificates and encryption, and we put them to use here in our exercise. If you are serving a lot of static pages, the performance cache (step 6) can improve how quickly pages are served by keeping them stored in RAM. With pages that are created dynamically, this can cause problems or incompatibilities, as the content would not all fit into RAM. Therefore, we disabled it in order to use WebMail. Is WebMail really as simple as one checkbox? Well, yes and no. After mail services are deployed in a compatible mode, yes. WebMail simply ties in with the IMAP mail services already running on your server, and gets its user account information from Directory Services, just as the mail services do. The compatible mode is as follows: 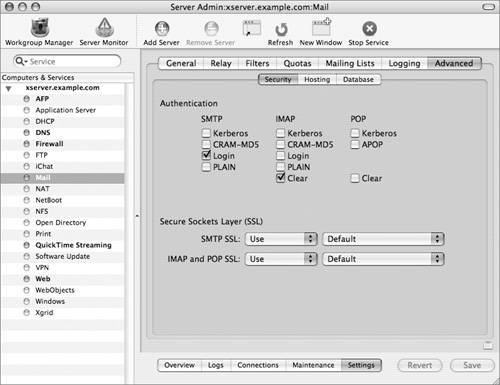 Look in Server Admin > Mail > Settings > Advanced > Security. At the minimum, you must choose the following settings:
WebMail's default configuration uses these settings, and does not use SSL. Because we are serving WebMail from a secure site, all traffic between the browser and the server is encrypted with SSL. You can (and should!) have more secure authentications options selected for your mail client users. For example, you might have Kerberos, CRAM_MDS, and Clear all selected for IMAP authentication methods. The weakness of this is that you are now relying on your users to configure their mail clients securely; with this configuration, nothing is requiring them to use SSL, or preventing them from using Clear authentication. The final requirement for one-click WebMail is that your Web service is running on the same server as your mail service. That way, no unencrypted data is passing between two servers. Note Though it is possible to configure WebMail to use SSL (thereby allowing you to require SSL for mail clients), the PHP implementation on Mac OS X was compiled without the necessary openssl PHP extension. |
EAN: 2147483647
Pages: 258