Building the Movie Sequence


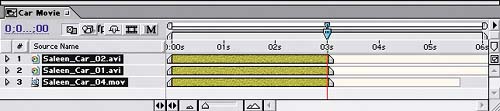
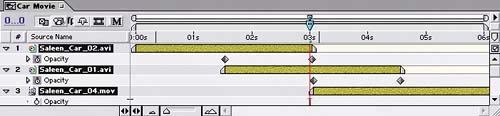
It's finally time to use the movie footage that you imported at the beginning of this project. All you need to do is put the movies in sequence, one after the other, and add transitions to them. You'll use the Sequence Layers command again, but with different options. Follow these steps:

1.

Create a new composition named Car Movie in the Comps folder using the NTSC DV, 720x480 comp preset, with Duration 6;00 seconds.

2.

Add the Saleen_Car_02.avi, Saleen_Car_01.avi, and SaleenCar_04.mov files to the Timeline at time 0;00. Saleen_Car_02 should be layer 1, Saleen_Car_01 should be layer 2, and Saleen_Car_04 should be layer 3.

3.

Go to time 3;00, select all three layers, and press Alt-] (Windows) or Option-] (Mac OS) to trim the layers' Out points to the current time.

Trimming the Out points of the Saleen_Car layers

4.

With the three layers still selected, choose Animation > Keyframe Assistant > Sequence Layers. Use these effect settings:

Overlap: On

Duration: 1;15

Transition: Dissolve Front Layer

Press U on your keyboard to view the Opacity keyframes created by this command.

Viewing the sequenced layers


    Adobe After Effects 6.5 Magic
    Adobe After Effects 6.5 Magic
    ISBN: 0321267230
    EAN: 2147483647
    Year: 2005
    Pages: 236

    flylib.com © 2008-2017.
    If you may any questions please contact us: flylib@qtcs.net