| In this section, you'll create a 3D TV channel number by extruding an Illustrator file's shape from a Solid layer. You'll assign prebuilt surface textures and lighting to the object to quickly create the number's look. To make the number rotate in space, you'll animate a virtual camera instead of the number itself. Note If you don't already have the 3D Invigorator effect installed into After Effects, quit After Effects, and then install a trial version of the effect from the book's DVD.
Follow these steps: 1. | At time 0;00, create a new comp-size Solid layer named 2, using any color.
| 2. | Apply Effect > Zaxwerks > 3D Invigorator to the new solid, checkmark Move Objects to Center in the dialog prompt, and then open the 2.ai file from this chapter's folder on the book's DVD.
The 3D Invigorator effect's properties in the Effect Controls window 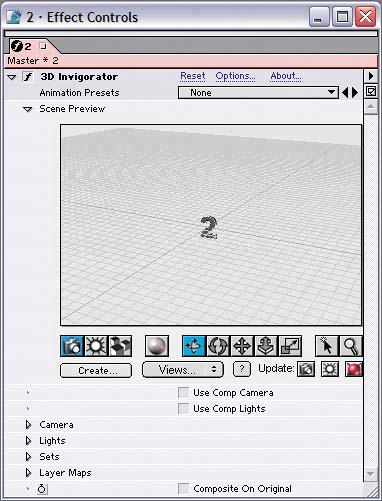
| 3. | To assign a texture to the number, click Options in the upper-right corner of the Effect Controls window. Drag an object style onto the object in the Scene Preview area of the dialog, and click OK.
Applying the object style to the number  | 4. | Expand the triangle next to the effect's Camera group in the Effect Controls window, add a keyframe to every property in the group, and set the camera properties as follows:
Eye X: 300 Eye Y: 500 Eye Z: 500 Target X: 0 Target Y: 0 Target Z: -15 Distance: 907 Tumble Left: 116.29 Tumble Up: 22.21 Roll: 0 Ortho Size: 500
The camera's view with the 2 layer's first set of keyframes 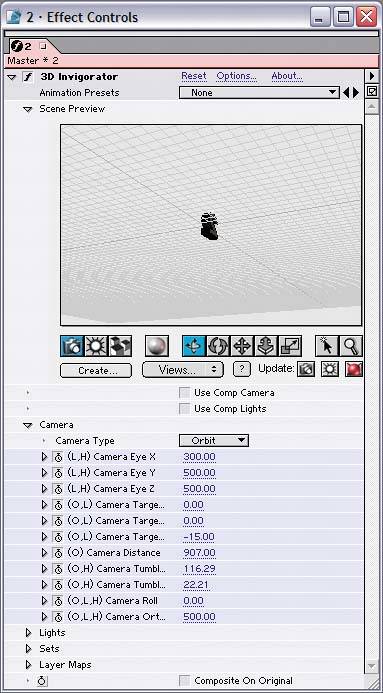
| 5. | Go to time 3;00, and change the effect's camera properties as follows:
Target Z: -10 Distance: 143.73 Tumble Left: -31.54 Tumble Up: 33.27 Ortho Size: 97.67
Animating the camera instead of the object 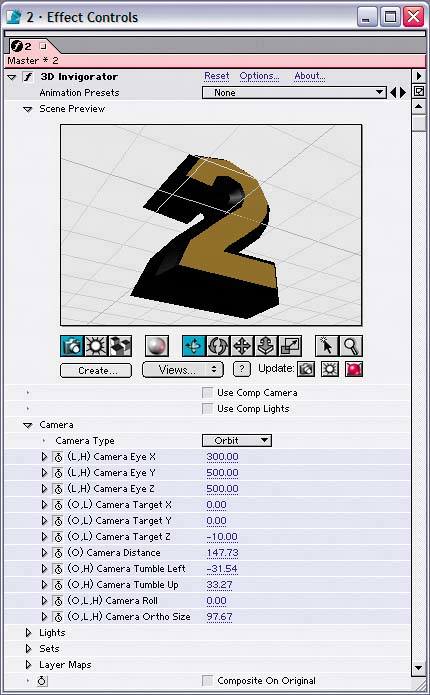
| 6. | To assign a lighting style to the number, click Options in the upperright corner of the Effect Controls window. Click the Light button (next to the Camera button), and then click the Lighting Styles tab in the right panel of the dialog. Drag a lighting style from the list onto the number in the scene preview area of the dialog, and click OK.
| 7. | Apply Effect > Perspective > Drop Shadow to the layer named 2. Set the effect's Distance to 70 and Softness to 50.
Settings for the drop shadow 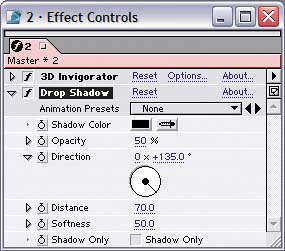
|
Save your project, and then preview your results. The number 2 should initially appear small and with its back to the viewer and then slowly rotate counter-clockwise as it moves closer to the viewer. |