Specifying Send Options
| When you create any type of messagefrom mail messages to tasksyou can specify a number of different send options (in other words, options that affect the way GroupWise sends the message). These options fall into three categories: General, Status Tracking, and Security. To apply one of the send options to a message you are creating, follow these steps:
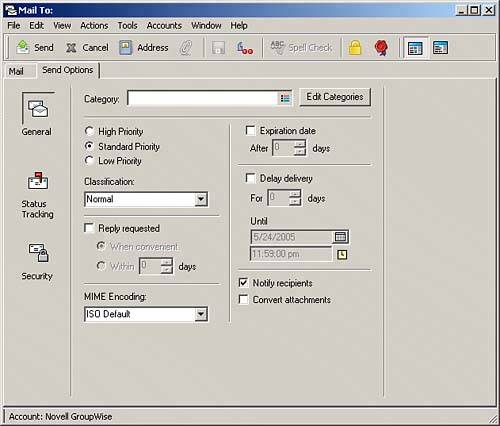
This message is sent with the options you selected. General Send OptionsGeneral options, shown in Figure 8.8, allow you to configure your outgoing messages, such as requesting a reply to a message within four days. NOTE You can set any of these send options as the default. Setting defaults is covered in Chapter 11. Table 8.3 lists the general send options (asterisks denote the default options). These options enable you to configure your outgoing messages.
Status Tracking OptionsThe status tracking options, shown in Figure 8.9, allow you to select the amount of information you want made available to you as the sender of a message, such as tracking all information versus just the delivery date and time of the message. Figure 8.9. The Status Tracking page allows you to control your message delivery.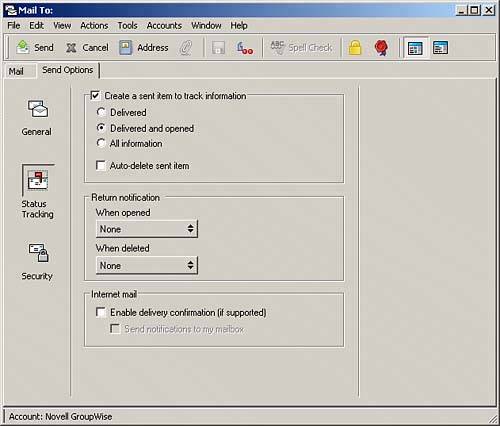 Table 8.4 summarizes the Status Tracking options (asterisks denote default options).
Security OptionsThe Security page relates to the security aspects of the messages you send, as shown in Figure 8.10. Figure 8.10. The Security page enables you to add security to your message.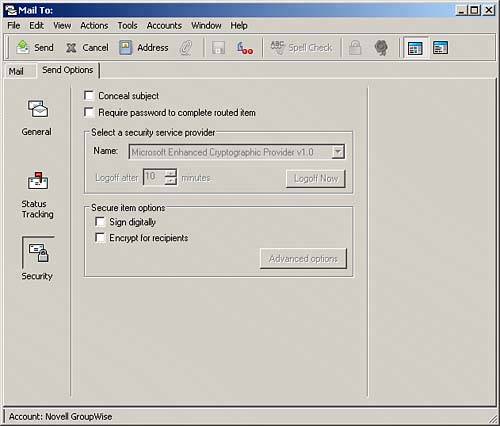 The Conceal Subject security option hides the message subject when viewing the mailbox. The subject is visible only when the recipient opens the message. The Require Password to Complete Routed Item option causes each recipient of a routed item to enter his or her GroupWise password after marking a routed item "Completed." The message is not forwarded to the next recipient unless the password is entered correctly. TIP You may turn a mail message into a routing slip that allows you to create a chain of recipients. The message is delivered to each recipient in the order that his or her name is entered in the Route field. (You can drag and drop names to change the route order also.) To turn a message into a routing slip, from the standard email compose window, choose Actions, Routing Slip. Enter the recipient names in the Route field in the desired order. The Select a Security Service Provider option is available only if you have installed a supported security provider. If this option is not available, either you have not installed a security provider or your security provider does not support the options. GroupWise works with security software available from third-party companies. The following security products are supported:
Contact your administrator to determine whether you have these products available to your GroupWise system. You can add security to the items you send by using digital signatures or encryption. The Sign Digitally option enables you to add a digital signature to your email message. When you add a digital signature to your message, recipients of the message who have an S/MIME-enabled email system can verify that the item actually originated from you. The Encrypt for Recipients option allows you to digitally encrypt the message. This assures you that only recipients who have an S/MIME-enabled email system will be able to read the contents of the message. You use your security certificate (explained later) to digitally sign your messages. You use other users' public security certificates to verify digitally signed items that you receive from them. Security CertificatesA security certificate is a file that uniquely identifies a specific individual or organization. You must obtain a security certificate before you can send security items. If you are using a Microsoft security provider, you can use your web browser to obtain a security certificate from an independent certificate authority. If you are using Entrust as your security provider, you must use an Entrust certificate. You manage your certificates by choosing Tools, Options, Certificates. We provide a more in-depth discussion of security certificates in Chapter 11. Refer to that chapter for the default security options you can set for your GroupWise client. NOTE Novell provides a list of certificate authorities you can use with GroupWise at www.novell.com/groupwise/certified.html. Marking Items PrivateSometimes you may want to store information in your mailbox that is private and you don't want your closest Proxy associates to see. You can add an extra measure of control on any item in your mailboxemail messages, appointments, tasks, notes, or any other messageby marking the item "Private." Marking an item Private does not change the way GroupWise handles the message, but it does place a lock on the item. You should mark items Private when you have granted others access to your mailbox. Unless you grant them the right to read items marked Private, any item you mark as Private will be invisible to them. To mark an item Private when composing the message, choose Actions, Mark Private, or you can simply press F8. To mark a received item Private, press F8 when the item is highlighted. NOTE If the item being marked Private is a calendar item, a padlock icon appears next to the item. If it is any other kind of item, no indication is given that the item is private, except for a check mark next to the Mark Private option under the Actions menu. To remove the Private setting, highlight the item and choose Actions, Mark Private. This action removes the check mark. |
EAN: 2147483647
Pages: 213