10.1 JavaScript and the Browser Object Model
| JavaScript programs are associated with a browser window and the document displayed in the window. The window is a browser object and the document is an HTML object. In the browser object model, sometimes called BOM, the window is at the top of the tree, and below it are objects: window, navigator, frames [], document, history, location , and screen . See Figure 10.1. Figure 10.1. The hierarchy of the browser object model. If you are writing a JavaScript program that needs to manipulate the window, then you would use the window object and properties and methods associated with it. For example, the status property of the window object is used when you want to display text in the status bar, and the window's alert method allows you to send a message to a dialog box. The document object model refers to the HTML document and all the elements and attributes associated with it. Since your Web page is so closely linked to HTML (or XML), JavaScript uses the document object model, also called DOM, to access the HTML elements and attributes within a page. The document is the root of this model. Each HTML element is assigned to an object: there are image objects, form objects, link objects, and so on (see Figure 10.2). (See Chapter 11, "The Document Objects," for more on document objects and the document object model.) Figure 10.2. The hierarchy of the document object model. By combining the browser and document object models, JavaScript allows you to manipulate all of the elements in a page as objects, from the window down the hierarchy, as shown in Figure 10.3. Figure 10.3. The browser and document object models combined (only a partial diagram). 10.1.1 Working with the navigator ObjectThe navigator object contains properties and methods that describe the browser. Netscape Navigator and Internet Explorer support the navigator object, but some browsers do not. The navigator object can be used for platform-specific checking to determine the version of the browser being used, whether Java is enabled, what plug-ins are available, and so on. Table 10.1 lists the properties that describe the navigator object. Table 10.1. Properties of the navigator object.
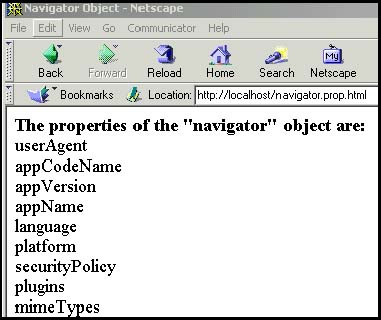
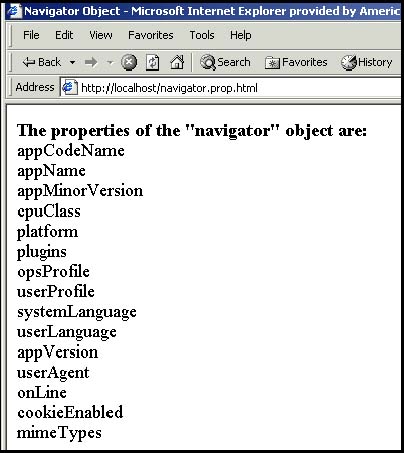
Example 10.1 <html> <head><title>Navigator Object</title></head> <body> 1 <script language="JavaScript"> document.write("<font size=+1><b>\ The properties of the \"navigator\" object are:</b><br>"); 2 for(var property in navigator) { 3 document.write( property + "<br>"); } </script> </body> </html> EXPLANATION
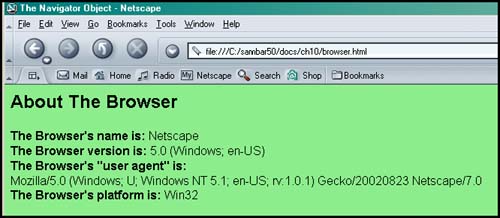
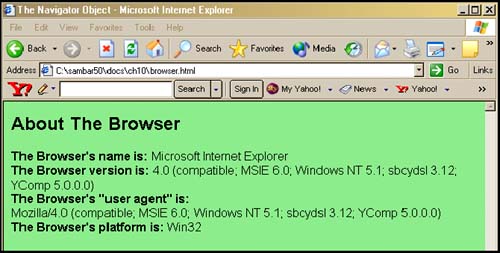
What Is Your Browser's Name? Version Number?Browsers support different features, properties, and methods; for example, Internet Explorer may display a page in a slightly different form than Netscape Navigator, one version of Netscape might support a feature not supported by an older version, a version of IE might not support a feature supported by Netscape, and so on. Then if you take into consideration all the other browsers and their unique features, it can be tricky to please all of the browsers all of the time or even some of the browsers all of the time. Browser detection allows you to check for specific browser names , versions, whether cookies are enabled, what types of plug-ins are loaded, and so on. The navigator object contains a number of properties that allow you to detect information about the user's browser so you can customize your Web page in a way that is transparent to the user. What Is a Browser Sniffer?A browser sniffer is a program that makes browser detection easy. Many Web sites provide free browser sniffers that determine the types of different browsers. If you want to know more about your browser, go to http://www.perlscriptsjavascripts.com/js/browser_sniffer.html. Example 10.2<html><head> <title>The Navigator Object</title></head> <body> <h2>About The Browser</h2> <script language="JavaScript"> 1 var BrowserName= navigator.appName; 2 var BrowserVersion = navigator.appVersion ; 3 var BrowserAgent= navigator.userAgent ; var platform=navigator.platform; document.write("<font size='+1'>"); 4 document.write("<b>The Browser's name is:</b> " + BrowserName + "<br>"); 5 document.write("<b>The Browser version is:</b> " + BrowserVersion + "<br>"); 6 document.write("<b>The Browser's \"user agent\" is:</b> " + BrowserAgent + "<br>"); 7 document.write("<b>The Browser's platform is:</b> " + platform + "<br>"); document.write("</font>"); </script> </body> </html> EXPLANATION
Detecting Plug-InsPlug-ins are special software programs that can be downloaded to add the ability to listen to audio, watch videos and movie clips, display animation, and create special image viewing files. Some examples of plug-ins are Macromedia Shockwave or Flash player, Adobe Acrobat Reader, and RealNetworks RealPlayer. Plug-ins can be platform dependent and their MIME types may vary as well. If you are using Netscape, go to the Help menu and select About Plug-ins to get more information about the plug-ins supported on your client. The plugins[] array of the navigator object (starting with Navigator 3) contains a complete list of installed plug-ins and can be numerically indexed to see all plug-ins installed for this browser, specifically Netscape. Each element of the plugins[] array represents a plugin object. The properties of the plugin object are shown in Table 10.2. When you use the HTML <embed> tag in a document, you are creating a plugin object. Each instance of the <embed> tag creates another object. See "The embeds Object" on page 346 in Chapter 11, and the discussion on page 210 of the <object> tag for embedding objects. Table 10.2. Properties of the plugin object.
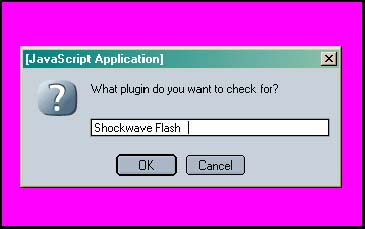
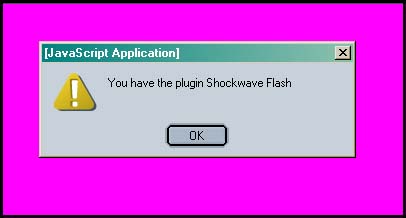
Example 10.3<html><head><title>Plugin Detection</title></head> <script language="JavaScript"> 1 function pluginDetector(type) { 2 if (navigator.plugins[type]){ return true; } else{ return false; } } <body bgcolor="magenta"> <font face="verdana"> <script language="JavaScript"> 3 var plugin = prompt("What plugin do you want to check for?",""); 4 if (pluginDetector(plugin)){ // Does the browser // support plug-ins? alert("You have the plugin "+ plugin); } else{ alert("Don't have the plugin"); } </script> </body></html> EXPLANATION
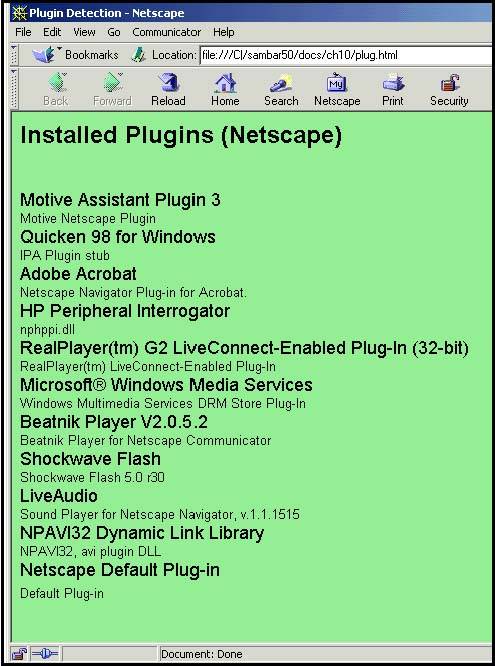
Example 10.4<html><head><title>Plugin Detection</title> </head><body bgcolor="lightgreen"> <font face="arial" size="+1"> <h2>Installed Plugins (Netscape)</h2> <script language="JavaScript"> 1 for ( var i = 0;i < navigator.plugins.length ; i++){ 2 document.write ("<br>"+ navigator.plugins[i].name +"<br>"); 3 if( navigator.plugins[i].description ){ document.write ("<font size='-1'>"+ 4 navigator.plugins[i].description + "<font size='+1'<br>"); } } </script> </body></html> EXPLANATION
What Is ActiveX?Athough IE 4 defines the plugins[] array, it is always empty because Internet Explorer for Windows versions 5.5 SP2 and 6.0 no longer support Netscape-style plug-ins. Instead of plug-ins, Microsoft has something called ActiveX controls. IE for Windows uses ActiveX controls instead of Netscape plug-ins or Java applets. ActiveX controls are used as a means to embed objects or components into a Web page. Online spreadsheets, word processors, patches, and timers are examples of such components. The plug-ins we describe here are ActiveX controls and can be downloaded from vendor sites on the Internet. You can add ActiveX controls to your Web pages by using the standard HTML <object> tag. The <object> tag takes a set of parameters that specify which data the control should use and define its appearance and behavior. Example 10.5<html><head>A Sample of ActiveX Control <title>ActiveX Example</title></head> <body> 1 <object id="realaudio1" width=0 height=0 2 classid="clsid:CFCDAA03-8BE4-11CF-B84B-0020AFBBCCFA"> 3 <param name="_ExtentX" value="0"> <param name="_ExtentY" value="0"> <param name="AUTOSTART" value="0"> <param name="NOLABELS" value="0"> 4 </object> </body> EXPLANATION
What Are MIME Types?MIME stands for Multi-purpose Internet mail extensions. [1] It is a standard format for sending mail messages across the Internet. Now it is used to exchange all kinds of file types across the Internet, such as audio, video, and image files. All browsers have a list of MIME types. JavaScript 1.1 implemented the mimeType object (see Table 10.3). These objects are predefined JavaScript objects that allow you to access the mimeTypes[] array, a property of both the navigator object and the plugin object. (Note: The mimeTypes[] array will not produce output in IE.)
audio/x-pn-realaudio-plugin is an example of a MIME type for RealPlayer G2 LiveConnect-Enabled Plug-In. Table 10.3. Properties of the mimeType object.
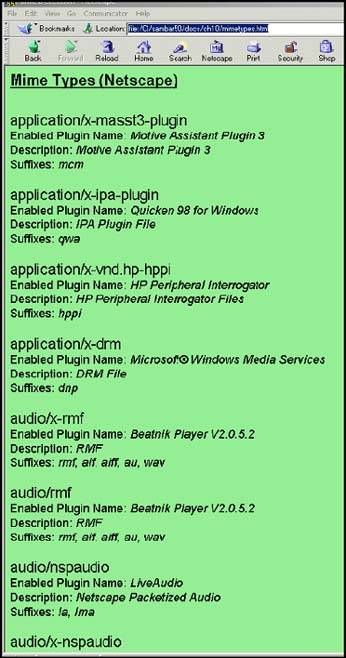
Example 10.6<html> <head><title>Mime Detection</title> </head><body bgcolor="lightgreen"> <font face="arial"> <h2><u>Mime Types (Netscape)</u></h2> <b> <script language="JavaScript"> for ( var i=0;i < navigator.mimeTypes.length ; i++){ 1 if( navigator.mimeTypes[i].enabledPlugin != null ){ document.write ("<br></em><font size='+2'>"+ 2 navigator.mimeTypes[i].type +"<br>"); document.write("<font size='+1'> Enabled Plugin Name: <em>"+ 3 navigator.mimeTypes[i].enabledPlugin.name +"<br>"); document.write("</em>Description: "+ "<em>"+ 4 navigator.mimeTypes[i].description + "<br></em>Suffixes: "+ "<em>"+ 5 navigator.mimeTypes[i].suffixes +"<br>"); } } </script> </body></html> EXPLANATION
10.1.2 Working with the window ObjectThe window object is where all the action happens in a browser. It's at the top of the JavaScript hierarchy, and is automatically defined for each window that you open, as represented in Figure 10.12. When you start up your browser, you may stay in the current window until you exit the browser, or you may have any number of windows open at the same time. Within each window you browse the Internet, read e-mail, search for cheap airline tickets, and buy a new book. Each new page you bring up is a document within the current window. The window is often partitioned into independent display areas, called frames, which are windows within windows. (Frames are discussed in "Working with Frames" on page 231.) Figure 10.12. Any number of windows, each with assorted objects. The window object comes with a number of properties and methods. Since it is the basis of all objects, the name of the window object can be excluded when applying methods to it; for example, it is not necessary to specify window.alert("Watch out!") or window.document.write("OK") . You simply use alert("Watch out!") or document.write("OK") . When a user clicks on a button or rolls the mouse over a link, an event occurs which often effects the behavior of a window. Such user-intiated events are discussed in Chapter 12, " Handling Events." The window Object's Properties and MethodsThe window object has a number of properties, which are also objects in their own right. Table 10.4 lists those properties and how they describe the attributes of the window. Table 10.4. Properties of the window object.
The window object also has a number of methods that define its behavior, such as how to open, close, scroll, and clear a window. They are listed in Table 10.5. Table 10.5. Methods of the window object.
Opening and Closing Windows You can open a new browser window by going to the File menu and selecting New FORMAT var window_object = window.open("url", windowname, [options]); Example: var winObj= window.open("http://localhost/windows/winter.jpg", "winter","width=1150,height=350,resizable=yes,scrollbars=yes, location=yes"); Example 10.7<html> <head><title>Opening a New Window</title> <script language="JavaScript"> 1 function newWindow(){ 2 var winObj=open("winter.jpg", "winter"); } </script> </head> <body bgColor="lightblue"> <h2>Winter Scene from the Old Country</h2> <h3>Click here to see through my winter window<br> 3 <a href="javascript:newWindow()">Winter Scene</a></h3> </body> </html> EXPLANATION
The window object's open() method has a number of options that allow you to further customize the new window. They are listed in Table 10.6. Table 10.6. The open() method and its options.
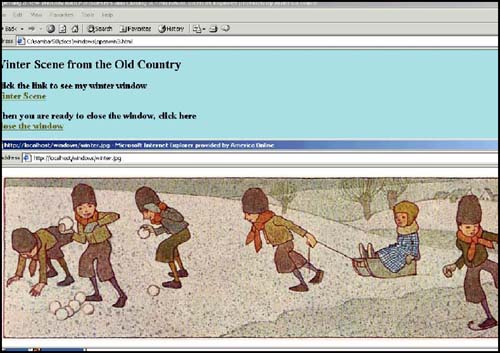
Example 10.8 <html> <head><title>Opening a New Window with Parameters and Closing It</title> <script language="JavaScript"> 1 function newWindow(){ 2 winObj=window.open("http://localhost/windows/winter.jpg", "winter","width=1150,height=350,resizable=yes, scrollbars=yes,location=yes"); 3 winObj.focus(); 4 //winObj.blur(); } 5 function closeWindow(){ 6 winObj.close(); } </script> </head> <body bgColor="lightblue"> <h2>Winter Scene from the Old Country</h2> <h3>Click the link to see my winter window<br> 7 <a href="javascript:newWindow()">Winter Scene</a> <p>When you are ready to close the window, click here<br> 8 <a href="javascript:closeWindow()">Close the window</a></h3> </body></html> EXPLANATION
Moving and Resizing a WindowJavaScript provides several methods with which to resize and move a window object. The window can be moved or resized absolutely , or relative to its current position or size. The numbers , given as arguments, are the pixel coordinates. They are listed in Table 10.7. Table 10.7. Move and resize methods.
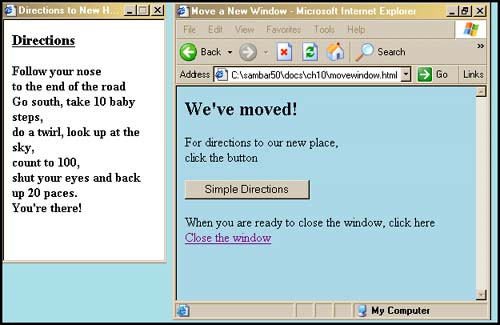
Example 10.9 <html> <head><title>Move a New Window</title> <script language="JavaScript"> function directions(){ 1 winObj=window.open("myplace.html","myplace", "width=200,height=300, resizable=no"); 2 winObj.moveTo(0, 0); // Move window to top left-hand corner 3 winObj.focus(); 4 parent.window.moveTo(215, 0); // Move the parent window 5 parent.window.resizeTo(400,400); // Resize browser window } function closeWindow(){ winObj.close(); } </script> </head> <body bgColor="lightblue"> <h2>We've moved!</h2> For directions to our new place, <br> click the button 6 <form > <input type="button" value="Simple Directions" 7 onClick="directions();"> <p>When you are ready to close the window, click here<br> <a href="javascript:closeWindow()">Close the window</a></h3> </body> </html> EXPLANATION
Creating Timed EventsThe window object provides a method that acts like an alarm clock so that you can time when you want certain things to happen in your program. The setTimeout() method evaluates an expression after a specified amount of time. The setTimeout() method has two arguments: a quoted expression, and the time in milliseconds to delay execution of the expression. (A minute contains 60,000 milliseconds, so 30 seconds would be 30,000 milliseconds.) Since JavaScript sees time in terms of milliseconds, Table 10.8 gives you a little conversion table to help determine the time in milliseconds. Table 10.8. Basic units of time.
If a function contains a setTimeout() method that in short intervals keeps invoking the function, the result can give the effect of continuous motion such a scrolling panorama or message, or even animation. [2] Often, timers are used to scroll messages in the title or status bars repeatedly. You must decide what is tasteful on your Web page and what is annoying, but that aside, we use setTimeout() and clearTimeout() methods for scheduling something to happen in the future.
As of JavaScript 1.2, the setInterval() and clearInterval() methods were introduced for automatically rescheduling the execution of code at defined intervals. The setTimeout() method is a window method. It takes two parameters:
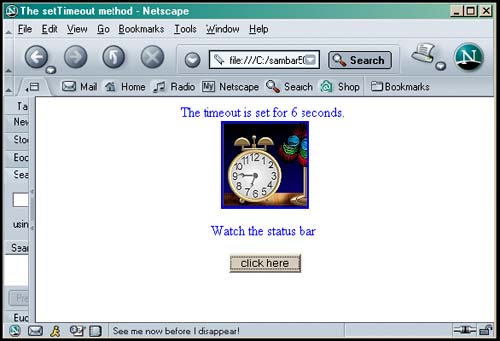
FORMAT var timeout = setTimeout("expression", delaytime); var timeout= setInterval("expression", intervaltime); Example: var timeout = setTimeout("timer()", 15000); // In 15 seconds call the // function "timer()" var timerId = setInterval("scroller()", 500); // In .05 seconds call // "scroller()" To clear the timed event use the clearTimeout() or clearInterval() methods: clearTimeout(timeout); clearInterval(timerID); Example 10.10<head><title>The setTimeout method</title> <script language="JavaScript"> 1 function changeStatusBar(){ 2 window.status = "See me now before I disappear!"; 3 timeout =setTimeout("window.status=''", 6000); // alert(timeout); This value differs in Netscape and IE } </script> <body> <center> <font face=arial size=3 color=blue> The timeout is set for 6 seconds. <br> 4 <img src="alarm.jpg" border=2> <p> Watch the status bar <br> 5 <form> <input type="button" value="click here" 6 onClick="changeStatusBar();" > </form> </center> </body> </html> EXPLANATION
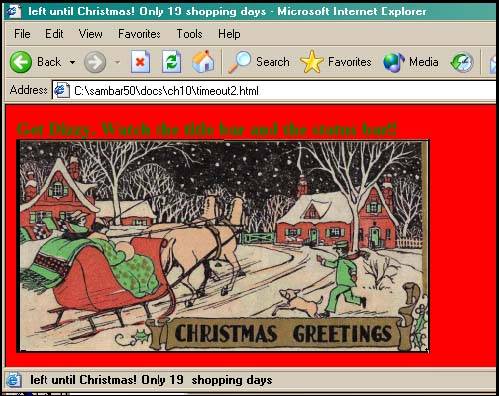
Example 10.11 <html> <!-- This script is a modification of a free script found at the JavaScript source. Author: Asif Nasir (Asifnasir@yahoo.com) --> <head> <script language="JavaScript"> 1 var today = new Date(); 2 var future = new Date("December 25, 2003"); 3 var diff = future.getTime() - today.getTime(); // Number of milliseconds 4 var days =Math.floor(diff / (1000 * 60 * 60 * 24 )); // Convert to days 5 var str= "Only " + days + " shopping days left until Christmas!"; 6 function scroller() { 7 str = str.substring(1, str.length) + str.substring(0,1); 8 document.title=str; 9 window.status=str; 10 setTimeout("scroller()", 300); // Set the timer } </script> </head> <body onLoad = "scroller()"> <b> <font color=green size=4> Get Dizzy. Watch the title bar and the status bar!! <br> 11 <image src="christmasscene.bmp"> </body> </html> EXPLANATION
Example 10.12 <html><head><title><Timeout></title> <script language="JavaScript"> 1 var today = new Date(); 2 var future = new Date("December 25, 2003"); 3 var diff = future.getTime() - today.getTime(); // Number of milliseconds var days =Math.floor(diff / (1000 * 60 * 60 * 24 )); // Convert to days var str= "Only " + days + " shopping days left until Christmas! "; 4 function startup(){ 5 setInterval("scroller()",500); } 6 function scroller(){ str = str.substring(1, str.length) + str.substring(0,1); document.title=str; window.status=str; } </script> </head> 7 < body onLoad = "startup()" bgColor=red > <b><font color=green size=4> Get Dizzy. Watch the title bar and the status bar!! <br> <image src="christmasscene.bmp"> </body> </html> EXPLANATION
ScrollingScrolling allows you to move to a particular place in text or an image. If you open up another window, you may want to scroll to a particular place in the window based on the user's selection from a menu in the main window, or you may want to use scrolling to produce an animated effect. For example, if you have a large image that can't be seen in the new window, you can set up scrolling so that you start at the left-hand side of the image and slowly move to the right-hand side and back again, giving a panoramic effect. Scrolling may have different behavior on different browsers. [3]
The scrollTo() method takes two arguments, the horizontal and vertical coordinates in pixels to represent the window position, where 0,0 would scroll to the left-hand top corner of the window, and position 0,350 would scroll down 350 pixels from the starting position, and 350,0 would scroll to the right 350 pixels from the starting position, and so on. FORMAT window_object.scrollTo(horizontal_pixel_position,vertical_pixel_position); Example: parent.window.scrollTo(0,350); Example 10.13 <html> <head><title>Scrolling through Autumn</title> <script language="JavaScript"> 1 winObj=window.open("fallscene.gif","mysscene", "width=350,height=292,resizable=no"); // Create the new window // with an image. 2 winObj.moveTo(0, 0); 3 winObj.focus(); 4 var pixelpos=0; 5 var ImgWidth=1096; 6 var pixelstep = 2; 7 var timeout; 8 function startScroll(){ 9 if (pixelpos <= (ImgWidth - 350)){ // Check that scrolling is still within the // boundaries of the window. 10 pixelpos += pixelstep; 11 winObj.scrollTo(pixelpos,0); // Go to that position in // the new window 12 timeout=setTimeout("startScroll()",20); } } 13 function scrollAgain(){ pixelpos = 0; // Reset the horizontal pixel position to 0 14 startScroll(); // Start scrolling again } function stopHere(){ 15 clearTimeout(timeout); // Stop the clock to stop scrolling } function closeWindow(){ 16 winObj.close(); } </script> </head> <body bgColor="lightgreen"> <font face="arial" size=4 > <b><br><center> A Window into an Autumn Day <form> 17 <input type="button" value="Start scrolling" onClick="startScroll();"> <input type="button" value="Stop scrolling" onClick="stopHere();"> <input type="button" value="Start over" onClick="scrollAgain();"> </form> <font size=-1> <p>When you are ready to close the window, click here<br> 18 <a href="javascript:closeWindow()">Close the window</a></h3> </body> </html> EXPLANATION
10.1.3 Working with FramesWhen you look out the window from the room where you might be at the moment, it may be one big pane of glass like a picture window, or the window may be divided up into panes of squares or rectangles, as shown in Figure 10.20. Figure 10.20. Windows can have many frames. The browser is a virtual window that can be divided up into frames ”independent windows, like panes, within the main window, where each frame is used to display different information. Frames were invented by Netscape. [4] Web designers have debated the merit of using frames because they are often misused and have some distinct disadvantages discussed later in this chapter.
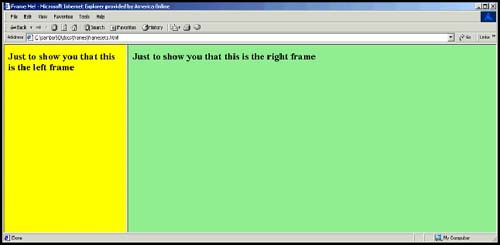
The file that defines the layout of the frames is called the parent window, and each of the frames it describes is called a child (see Figure 10.21). Although you can't see the parent window, it will show up in the browser's source for the page. Figure 10.21. The parent window is divided into child frames. To build frames in a Web page, you use the HTML <frameset> tags instead of the <body> tags (see Table 10.9). At least three files are needed to create frames. The first file defines the layout of the frames (or subwindows) by defining the size and position of the frames. The rows and cols attributes of each frameset specify how much room the frame will need within the window. These values use exact pixels as a default, although you can also use percentages to represent a section of the window, or an asterisk * to allocate leftover space. (These size values will be shown in Examples 10.14 and 10.15.) Creating HTML FramesIn Example 10.14 the window is divided into two frames: a left-hand frame that takes up 25 percent (in columns) of the window and a right-hand frame that takes up 75 percent (in columns ) of the rest of the window. Since files are required to accomplish this, the main file defines the frameset, the second file contains the HTML code for the left-hand frame, and the third file contains the HTML code for the right-hand frame. Table 10.9. HTML frame tags.
Example 10.14<html> <head><title>Frame Me!</title></head> <!-- Creating the framesets for two files --> <!-- This file is named: framesets.html --> 1 <frameset cols="25%,75%"> 2 <frame src="leftframe.html" > 3 <frame src="rightframe.html" > 4 </frameset> </html> ---------------------------------------------------------------------- <html> <head><title>Left Frame</title></head> <!- - This file is named: leftframe.html --> 5 <body bgColor="yellow"> <h2> 6 Just to show you that this is the left frame </h2> </body> </html> ---------------------------------------------------------------------- <html> <head><title>Right Frame</title></head> 7 <!- - This file is named: rightframe.html --> 8 <body bgColor="lightgreen"> <h2> Just to show you that this is the right frame </h2> </body> </html> EXPLANATION
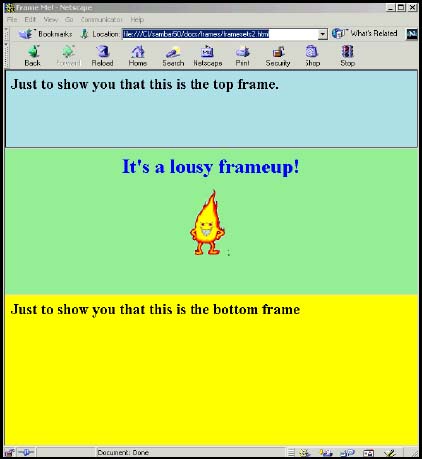
The next example shows a window partitioned into three horizontal frames. Example 10.15<html> <head><title>Frame Me!</title></head> <!-- This file simply defines the frames; it points to other HTML files (not shown) that comprise the HTML content --> 1 <frameset rows="130,*,*" frameborder="yes" border="1" framespacing="0"> 2 <frame src="topframe.html" > 3 <frame src="main.html" scrolling="no"> <!--main.html is the middle frame --> <frame src="bottomframe.html" > 4 </frameset> </html> EXPLANATION
Figure 10.23. Three horizontal frames created in Example 10.15. The frame ObjectHTML frames in JavaScript are represented as an array of frame objects. The frames[] array is a property of the window object and is referenced with the window's parent property. Each element of the array represents a frame in the order in which it appears in the document; thus, window.parent.frames[0] would reference the first frame defined in a frameset (see Figure 10.24). If you name the frame, then you can reference the frame element by its name. If the frame is named leftframe , it can be referenced as window.parent.leftframe. Figure 10.24. The JavaScript hierarchy. Since frames are just little windows, they share many of the same properties and methods of the window object. See Table 10.10 for a list of properties and Table 10.11 for a list of methods. Table 10.10. Properties of the frame object.
Table 10.11. Methods of the frame object.
Creating Menus and Navigation BarsSince frames can be used to divide a page, it is common to use one of the frames as a menu of items and the other as the main page where a page is loaded depending on the user's selection. If one frame contains a selection of links, then it can serve as a navigation bar. When the user clicks on a link, the page at that URL will be loaded into the main frame. In Example 10.16 the frames are defined for two frames. Example 10.17 displays the content of the two frame files. The left-hand frame will represent a menu of links. The background color in the right-hand frame will change when the user clicks on a link in the left-hand frame. Example 10.16<html> <head><title>Frame Me!</title></head> <!-- Creating the framesets for two frames --> <!- - This HTML file is named: framedef.html --> 1 <frameset cols="25%,75%"> 2 <frame src="leftmenu.html" name=lframe> 3 <frame src="rightcolor.html" name=rframe> 4 </frameset> </html> EXPLANATION
Example 10.17<html> <head><title>Left Frame</title> <!- - This HTML file is named: leftmenu.html --> 1 <script language="JavaScript"> 2 function setBgColor(color){ 3 parent.frames[1].document.bgColor=color; // Or use the frame's name: parent.rframe.document.bgColor } </script> </head> <body bgColor="white"> <h3> Pick a color: <br> 4 <a href="javascript:setBgColor('red')">red</a> <br> <a href="javascript:setBgColor('yellow')">yellow</a> <br> <a href="javascript:setBgColor('green')">green</a> <br> <a href="javascript:setBgColor('blue')">blue</a> </h3> </body> </html> ------------------------------------------------------------------ <html> <head><title>Right Frame</title></head> <body> <h2> This is the frame where colors are changing.<br> In your javascript function, this is frame[1]. </h2> </body> </html> EXPLANATION
Using the top Property to Keep the Main Window out of a FrameIf you create a Web page, it should load into the user's main browser window, not in one of the frames. You can use the location method to force your page to load in the main window by putting the JavaScript code shown in Example 10.18 into the <head> portion of the page. Every window and frame has a top property, a reference to the topmost window object currently loaded in the browser. (See "The location Object" on page 244.) Example 10.18<html><head><title>Forcing the Frame</title> 1 <script language = "JavaScript"> 2 if ( window != top ) { // True if window is not the top // window in the hierarchy 3 top.location.href = location.href; // Put this window on top } </script> 4 <body bgcolor="lightblue"> <h1> The important page that we're talking about <h2> </body> </html> EXPLANATION
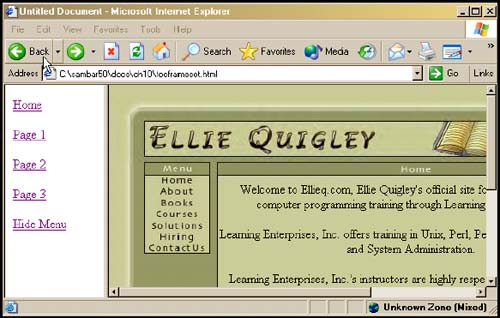
Collapsing Toolbars and Menu BarsYou don't always necessarily want to look at the toolbar or menu bar. It can be in the way of what you're viewing in the main page. Example 10.19 collapses the frame in order to bring the main frame to the foreground so that it will be viewed in the entire window. Example 10.19<html> <head> <title>Untitled Document</title> <meta http-equiv="Content-Type" content="text/html; charset=iso-8859-1"> </head> <frameset cols="117,450" rows="*"> <frame src="toctoolbar.html" name="menu"> <frame src="tocmain.html" name="main"> </frameset> <noframes><body bgcolor="#FFFFFF"> </body></noframes> </html> ---------------------------------------------------------------------- (The Startup Main Page) <html> <head> <title>Untitled Document</title> <meta http-equiv="Content-Type" content="text/html; charset=iso-8859-1"> </head> <body bgcolor=yellow> <h1>This is the main page</h1> <body bgcolor="#FFFFFF"> </body> </html> ---------------------------------------------------------------------- (The Menu Bar Page) <html> <head> <title>Menu Bar</title> <meta http-equiv="Content-Type" content="text/html; charset=iso-8859-1"> <script language="javascript"> var myUrl; 1 function openSite( url ){ 2 parent.main.location = url; 3 myUrl=url; } 4 function collapse(){ if ( ! myUrl){ 5 parent.location = "tocmain.html";} else{ 6 parent.location=myUrl; // Force this page into the // parent location } } </script> </head> <body bgcolor="#FFFFFF"> 7 <p><a href="javascript:openSite('tocmain.html')">Home</a><p> <p><a href="javascript:openSite('http://ellieq.com');"> Page 1</a></p> <p><a href="javascript:openSite('http://prenticehall.com');"> Page 2</a></p> <p><a href="javascript:openSite('http://google.com');"> Page 3</a></p> 8 <p><a href="javascript:collapse();">Hide Menu</a><p> </body> </html> EXPLANATION
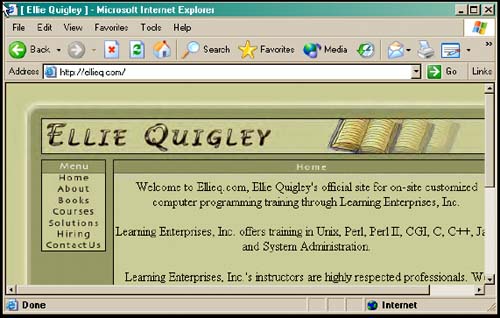
Figure 10.26. Two frames, a menu, and the main frame. The user clicked on Page 1. Figure 10.27. The user clicked Hide Menu . The larger frame has expanded to fill the entire page.Backpaging will take you back to the menu. 10.1.4 The location ObjectThe location object is a property of the window object and is used to access the URL of the document currently loaded in the window. In previous examples, we have seen location as a window property, but because it is really also an object itself, it also has properties used to describe the different parts of a URL. (See Table 10.12.) If you are writing a page containing frames, the entire page may not be picked up by a search engine, such as Yahoo! or Google. Anyone linking to your page via the search engine will only get part of the page, not the complete frameset. Also, when a page is divided into frames, the visitor cannot bookmark the page if the browser is not in the top frameset. The location object can be used to make sure the topmost window is the one currently loaded in the browser. (See "Using the top Property to Keep the Main Window out of a Frame" on page 240.) FORMAT javascript: window.location.href="URL"; javascript: window.location.replace("URL"); Example: javascript: window.location.href="http://www.legos.com/"; javascript: window.location.replace("http://www.legos.com/"); Table 10.12. Properties of the location object.
Table 10.13. Methods of the location object.
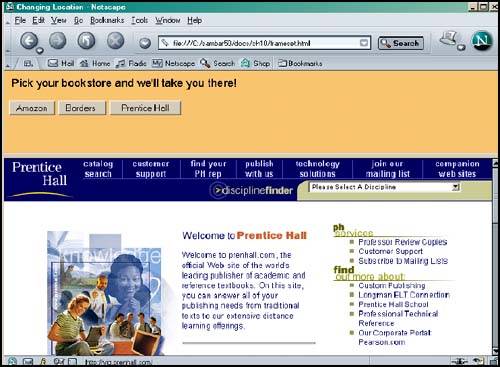
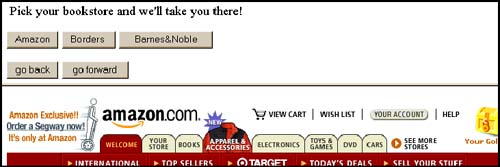
Two methods of interest are replace() and reload() . The replace() method is used to change the location of the current page; that is, to point to another page. It is similar to the href property, but where href puts the new page at the top of the history list, the replace() method removes the current page from the history list and replaces it with the new page. The reload() method behaves like the browser's Reload button. It causes the window's current document to be reloaded. Loading a New Page into a Frame with the location ObjectIn Example 10.20, the location object changes the location of the current page. By selecting a Web site, the user is taken to that site, which is displayed in the bottom frame of a frameset. Example 10.20(The file defining the framesets) <html><title>Changing Location</title> <html> <head><title>Frames</title></head> <frameset rows="130,*" frameborder="yes" border="8" framespacing="0"> <frame src="location.html" scrolling="no"> <frame src="emptyframe.html" > </frameset> </html> --------------------------------------------------------------------- (The empty file which will be the bottom frame) <html> <head><title>Empty Frame</title> </head> <body> </body> </html> --------------------------------------------------------------------- <html><head><title>Changing Location</title> </head> <script language="JavaScript"> 1 function loadPage(urlAddress){ 2 parent.frames[1].location.href = urlAddress; } </script> </head> <body bgcolor="F8C473"> <font size="+1" face=arial,helvetica> Pick your bookstore and we'll take you there! 3 <form> <input type="button" value="Amazon" 4 onClick="loadPage('../amazon.com/default.htm');"> <input type="button" value="Borders" onClick="loadPage('../borders.com/default.htm');"> <input type="button" value="Prentice Hall" onClick="loadPage('../prenhall.com/default.htm');"> </form> </body> EXPLANATION
10.1.5 The history ObjectThe history object is a property of the window object. It keeps track of the pages (in a stack) that the user has visited. The history object is most commonly used in JavaScript to move back or forward on a page, similar to the back button and forward button supported by your browser. The history object can reference only those pages that have been visited; that is, those pages on its stack. It has a length property and three methods called go(), back() and forward() . [5]
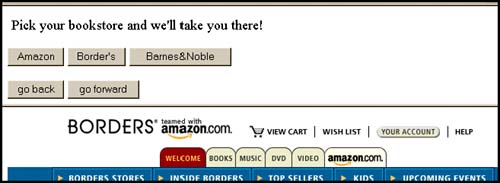
FORMAT Examples: history.go(-3) // Go back three pages history.go(2) // Go forward three pages back() // Same as history.go(-1) forward() // Same as history.go(1) Example 10.21 <html><head> <title>The History Object</title> </head> <script language="JavaScript"> function loadPage(urlAddress){ 1 parent.frames[1].location.href = urlAddress; } </script> </head> <body> <font size="+1" face=arial,helvetica> <form name="form1"> <input type="button" value="Amazon" onClick="loadPage('../amazon.com/default.htm');"> <input type="button" value="Borders" onClick="loadPage('../borders.com/default.htm');"> <input type="button" value="Barnes&Noble" onClick="loadPage('../barnesandnoble.com/default.htm');"> </form> <form name="form2"> 2 <input type="button" value="go back" 3 onClick="javascript: history.go(-1);"> 4 <input type="button" value="go forward" 5 onClick="javascript: history.go(1);"> </form> </body> </html> EXPLANATION
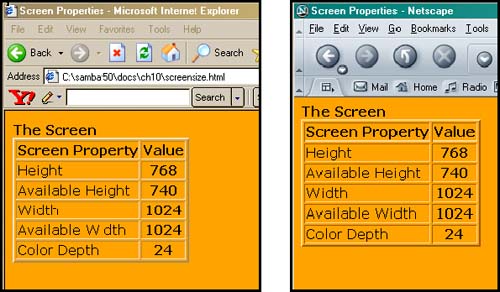
10.1.6 The screen ObjectThe screen object is a property of the window object and is automatically created when a user loads a Web page. It gives you access to the various properties of the user's screen such as its height, width, color depth, and so on. These are listed in Table 10.14. This can be helpful when designing pages that will require specific dimensions. For example, if the user's available screen width is less that 650 pixels (640x480), you may want to load a smaller image, whereas if it is over 1000 pixels (1024x768), a larger image can be loaded. There are no event handlers for this object. Table 10.14. Properties of the screen object.
Example 10.22 <html><head><title>Screen Properties</title> </head> <body bgcolor="orange" > <font face=verdana> <script language="JavaScript"> document.write("<b>The Screen</b><br>"); document.write("<table border=2>"); document.write("<tr><th>Screen Property</th><th>Value</tr>"); 1 document.write("<tr><td>Height</th><th>", screen.height ," </td></tr>"); document.write("<tr><td>Available Height</th><th>", 2 screen.availHeight ,"</td></tr>"); document.write("<tr><td>Width</th><th>", screen.width ," </td></tr>"); document.write("<tr><td>Available Width</th><th>", 3 screen.availWidth ,"</td></tr>"); document.write("<tr><td>Color Depth</th><th>", 4 screen.colorDepth ,"</td></tr>"); document.write("</table>"); </script> </body> </html> EXPLANATION
| ||||||||||||||||||||||||||||||||||||||||||||||||||||||||||||||||||||||||||||||||||||||||||||||||||||||||||||||||||||||||||||||||||||||||||||||||||||||||||||||||||||||||||||||||||||||||||||||||||||||||||||||||||||||||||||||||||||||||||||||||||||||||||||||||||||||||||||||||
 Window
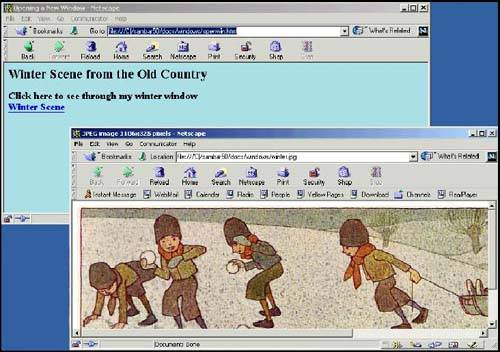


EAN: 2147483647
Pages: 150