| This section will guide you through the steps to migrate a Windows NT4 domain directly to Windows Server 2003 and Active Directory. Three areas will be covered in this section: Upgrading primary domain controllers When you perform an inplace upgrade, the first server in the Windows NT domain to upgrade is the primary domain controller. When you upgrade the primary domain controller, all Windows NT domain security principles such as user accounts, domain groups, permissions, and network services are also upgraded to Windows Server 2003 and Active Directory. Note Before you begin an inplace upgrade of a domain, it is a good practice to synchronize the primary domain controller and backup domain controllers. After the SAM database is copied to all backup domain controllers, you should remove one of the backup domain controllers from the domain in case you need to roll back to Windows NT. This BDC will contain a copy of the domain's SAM database and can be promoted to a primary domain controller as a means of recovering the original Windows NT4 domain and SAM database.
Upgrading backup domain controllers After the primary domain controller is upgraded, the next step is to complete an upgrade of the remaining backup domain controllers. As a migration process, a Windows NT4 backup domain controller does not need to be upgraded in place. The system that will be a Windows 2003 domain controller should just be installed from scratch and then promoted with the DCPROMO command to become a Windows Server 2003 domain controller. Upgrading domain member servers Each of the domain member servers can be upgraded at any time. As with domain controllers, migrate each member sever based on importance and network role. When you're performing an inplace upgrade to Windows Server 2003 and Active Directory, you must install Microsoft's DNS. Each server's TCP/IP property should be modified to include the TCP/IP address of the Active Directoryintegrated DNS.
Upgrading the Windows NT4 Primary Domain Controller To begin performing an inplace upgrade, do the following: | | 1. | Insert the Windows Server 2003 installation CD-ROM into the CD-ROM drive of the domain's primary domain controller. If your server has autorun enabled, the Windows Server 2003 Setup Wizard screen will appear. If your server does not have autorun enabled, you can launch the Windows Server 2003 Setup Wizard by running the Setup.exe program from the Windows Server 2003 CD-ROM.
| 2. | On the Welcome to Windows Server 2003 Family page, select Install Windows Server 2003 to begin upgrading the primary domain controller to Windows Server 2003 and Active Directory. This step will launch the Windows Setup Wizard, which will guide you through the setup process.
| 3. | On the Welcome to Windows Setup page, select the installation type you want to perform; in this case, select Upgrade (Recommended). This will begin the upgrade of the Windows NT4 server operating system to Windows Server 2003 and Active Directory. Click Next to continue.
| 4. | On the Licensing Agreement page, use the scrollbar to read the Microsoft licensing agreement. This page requires you to select one of the options. After reading the Licensing Agreement page, select I Accept This Agreement and click Next to continue.
| 5. | Your copy of Windows Server 2003 should have a license key that came with the Windows Server 2003 CD-ROM Software. Enter the 25-character product code and click Next.
| 6. | Review the Report System Compatibility to identify any issues with the inplace upgrade by clicking the details button. Select Next to continue.
|
The Windows Server 2003 Setup Wizard will now begin the installation of Windows Server 2003. The wizard will begin copying necessary files to your computer's hard drive. You can monitor the upgrade progress from the progress bar in the lower-left corner of the installation screen. After the Windows Server 2003 Setup Wizard copies the files, the server will automatically restart. Upgrading to Active Directory After the Windows Server 2003 Setup Wizard upgrades the operating system to Windows Server 2003, the system will restart automatically and begin running the Active Directory Installation Wizard, as shown in Figure 16.2. Figure 16.2. Active Directory Installation Wizard. 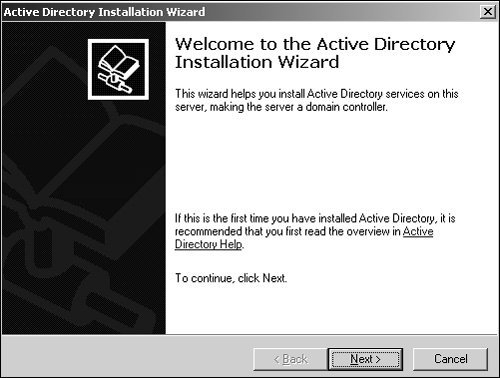
To install Microsoft's Active Directory, do the following: 1. | At the Welcome screen, click Next. This will upgrade the existing Windows NT4 domain and domain security principles to Active Directory.
Note Choosing this option will maintain the existing NT4 domain and upgrade all domain security principles directly to Active Directory. All NT4 user accounts, domain groups, and computer accounts will automatically be upgraded into the new Active Directory domain. | | | 2. | Review the Operating System Compatibility screen; if you agree, select Next to continue.
| 3. | At the Create New Domain page, select the option to create a new domain in a new forest and then click Next.
As mentioned earlier, Active Directory requires that the domain name system be installed before the AD installation can continue. Because this is an upgrade from an existing NT domain, you can assume that Microsoft DNS has not been installed on your network.
| 4. | If your network has a DNS server compatible with Windows Server 2003 and Active Directory, select Yes, I Will Configure the DNS Client.
| 5. | If there is no DNS server on your network and you intend this server to be the first DNS server within the new Active Directory domain, select No, Just Install and Configure DNS on This Computer. Then click Next to continue.
| 6. | On the New Domain page, type your domain's DNS name. This should be the domain name you selected in Chapter 5, "Designing a Windows Server 2003 Active Directory," as your Active Directory fully qualified DNS name. Click Next to continue. For a continuation of this process, refer to the next section.
| 7. | After the installation of Active Directory is complete, review the Active Directory Users and Computers MMC snap-in to ensure that all security principles have been upgraded properly.
|
Setting Forest Functionality Levels Forest functionality levels deal with the integration of Windows NT4 and Windows 2000 domain controllers into Windows Server 2003 environments. The option that you select depends on whether you are planning to install additional Windows NT4 or Windows 2000 domain controllers in your new domain. The option Windows Server 2003 Interim Forest is used for additional Windows NT4 domain controller interoperability, whereas the Windows 2000 Domain option allows for Windows 2000 domain controllers to be added in the future. For this installation, assume that no Windows 2000 server will be installed in the new Windows Server 2003 domain. Now pick up where you left off in the preceding section: 8. | Select the Windows Server 2003 option and click Next.
| 9. | On the Database and Log Folders page, you can select the location paths for the Active Directory database and database log files. Unless your design requires the Active Directory database and log files to be placed in a different location, choose the default path and click Next. Ensure that the server you are upgrading has sufficient disk space to host Active Directory databases.
| 10. | If your server configuration does not call for you to move the SYSVOL folder, select the default location and click Next to continue. The SYSVOL folder is the location for storing a copy of the domain's public files. These public files are replicated and used for domain information on all domain controllers within the Active Directory domain.
| 11. | On the Permissions page, select Permissions Compatible Only with Windows 2000 or Windows Server 2003 Operating Systems and click Next. You select this option because this migration path is an upgrade from Windows NT4. Therefore, you don't need to configure Active Directory with permissions that are compatible with Windows NT domains.
|
The following section provides the next steps in the Windows Server 2003 inplace upgrade. Applying Security to the Directory Services Restore Mode As a continuation from the preceding section, the next steps in the process are the following: | | 12. | Apply security to the Directory Services Restore Mode by assigning a password to the Directory Service Restore Mode account. This password should be documented in a secure location in case a recovery of the server is required. When you're configuring the account name and password, keep in mind that each Windows Server 2003 server within Active Directory will have its own unique Directory Services Restore Mode account. This account is not associated with the Domain Administrator account or any other Enterprise Administrator account in Active Directory. Enter the account name and password and then click Next.
| 13. | Use the scrollbar to review the server configuration summary page before you complete the installation. Ensure that the configuration information is correct. If changes are required, use the Back button to modify the server configuration. If the installation summary is correct, click Next to continue.
|
Caution When you click Next to continue, the installation of Active Directory and Microsoft DNS will begin, and no modifications can be made thereafter.
Before choosing Finish and completing the inplace upgrade, review the Windows Server 2003 Setup Wizard information. This information can identify whether your installation experienced any errors. Note It is a good practice to review the server event and system logs after completing any upgrade. Review each log and identify errors and warnings that can potentially affect the stability of the server you are upgrading and that can cause problems with domain authentication. Also review the Active Directory Users and Computers MMC snap-in to ensure that all security principles have migrated successfully to Windows Server 2003 and Active Directory.
Migrating Backup Domain Controllers and Domain Member Servers After the domain's primary domain controller upgrade is complete, the next step is to upgrade the remaining network backup domain controllers and member servers to Windows Server 2003 and Active Directory. Note Before you begin, review the backup domain controller's and member server's application and system logs to identify issues that can affect the progress of your migration.
When you're performing an upgrade of Windows NT4 backup domain controllers and domain member servers, the Active Directory Installation Wizard allows you to change the server's domain membership type or server roles. For example, an existing NT BDC can be migrated to Windows Server 2003 and Active Directory as a member server or a domain controller. The same is true for Windows NT4 domain member servers. When you begin this phase of the upgrade, determining which servers to upgrade first is important. Your migration script should include the order in which each BDC and member server will be migrated as well as the server role in which the BDC or member server will play after it is upgraded. As a rule, you should first consider upgrading backup domain controllers that host network services such as DHCP and WINS. When you migrate vital network services, network downtime and interruption of server-to-server communications are minimized. Starting the Domain Controller/Member Server Upgrade The first step in this phase is to insert the Windows Server 2003 installation CD into the CD-ROM drive of the backup domain controller. If your server has autorun enabled, the Windows Server 2003 Setup screen will appear. The procedure assumes that the upgrade is being performed on a domain member server. If your server does not have autorun enabled, you can launch the Windows Server 2003 Setup Wizard by running the Setup.exe program from the Windows Server 2003 CD-ROM. Then follow these steps: 1. | On the Welcome to Windows Server 2003 Family page, select Install Windows Server 2003. This step will launch the Windows Setup Wizard, which will guide you through the setup process.
| 2. | On the Welcome to Windows Setup page, select the installation type; in this case, select Upgrade (Recommended). This will begin the upgrade of the Windows NT4 operating system to Windows Server 2003. Click Next to continue.
| 3. | On the Licensing Agreement page, use the scrollbar to read the Microsoft licensing agreement. This page requires you to select one of the options. To continue, select I Accept This License Agreement and then click Next.
| 4. | Each copy of Windows Server 2003 comes with its own 25-character license key. Enter the 25-character product code and click Next.
|
The Setup Wizard will begin upgrading the Windows NT4 operating system to Windows Server 2003 by copying necessary files to the server's hard drive. You can monitor the inplace upgrade progress from the progress bar in the lower-left corner of the screen. After the wizard copies files, the server will automatically restart. Upgrading the Windows NT4 BDC to a Windows Server 2003 Domain Controller Installing Microsoft's Active Directory on a Windows NT4 backup domain controller or member server differs from upgrading the primary domain controller. The installation of Active Directory on BDCs and member servers requires only that you configure the server role in which each server will play after the upgrade is complete. After the Server Installation Wizard finishes upgrading the operating system to Windows Server 2003, the system will restart automatically and begin running the Active Directory Installation Wizard. To continue the upgrade process, do the following: 1. | At the Welcome screen, click Next to begin the installation of Active Directory.
| 2. | Select Member Server as the server role, as depicted in Figure 16.3, and then click Next to continue. The Active Directory Installation Wizard will install the domain controller or member server into the new Active Directory domain.
Figure 16.3. The Server Role Configuration page. 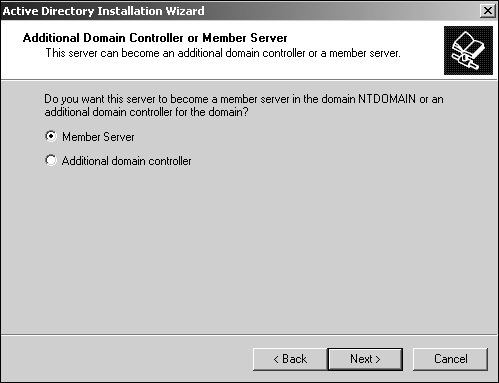
| 3. | Add the TCP/IP address of the Active Directory DNS server in the Network Connections property page of Windows Server 2003. After you add the DNS server address, click Next to continue. This scenario assumes that no DNS server address has been configured prior to performing an inplace upgrade of the organization's primary domain controller. If the BDC being upgraded has not been configured with the TCP/IP address of the new domain's DNS server, the Configure Domain Name Service Client configuration page will open.
| 4. | On the Network Credentials page, enter the name and password of the Domain Administrator account with permissions to join new computer accounts to the domain. Click Next to continue.
| 5. | On the Administrator Password page, you can assign a new local administrator password to the new Active Directory server. Enter a new password and click Next.
| 6. | Use the scrollbar to review your server configuration summary and ensure that the configuration you have selected is correct. Click Finish to close the Active Directory Installation Wizard and finish the inplace upgrade.
| | | 7. | After the server joins the Active Directory domain, restart the server to complete the inplace upgrade and apply changes to the new Active Directory member server.
|
Review the server's Event Viewer application and system logs to identify any errors with your upgrade. Resolve any issues identified to maintain server health and network connectivity before continuing the upgrade of any additional domain servers. |