Section 20.4. Using ntbackup to Back Up
20.4. Using ntbackup to Back Upntbackup can be used to back up Exchange live because Microsoft has connected the two using Exchange's API. This is the only way to perform automated backups of Exchange without purchasing a third-party tool. 20.4.1. Making a Basic BackupTo start the backup utility, go to Start Figure 20-7. ntbackup: wizard mode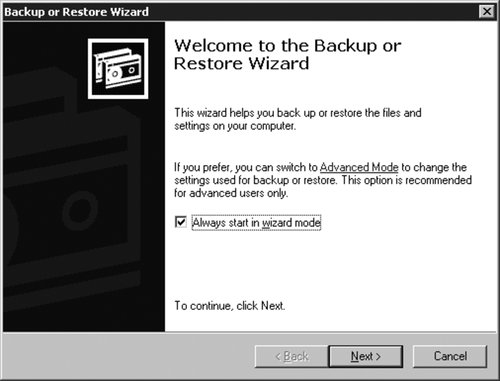 If you are a more advanced user and prefer to not use the wizard but instead start in advanced mode, you can uncheck the "Always start in wizard mode checkbox" and then click the Advanced Mode link. To switch back to wizard mode, select Tools Click the Advanced Mode link to display the choices shown in Figure 20-8. From here you can easily work in wizard mode by selecting the Backup wizard, or you can select the Backup tab to manage the backup. In this example, we perform a backup without the wizard and proceed to the Backup tab. Figure 20-8. Backup wizard main screen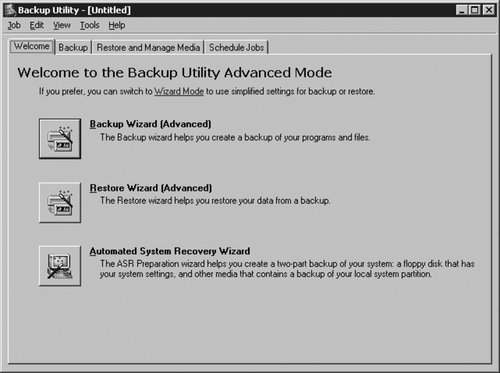 Which components are installed on the Exchange Server dictates which components need to be backed up. To back up all the storage groups on the server, select the checkbox next to Microsoft Information Store. To back up a specific storage group, expand the Microsoft Information Store, and select the storage group. In Figure 20-9, we have specified the Information Store for the Exchange Server and that the backup location should be E:\Exchange\Backup.bkf. This will be a file-based backup to externally attached storage, such as a NAS or SAN. Other options include backup directly to tape. On the right pane, we specified both the mailbox store and the public folder store. Figure 20-9. Storage group selection for backup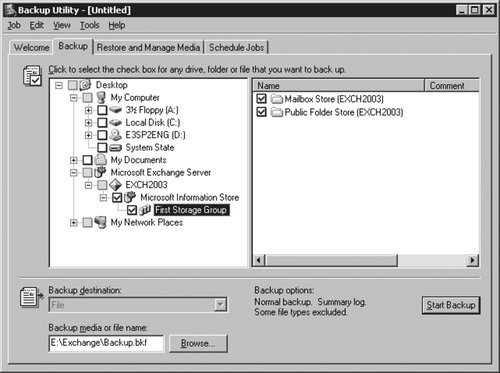 After selecting the components to back up, click the Start Backup button to display a window like the one shown in Figure 20-10. Figure 20-10. Backup-job information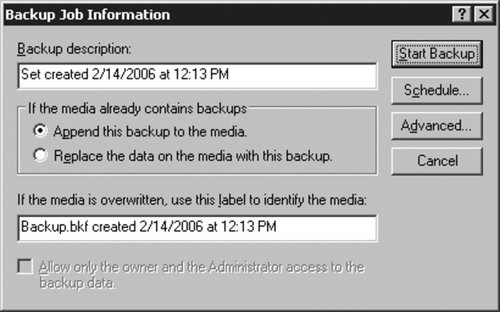 From this screen, you can (and should) enter a detailed description as well as specify advanced backup options or schedule this backup instead of running it immediately. If you click the Advanced button, you are presented with the dialog box in Figure 20-11, in which you can change some of the default options or the type of backup you'd like. It is always a good idea to verify the backup after it is complete, so this checkbox is selected. If you change the type of backup on this screen, be careful to select a backup that clears the transaction logs and marks the backup flag. Figure 20-11. Advanced backup options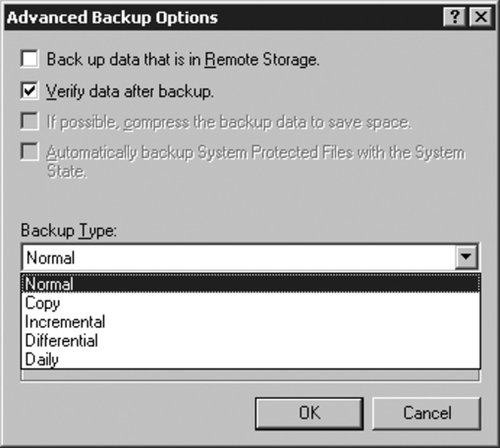 After selecting your options, click OK to return to the main menu, and then click Start Backup to begin. You'll see a status window like that shown in Figure 20-12. The next step, covered in the following section, is to verify the backup. 20.4.2. Verifying the BackupAfter the backup has completed, make sure it was successful. This can be verified by first checking that the backup status is Completed in the Backup Progress window, as shown in Figure 20-12. Figure 20-12. Backup progress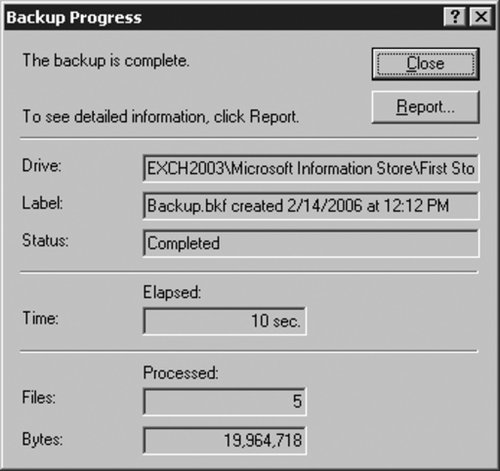 As tedious as it might sound, click the Report button to view the backup report to verify that even though the backup was successful, there were no errors. You will see a report similar to the one shown in Figure 20-13. Figure 20-13. Backup verification by viewing the backup logfile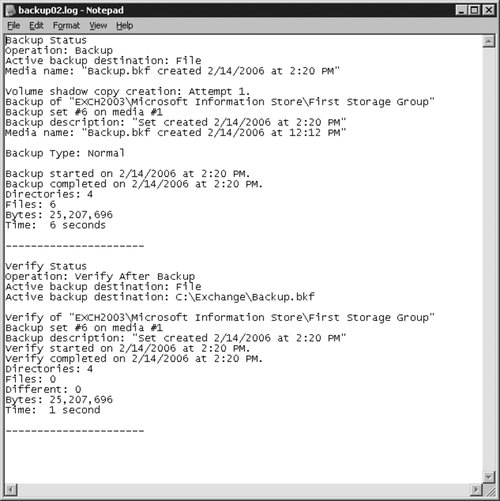 The default report is only a summary. If there are errors, and you need more details, rerun the backup with detailed logging enabled. Because all backup jobs on this server append to this logfile, it may be necessary to scroll through a considerable amount of information to find the offending error. If you checked the "Verify data after backup" checkbox, check the report to confirm that the backup was successful. To do this, look for a line that starts with the word different. If it is anything other than zero, there might be problems, but nonconformity between the files does not always indicate a problem; you must investigate each case individually. While these methods report most errors, the authoritative place to check is the application event log (see Figure 20-14). It is important to scan the application log regularly for backup errors because not all errors are logged to the ntbackup logs. This job can be made easier by looking between event ID 8000 and 8009, which indicate the start and end of the backup, respectively. Pay particular attention to any sources that are ntbackup or ESE. Figure 20-14. Backup status in Event Viewer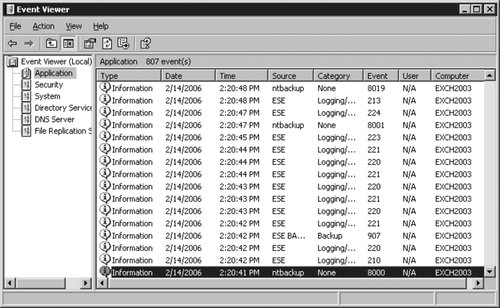 If you don't find any errors, there is a good chance that your backup was successful. However, if you want the ultimate verification, you should do a test restore, covered next. |
 Run, and type ntbackup. When you initially start ntbackup, it starts in wizard mode as shown in Figure 20-7. If youre running Exchange 2000 on Windows Server 2003 or later, the procedure is the same. If you run a version of Exchange on Windows Server prior to 2003, the backup utility is called backup and can be executed by going to Start
 Run, and typing Backup.
EAN: 2147483647
Pages: 237