12.3. Position and Movement Before CSS, if you wanted to control the layout of the page with any consistency, you had to use an HTML table. As for any form of animation, you either had to use something such as an animated GIF or a plug-in such as Flash. Netscape and Microsoft together helped bring an end to all of this with the co-introduction of a specification called the CSS-P, or CSS Positioning. Consider the page as a graph, with both x- and y-coordinates. With CSS-P, you can set an element's position within this coordinate system. Add JavaScript, and you can move elements about the page. The proposed CSS-P attributes were eventually incorporated into the CSS2 specification. The positioning properties in CSS2 include the following:
position -
The position property takes one of five values: relative, absolute, static, inherit, or fixed. static positioning is the default setting for most elements. This means they're part of the page flow, and other elements in the page impact the element's position, and it impacts all elements that follow. relative positioning is similar except that the element is offset from its normal position. A position set to absolute takes the element out of the page flow, allowing you to set its position absolutely in the page. This also allows you to layer elements, one on top of another, just by positioning them in the same location. A fixed position is similar to absolute positioning, except the element is positioned relative to some viewport. For most DHTML efforts, you'll mainly use absolute or relative positioning.
top -
In the web-page coordinate system, the value of x starts at the top and is zero. It increases as you travel down the container, whether that container is the page or another element. Setting an element's top property sets its position relative to the top of the container.
left -
In the web-page coordinate system, the value of y starts at the left and is zero. It increases as you travel across the container to the right. Setting an element's left property sets its position relative to the left side of the container.
bottom -
The bottom property has as its zero value the bottom of the page. Higher values move the element up the page.
right -
The right property has as its zero value the right side of the page. Higher values move the element towards the left.
z-index -
You may want to add the z-index. If you draw a line perpendicular to the page, this is the z-index. As mentioned earlier, with absolute positioning, elements can be layered on one another. Their position within the stack is controlled by one of two things: the first is its position in the page. Elements defined later in the web page are located higher in the stack; earlier elements, lower in the stack. This can be overridden using z-index. Both negative and positive integers can be used, with a value of 0 being the normal rendering layer (relative positioning), negative pushing an element lower than this, and positive, higher. The display attribute also influences both positioning and layout, but it's covered later in the section "Display, Visibility, and Opacity." The attribute float is also involved in positioning, but it doesn't play well with DHTML so I won't cover it. The top, right, bottom, and left properties, as well as z-index, work only if position is set to absolute. Elements can be set outside the page by setting any of the properties to a negative value. Elements can also be moved based on events, such as mouse clicks. One DHTML effect is a fly-in, where elements seem to literally "fly in" from the sides of the document. This is a good approach for tutorials or other efforts in which you want to introduce one topic after another, based on a mouse click or keyboard entry from the web-page reader. Example 12-4 demonstrates a fly-in with three elements coming from the top left. A timer is used to create the movement and reset each round until the x, the top value, is greater than a value (200 + a value x the number of the element, to create an overlap). The elements are hidden when they are originally positioned off the page, to the left and top, because setting elements beyond the page to the right or bottom results in a scrollbar being added to the page. Example 12-4. Element positioning and movement with fly-ins <!DOCTYPE html PUBLIC "-//W3C//DTD XHTML 1.0 Transitional//EN" "http://www.w3.org/TR/xhtml1/DTD/xhtml1-transitional.dtd"> <html> <head> <title>Fly-Ins</title> <meta http-equiv="Content-Type" content="text/html; charset=utf-8" /> <style type="text/css"> div { padding: 10px; } #div1 { background-color: #00f; color: #fff; font-size: larger; position: absolute; width: 400px; height: 200px; left: -410px; top: -400px; } #div2 { background-color: #ff0; color: #; font-size: larger; position: absolute; width: 400px; height: 200px; left: -410px; top: -400px; } #div3 { background-color: #f00; color: #fff; font-size: larger; position: absolute; width: 400px; height: 200px; left: -410px; top: -400px; } </style> <script type="text/javascript"> //<![CDATA[ var element = ["div1","div2","div3"]; function next( ) { setTimeout("moveBlock( )",1000); } var x = 0; var y = 0; var elem = 0; function moveBlock( ) { x+=20; y+=20; var obj = document.getElementById(element[elem]); obj.style.top = x + "px"; obj.style.left = y + "px"; if (x < (100 + elem * 60)) { setTimeout("moveBlock( )", 100); } else { elem++; x = 0; y = 0; } } //]]> </script> </head> <body> <p> <a href="javascript:next( );">Next slide</a> </p> <div > Now is the time for all good wo-men to come to the aid of their country. </div> <div > 99 bottles of beer on the wall, 99 bottles of beer.<br /> Take one down, pass it around, 98 bottles of beer one... </div> <div > web 2.0 WEB 2.0 WeB 2222....0000<br /> I'm so cool, <h2>Learning JavaScript!</h2> </div> </body> </html>
|
The text in the examples is a bit of nonsense, but with a little design polish and more appropriate writing, it's an effective presentation technique. Figure 12-2 shows a screen capture of the page, opened in Safari. Figure 12-2. Fly-in page 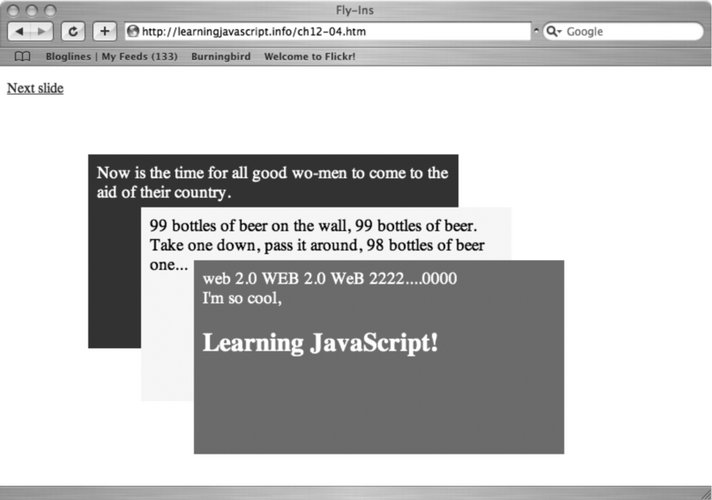
To make the page more accessible, the link can be changed to open up pages with the fly-in information. Alternatively, all three information blocks could be positioned in the page, and script used to hide them only if JavaScript is enabled. Another common use of DHTML associated with movement has as much to do with tracking the movement of the web-page reader as it does elements in the page. The technique is called drag and drop, and it's discussed next. 12.3.1. Drag and Drop One DHTML item that generated much interest when it was first introduced was drag and drop. Shopping-cart examples popped up all over, including a few variations of my own. I even created a drag-and-drop game. Over time, though, we saw that much of the interest in drag and drop did not manifest itself in applications. I rarely see a drag-and-drop application in effect, and when I do see one, I tend to be irritated. Why? It's not always that easy to do drag and drop; especially if you're using a trackpad or a text-to-speech browser. What reawakened the interest in drag and drop was Google Maps' use of the technique to allow you to move a map around within a constrained space. It was the first time I'd seen a really effective use of drag and drop. We'll take a look at Google Maps and its associated API in Chapter 13, but for now, let's look at implementing our own, very tiny emulation of drag-and-drop technology.  | What makes the Google Maps approach really exciting is that as you scroll through a map, the application actually pulls up the next pieces from the server and integrates them into the page using a caching mechanism. With this, you seem to never reach the end of the map. It's really well done. |
|
In Example 12-5, a DIV element is created, and a screenshot from the book is embedded within the element. In addition to drag and drop, it also uses the overflow attribute. You'll see more on overflow later, but for now the DIV element is set to hide or clip the overflow from the element's contents. This prevents any overlap of the image outside the defined space. Example 12-5. The GoogleMap effect: drag and drop of object in a container <!DOCTYPE html PUBLIC "-//W3C//DTD XHTML 1.0 Transitional//EN" "http://www.w3.org/TR/xhtml1/DTD/xhtml1-transitional.dtd"> <html> <head> <title>GoogleMapEffect</title> <meta http-equiv="Content-Type" content="text/html; charset=utf-8" /> <style type="text/css"> #div1 { overflow: hidden; position: absolute; top: 100px; left: 100px; border: 5px solid #000; width: 400px; height: 200px; } img { border: 1px solid #000; } </style> <script type="text/javascript"> //<![CDATA[ // global variables var dragObject = null; var mouseOffset = null; // capture mouse events document.onmousemove = mouseMove; document.onmouseup = mouseUp; // create a mouse point function mousePoint(x,y) { this.x = x; this.y = y; } // find mouse position function mousePosition(evnt){ var x = parseInt(evnt.clientX); var y = parseInt(evnt.clientY); return new mousePoint(x,y); } // get element's offset position within page function getMouseOffset(target, evnt){ evnt = evnt || window.event; var mousePos = mousePosition(evnt); var x = mousePos.x - target.offsetLeft; var y = mousePos.y - target.offsetTop; return new mousePoint(x,y); } // turn off dragging function mouseUp(evnt){ dragObject = null; } // capture mouse move, only if dragging function mouseMove(evnt){ if (!dragObject) return; evnt = evnt || window.event; var mousePos = mousePosition(evnt); // if draggable, set new absolute position if(dragObject){ dragObject.style.position = 'absolute'; dragObject.style.top = mousePos.y - mouseOffset.y + "px"; dragObject.style.left = mousePos.x - mouseOffset.x + "px"; return false; } } // make object draggable function makeDraggable(item){ if (item) { item = document.getElementById(item); item.onmousedown = function(evnt) { dragObject = this; mouseOffset = getMouseOffset(this, evnt); return false; }; } } //]]> </script> </head> <body onload="makeDraggable('img1');"> <div > <img src="/books/4/327/1/html/2/fig01-1.jpg" /> </div> </body> </html>
|
This is the most complex example we've had so far in the book, so let's take the JavaScript from the top: Two global objects are created: dragObject and mouseOffset. The former is the object being dragged; the latter is the object's offset value. The offset is the object's position relative to a container, in this instance, the page. We also capture the mousemove and mouseup events for the document and assign them to event handlers, mouseMove and mouseUp. The next is an object, mousePoint. This just wraps the two mouse coordinates: x and y. Creating an object makes it easier to pass around both values. The next function is mousePosition. This function accesses the target object's clientX and clientY values and returns a mousePoint object representing the object's x and y location relative to the client area of the window, excluding all the chrome. The parseInt function ensures the values are returned as numerics. Following is getMouseOffset, which takes as parameters an object target and an event. Once the event object has been normalized past the cross-browser differences, the mouse position of the event is set to the function just discussed, mousePoint. This is then modified against the object's offsetLeft and offsetTop properties. If we didn't do this bit of computation, the object would move with the mouse, but there would most likely be an odd jerking motion, and the object would seem to float above, below, or to the side of the mouse. Once normalized, it's used to create a normalized mousePoint, which is returned from the object. The next function is mouseUp, and all it does is turn off dragging by setting dragObject to null. Following is the mouseMove function, where most of the dragging computation occurs. In this function, if the dragging object isn't set, the function is exited. Otherwise, the normalized mouse position is found, the object is set to absolute positioning, and its left and top properties are set (after again being adjusted for offset). The last function is makeDraggable, which just makes the object passed to the function into a draggable one. This means adding a function for the object's mousedown event, which sets the drag object to the object, and gets the object's offset value.
Seems like a lot of code, but it's actually much simpler than it used to be with the older browsers because most modern browsers share the same properties when it comes to positioning. Rah for that, because drag and drop is hard enough without the extra challenge. Again, Google Maps adds an extra element of sophistication by using Ajax to continuously refresh the map, so you never run out. That's a little bit beyond this book, though. Consider it a future personal challenge. |