Selectors
| < Day Day Up > |
As shown in the previous sections, the simplest rules can be applied to all occurrences of a particular tag such as <p> . For example, consider setting the line spacing for all paragraphs using a rule such as the following:
p {line-height: 150%;} While some XHTML elements have a default rendering that is expected, you can also use the elements div and span , which have no predefined presentation. Beyond this caveat, designers are free to use style properties with nearly every XHTML display element, including the body element itself. For example, a rule such as
body {background-color: black;} would set the background color of the entire document to black. To decrease the amount of typing for setting rules for multiple tags, it is possible to group them with commas. For example, if you want the tags <h1> , <h2> , and <h3> to have the same basic background and color, you could apply the following rule:
h1, h2, h3 {background: yellow; color: black;} If it turns out that each particular heading should have a different size , you can then add that characteristic by adding other rules:
h1 {font-size: 200%;} h2 {font-size: 150%;} h3 {font-size: 125%;} When the grouping rule and the other rules are encountered , they are combined. The resulting rules create the whole style. Although associating all elements with a certain look is useful, in reality page designers probably will want to create very specific rules that are applied only to certain elements in a document or that can be combined to form more complex rules.
id Rules
Without inline styles, how can a particular style be applied to one particular <h1> tag, or to only a select few particular <h1> tags? The solutions to these problems are the class and id attributes. As discussed in Chapter 3, you can name a particular tag with the id attribute so that it can be made a destination for a link. For example,
<h1 id="FirstHeading"> Welcome to Demo Company, Inc. </h1>
assigns a name of "FirstHeading" to this <h1> tag. One possible use of this, as discussed in Chapter 4, is for this item to be linked to, like so:
<a href="#FirstHeading"> Go to Heading 1 </a>
However, another possible use of the name for an element is to reference it from a style rule. For example, a CSS rule such as
#FirstHeading {background-color: green;} would apply a green background to the element with its id attribute set to FirstHeading .
The following markup shows how a green background is applied to the <p> tag with the id value of "SecondParagraph" , whereas no style is applied to the other paragraphs:
<!DOCTYPE html PUBLIC "-//W3C//DTD XHTML 1.0 Transitional//EN" "http://www.w3.org/TR/xhtml1/DTD/xhtml1-transitional.dtd"> <html xmlns="http://www.w3.org/1999/xhtml" lang="en"> <head> <title> ID Rule Example </title> <meta http-equiv="content-type" content="text/html; charset=ISO-8859-1" /> <style type="text/css"> <!-- #SecondParagraph {background-color: green;} --> </style> </head> <body> <p> This is the first paragraph .</p> <p id="SecondParagraph"> This is the second paragraph .</p> <p> This is the third paragraph .</p> </body> </html> As a core attribute, the id attribute is common to nearly all XHTML/HTML elements. However, given widespread use of id attributes, page authors need to be very careful to ensure that HTML elements are named uniquely. Developers must not name two elements the same name using the id attribute. If two of the paragraphs have id="secondparagraph" , what will happen? In the case of most browsers, both paragraphs should show up green. However, this is such sloppy style that it generally will result in significant errors once scripting is added to the document. Furthermore, the document will not validate with such mistakes. If multiple elements should be affected in a similar way, use a class rule instead.
class Rules
The class attribute is used to define the name(s) of the class(es) to which a particular tag belongs. Unlike id values, class values don't have to be unique as many elements can be members of the same class. In fact, elements don't even have to be of the same type to be in a common class. Writing rules for classes is easy: simply specify the class name of your own choosing such as "nature," with a period before it as the selector:
.nature {color: green;} The use of class is illustrated here:
<!DOCTYPE html PUBLIC "-//W3C//DTD XHTML 1.0 Transitional//EN" "http://www.w3.org/TR/xhtml1/DTD/xhtml1-transitional.dtd"> <html xmlns="http://www.w3.org/1999/xhtml" lang="en"> <head> <title> Class Example </title> <meta http-equiv="content-type" content="text/html; charset=ISO-8859-1" /> <style type="text/css"> <!-- .veryimportant {background-color: yellow;} --> </style> </head> <body> <h1 class="veryimportant"> Example </h1> <p class="veryimportant"> This is the first paragraph .</p> <p> This is the second paragraph .</p> <p class="veryimportant"> This is the third paragraph .</p> </body> </html> The previous example has three elements, each of which has its class attribute set to veryimportant . According to the style sheet information, all members of the veryimportant class, as indicated by the period, have a yellow background color.
Other variations on class rules are possible. For example, setting all h1 elements of the class veryimportant to have a background color of orange could be written like this:
h1.veryimportant {background-color: orange;} It is also possible to combine classes together directly. For example, consider the following rule:
h1.veryimportant.stuff {background-color: green;} This would match only <h1> tags with class attribute values including veryimportant and stuff . Given these rules, the following tags with class attributes would be affected in the various ways indicated.
<h1 class="veryimportant"> Has an orange background</h1> <h1 class="veryimportant stuff"> Has a green background </h1> <h1 class="veryimportant heading stuff"> Probably has a green background </h1> <h1 class="stuff"> Has the default background unless class rule for stuff set </h1>
Notice that the rule for green background matches any < h1 > tag that includes the values veryimportant and stuff but not necessarily uniquely or in order. The following is a complete example showing multiple class rules working together:
<!DOCTYPE html PUBLIC "-//W3C//DTD XHTML 1.0 Transitional//EN" "http://www.w3.org/TR/xhtml1/DTD/xhtml1-transitional.dtd"> <html xmlns="http://www.w3.org/1999/xhtml" lang="en"> <head> <title> Multiple Classes Example </title> <meta http-equiv="content-type" content="text/html; charset=ISO-8859-1" /> <style type="text/css"> <!-- .heading {font-family: Impact, Sans-Serif;} .veryimportant {background-color: yellow;} .stuff {color: red;} .veryimportant.stuff {font-style: italic;} .veryimportant.example.stuff {text-decoration: underline;} --> </style> </head> <body> <h1 class="veryimportant heading stuff"> Heading (yellow background, red text, italic, and Impact) </h1> <p class="veryimportant"> This is the first paragraph. (yellow background, black text) </p> <p class="stuff"> This is the second paragraph. (red text, default background) </p> <p class="veryimportant stuff"> This is the third paragraph. (yellow background, red text, italic) </p> </body> </html> As these examples have shown, classes can be used to significantly reduce the number of style rules necessary in a document.
Pseudoclasses
A special predefined class grouping, called pseudoclasses , is used in CSS to deal with special situations such as the first letter or line of information, the focus of the cursor, the states of links, and so on. These selectors are pseudoclasses because they deal with style information for content, which may change depending on user activity, screen size, or other factors. Let's focus first on the more common pseudoclass and then present the less common ones that are not as well-supported in browsers.
Recall that a hypertext link has three primary states in HTML ”unvisited, visited, and active ”in which the link text color is blue, purple, and red, respectively. In HTML, it is possible to control the color of these link states through the link , vlink , and alink attributes for the <body> element. In CSS, the presentation of link states is controlled through the pseudoclass selectors a:link , a:visited , and a:active . CSS2 also adds a:hover for the mouse hovering over a link and is one of the most commonly supported CSS2 features in browsers. Another pseudoclass :focus is added by CSS2 and would be selected when the link gains focus ”generally through keyboard navigation. Unfortunately, :focus is not nearly as well-supported in browsers as :hover . An example showing how these link pseudoclass selectors are used is shown here:
<!DOCTYPE html PUBLIC "-//W3C//DTD XHTML 1.0 Transitional//EN" "http://www.w3.org/TR/xhtml1/DTD/xhtml1-transitional.dtd"> <html xmlns="http://www.w3.org/1999/xhtml" lang="en"> <head> <title> Link Pseudo-Class Example </title> <meta http-equiv="content-type" content="text/html; charset=ISO-8859-1" /> <style type="text/css"> <!-- a:link {color: blue; text-decoration: none;} a:active {color: red; background-color: #FFFFCC;} a:visited {color: purple; text-decoration: none;} a:hover {color: red; text-decoration: underline;} a:focus {border-style: dashed; border-width: 1px; background-color: #FFA500;} --> </style> </head> <body> <a href="http://www.htmlref.com"> HTML: The Complete Reference </a> </body> </html> Although the CSS rules associated with the states of a link can be used to change the link's appearance in dramatic ways, designers are encouraged to limit changes to improve usability. Also note that size changes and other significant differences in link presentation can result in undesirable screen refreshes as the document reloads . For example, with a rule such as
a:hover {font-size: larger;} you may notice text lines shifting up and down as you roll over links. The hover and focus pseudoclasses are discussed later in the chapter when CSS2 is covered.
Pseudo-Elements
Another form of selector similar to pseudoclasses in terms of syntax is called a pseudo-element. Under CSS1, two pseudo-elements exist: :first-letter and :first-line . These selectors are used along with common block-level text elements such as p to affect the presentation of the first letter or first line of enclosed text. A short example illustrating their use is presented here:
<!DOCTYPE html PUBLIC "-//W3C//DTD XHTML 1.0 Transitional//EN" "http://www.w3.org/TR/xhtml1/DTD/xhtml1-transitional.dtd"> <html xmlns="http://www.w3.org/1999/xhtml" lang="en"> <head> <title> First Line and Letter </title> <meta http-equiv="content-type" content="text/html; charset=ISO-8859-1" /> <style type="text/css"> <!-- p:first-line {background-color: yellow;} p:first-letter {color: red; font-size: 150%;} --> </style> </head> <body> <p> CSS selectors can be used to select elements in a variety of interesting ways. This is some text to fill up the paragraph. This is only text to fill up this paragraph. This should be enough text to make this paragraph. </p> <p> CSS selectors can be used to select elements in a variety of interesting ways. This is some text to fill up the paragraph. This is only text to fill up this paragraph. This should be enough text to make this paragraph. </p> </body> </html> Figure 10-2 shows two renderings of this example to demonstrate how the text affected by the rule varies depending on the text flow. Pseudoclasses and elements hint at a much more complex set of CSS rules that are invoked depending on where an element appears in a document.
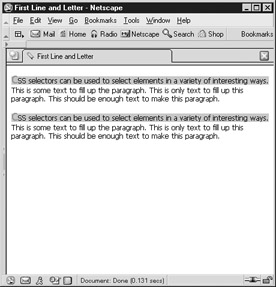
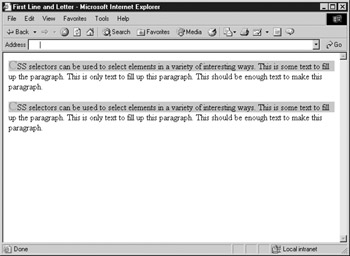
Figure 10-2: Pseudo-elements vary their application
Contextual Selection
Although the class and id attributes provide a great deal of flexibility for creating style rules, many other types of rules of equal value exist. For example, it might be useful to specify that all <strong> tags that occur within a <p> tag get treated in a certain way, as compared to the same elements occurring elsewhere within the document. To create such a rule, you must use contextual selection . Contextual selectors are created by showing the order in which the tags must be nested for the rule to be applied. The nesting order is indicated by a space between each selector. For example, given the rule
p strong {background-color: yellow;} all occurrences of the strong element within a p element have a yellow background. Other occurrences of strong might not necessarily have the yellow background. However, contextual selection does not require a direct parent-child relationship with elements. For example, with the rule in the preceding example, you would find that given
<p> This <span> is not <strong> directly </strong> within </span> the paragraph. </p>
the nested < strong > tag will still have a yellow background even though it is not directly within the < p > tag. What you are seeing here is that the rule really says that all < strong > tags that are "descendents" of a < p > tag are given a yellow background. It is possible to use a more specific CSS2 rule like
p > strong {background-color: yellow;} to specify only < strong > tags that are directly within < p > tags are styled. This is discussed later in the section "CSS2 Selectors." For now, Table 10-2 summarizes the basic selectors found in CSS1.
| Selector | Description | Example |
|---|---|---|
| element | Selects all elements of the name specified in the rule. | h1 {color: red;} /* makes all h1 tags red */ |
| #id | Selects any tag with an id attribute set. | #test {color: green;} |
| .class | Selects any tag with the specified class value. | .note {color: yellow;} |
| element.class | Selects the specified elements with a particular class value. | h1.note {text-decoration: underline;} |
| Grouping | Applies the same rules to a group of tags. | h1,h2,h3 {background-color: orange;} |
| Contextual | Selects descendent tags. | p strong {color: purple;} /* sets all strong tags that are descendents of p tags purple */ |
| :first-line | Selects the first line of an element. | p:first-line {color: red;} |
| :first-letter | Selects the first letter of an element. | p:first-letter {font-size: larger;} |
| a:link | Specifies the unvisited link. | a:link {font-weight: bold;} |
| a:active | Specifies the link as it is being pressed. | a:active {color: red;} |
| a:visited | Specifies the link after being pressed. | a:visited {text-decoration: line-through;} /* puts a line through visited links */ |
With these more advanced rules, it becomes clear that precise understanding of the document structure is very important to the correct application of style sheets.
| < Day Day Up > |
EAN: 2147483647
Pages: 252