Positioning Text and Elements
|
By default, when you type in text or drag elements onto the document, the document is arranged like a word processing document, with the elements against the left edge and flowing down the page. This mode is occasionally referred to as flow mode. If you want to position elements in relation to each other, the usual solution is to put a table on the page and arrange the elements in cells.
Absolute Positioning
An alternative to laying your page out in flow mode is to use absolute positioning. The Absolute Position button on the toolbar allows you to place your control anywhere on your page without having to use a table to hold the position. To see how absolute positioning works, select the button on your page. In the toolbar, click the Absolute Position button. A four- way arrow will appear allowing you to drag the button around in any direction and drop it wherever you want.
With absolute positioning, the control uses x and y coordinates. (Technically, it uses a style attribute in which the Left and Top values are set.) Absolute positioning gives you a more flexible way to position controls. However, it has the following disadvantages, which is why it isn t the default:
-
Not all browsers support absolute positioning. If the visitors to your site have older browsers or browsers other than Microsoft Internet Explorer, absolute positioning might not work for them. And even browsers that do support styles and absolute positioning often behave slightly differently, which can make your pages look different when viewed with different browsers.
-
For text to be absolutely positioned, it has to be inside a control that acts as the container. In flow mode, you can just type in your text.
-
Frankly, absolute positioning might cause confusion because you can drag elements anywhere on the page and they don t necessarily appear on the page in the order you ve added them.
If you put the button into absolute position mode to experiment, you might want to put it back the way it was. Select the button again, and click the Absolute Position button. The button returns to flow mode.
As mentioned, you can position plain text using absolute positioning but you need to place the text in a container control. Let s practice using absolute positioning to position text.
Add static text with absolute positioning
-
From the HTML Elements tab of the Toolbox, drag a Panel onto the page. (Notice that it says Div in the panel; it s an HTML <div> element.)
-
With the panel selected, click the Absolute Position button in the toolbar. Now you can drag the panel around.
-
To insert text into the panel, double-click the panel. The first click selects it, and the second click changes it to edit mode, which is indicated with a crosshatched border.
-
Type some text in the text box. When you re finished, click somewhere outside the panel.
You now have a chunk of static text that you can position in the page by dragging.
You re not limited to inserting just static text into a Panel control. You can add any other controls to it to create a movable group. That s all I m going to tell you about absolute positioning and the support for it in Web Matrix. If you like this feature, try using it when you design pages. You can use it in both ASP.NET pages and plain old HTML pages.
Controlling the Grid
If you do want to use absolute positioning, you might also want to use the grid on the page. First select a control and turn on absolute positioning as described in the previous section. In the toolbar, click the Toggle Design Grid button. Your page now looks like Figure 4-5.
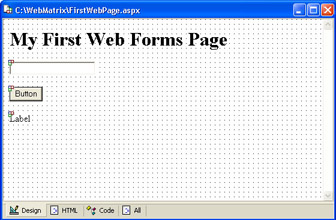
Figure 4-5: The page in Design view with the grid enabled.
The dots shown on the page help you align your elements. You can go one better and use the dots as a design matrix. Click the Toggle Snap To Grid button in the toolbar. Now when you drag controls, they will automatically align with the nearest dots.
I said earlier that the toolbars provide lots of options for formatting. You can set the font and size and color of text, for example. You can make text into a bulleted or numbered list, or you can set it to a predefined HTML tag such as Heading 1 (<h1>).
In Web Matrix, formatting works very much the way you would expect: you select the text or element you want to format, and then you choose the formatting option from the toolbar or the menus.
If you re not used to working with an HTML editor, some of the formatting choices might seem unusual. For example, the Block Format drop-down list offers an option called Formatted. If you choose it, the text is set to monospace. In HTML terms, you put a <pre> tag around the text. I encourage you to play with the formatting options to familiarize yourself with them.
Those who are experienced with HTML should pay attention to the following points:
-
Pressing ENTER in Design view inserts <p> tags, with both opening and closing tags. Press SHIFT+ENTER to insert <br> tags.
-
If you format text using commands from the formatting toolbar or the Format menu, the format is applied to your text using tags such as <font>, <strong> (for bold) and <em> (for italics). These tags are used for maximum compatibility with all browsers. If you re used to using styles and stylesheets, you probably don t want to use formatting commands to format text.
-
If your document contains a <style> block, Design view will reflect the settings specified in the <style> block. However, Design view won t resolve a reference to an external .css stylesheet.
In general, if you re experienced with HTML, you probably want to experiment with formatting options and then use HTML view to see how formatting is being applied. Naturally, you can always set formatting options in HTML view yourself.