Section 17.5. Choosing Menu Audio
17.5. Choosing Menu AudioSome of Apple's canned themes come with musical soundtracks , and some don't. If you'd like some music to play during, for example, the Shelves theme, you'll have to install it yourself. You can also replace the music that comes with any of Apple's themes with a song you like better. In the case of musically challenged themes like Anime Pop, this ability is a true blessing, possibly saving lives and sanity .
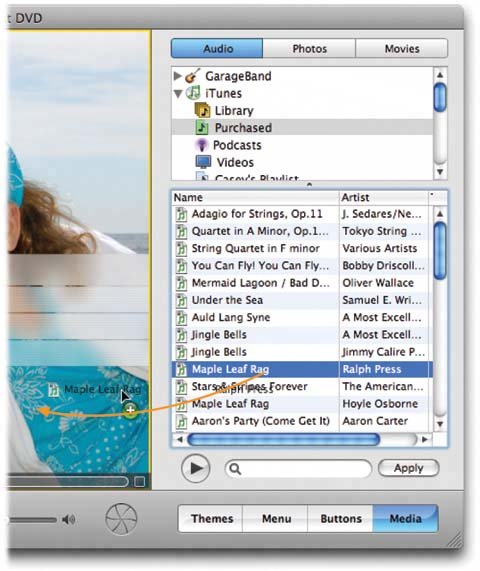
Drag the audio file (from your iTunes list or from the Finder) into the Audio well (either in the Menu pane or the Drop Zones editor) or onto the menu background. Tip: Want to see a nifty bug? Hold down the Incidentally, iDVD doesn't do much to help when your background video and background audio aren't the same length. If the music is too short, it repeats until the video is finished playing, cutting off the music if necessary to start in sync with the video track. If the music is too long, the video repeats until the music ends, cutting off the video mid-repeat. Use the Duration slider in the Settings pane to set the loop time, which applies to both sound and video. Or, if you're really a perfectionist, you could always use a program like GarageBand to match the soundtrack length to the video. Create a nice fade-out at the end of the audio, and a fade-in at the beginning, so that the looping won't be quite so jarring. Note: Remember, this technique affects the background music of only the currently displayed menu screen. To apply the change to all menu screens, wrap up by choosing Advanced  Apply Theme To Project. And make sure you dont exceed your total menu-length budget (15 minutes, or 7.5 minutes for widescreen DVDs). Apply Theme To Project. And make sure you dont exceed your total menu-length budget (15 minutes, or 7.5 minutes for widescreen DVDs). 17.5.1. Replacing Menu AudioTo replace a custom audio file with another, repeat the steps you used to install the music to begin with. iDVD replaces the current track with the new one. 17.5.2. Removing Menu Audio To remove audio, drag it out of the Audio well, either the one in the Menu pane or the one in the Drop Zone editor. Puff! When the audio well is empty, it shows a speaker icon ( If you want to remove all audio from your menu screen, you may have to drag twice: Your first drag removes custom sounds, and the second removes the theme sound, if one exists. 17.5.3. Adjusting Menu Audio VolumeIn iDVD 6, you can now control your menu screen's audio volume; click the Menu button to see the volume slider. Don't forget to check your audio before burning; this slider affects the final DVD. |
EAN: N/A
Pages: 203