Section 11.3. Exporting a Saved Slideshow
11.3. Exporting a Saved SlideshowBut what if you've created a more elaborate slideshow, using the Slideshow editing mode? What if there's an Slideshow icon in your Source list at this moment, representing hours you've spent perfecting your pans, fiddling with your fades, and tweaking your timings into a work of art? This creation isn't for posting on the Web. It's designed to be savored in all its glory on a 30-inch Cinema Display. And you want to preserve every nuance when you export your masterpiece to QuickTime. To do so, click the slideshow icon in the Source list and, once again, choose File Make your selections, click the Export button, then go walk the dog. iPhoto will take some time to convert your Saved slideshow to a QuickTime movie. Figure 11-4. You may spend a lot of time creating your saved slideshow movie, but it won't take you long to configure the Export dialog box. Your options are limited here. Clearly, the iPhoto engineers figured that at this point, you've spent quite enough time making artistic decisions. |
 Export. This time, though, the Export dialog box (Figure 11-4) asks you to make only three decisions: what youre going to name the file, where you're going to save it on your hard drive, and what its dimensions are. And even then, you're limited to three choices: 640 x 480, 320 x 240, and 240 x 180.
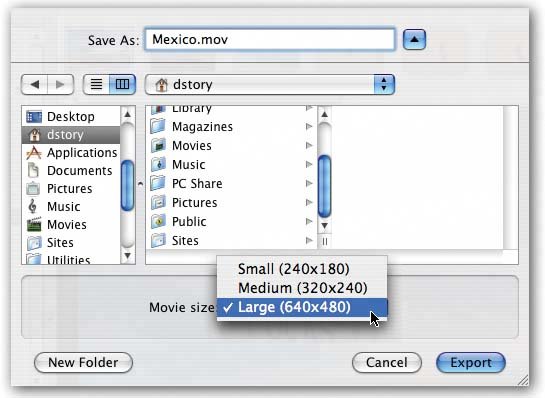
EAN: 2147483647
Pages: 183