Section 2.14. Taskbar Toolbars: All Versions
2.14. Taskbar Toolbars : All VersionsTaskbar toolbars are separate, recessed-looking areas on the taskbar that offer special-function features. You can even build your own toolbarsfor example, one stocked with documents related to a single project. (Somewhere in America, there's a self-help group for people who spend entirely too much time fiddling with this kind of thing.) To make a toolbar appear or disappear, right-click a blank spot on the taskbar and choose from the Toolbars submenu that appears (Figure 2-26). The ones with checkmarks are the ones you're seeing now; choose one with a checkmark to make the toolbar disappear.
Here's a rundown of the ready-made taskbar toolbars at your disposal. 2.14.1. Address ToolbarThis toolbar offers a duplicate copy of the Address bar that appears in every Explorer window, complete with a Recent Addresses pop-up menuexcept that it appears in the taskbar at all times. That way, it's always available, even if no Explorer window happens to be open . 2.14.2. Windows Media Player ToolbarYou may be a bit baffled when you choose this one's name from the Toolbars listand nothing happens . That's because this toolbar only deigns to make itself visible when (a) you're actually running Windows Media Player (Chapter 14), and (b) you've then minimized it. Only then do you see the full glory of the Windows Media Player Toolbar. 2.14.3. Links ToolbarFrom its name alone, you might assume that the purpose of this toolbar is to provide links to your favorite Web sites. And sure enough, that's one thing it's good for. But in fact, you can drag any icon at all onto the toolbarfiles, folders, disks, programs, or whateverto turn them into one-click buttons . In short, think of the Links toolbar as a miniature Start menu for places and things you use most often. Here are a few possibilities, just to get your juices flowing :
You can drag these links around on the toolbar to put them into a different order, or remove a link by dragging it awaydirectly into the Recycle Bin, if you like. (They're only shortcuts; you're not actually deleting anything important.) To rename something herea good idea, since horizontal space in this location is so preciousright-click it and choose Rename from the shortcut menu. Tip: Dragging a Web link from the Links toolbar to the desktop or an Explorer window creates an Internet shortcut file . When double-clicked, this special document connects to the Internet and opens the specified Web page. 2.14.4. Tablet PC Input PanelThis toolbar is useful only if you're working on a Tablet PC, which has a touch screen and stylus. It provides quick access to Vista's handwriting-recognition software. Chapter 19 has the details. 2.14.5. Desktop ToolbarThe Desktop toolbar (Figure 2-26, bottom) offers quick access to whichever icons are sitting on your desktopthe Recycle Bin, for example, and whatever else you've put there. As a convenience, it also lists a few frequently-used places that aren't on the desktop, including Internet Explorer and the Control Panel (complete with a pop-up menu that lists the individual Control Panel applets for even faster access). When it first appears, the Desktop toolbar takes the form of a 2.14.6. Quick Launch ToolbarThe Quick Launch toolbar is fantastically useful. In fact, in sheer convenience, it puts the Start menu to shame. Maybe that's why it's the only toolbar that appears on your taskbar automatically. It contains icons for functions that Microsoft assumes you'll use most often. They include:
But what makes this toolbar great is how easy it is to add your own iconsparticularly those you use frequently. There's no faster or easier way to open them, even when your screen is otherwise filled with clutter. To add an icon to this toolbar, simply drag it there, as shown in Figure 2-27. To remove an icon, just drag it off the toolbardirectly onto the Recycle Bin, if you like. (You're not actually removing any software from your computer.) If you think you'll somehow survive without using Internet Explorer each day, for example, remove it from the Quick Launch toolbar.
2.14.7. Language ToolbarWindows has long been able to run software in multiple languagesif you installed the correct fonts, keyboard layouts, and localized software (a French copy of Windows, a French version of Outlook, and so on). In fact, you can even shift from language to language (or keyboard layout to keyboard layout) on the fly, without reinstalling the operating system or even restarting the computer.
Chances are that you don't speak all of the world's useful languages, though. So the idea here is to install the software necessary only for the languages and layouts you do use (see the box on the facing page). After that, you can use the Language bar to switch among them with a quick click. 2.14.8. Redesigning Your ToolbarsTo change the look of a toolbar, right-click any blank spot within it. Tip: How much horizontal taskbar space a toolbar consumes is up to you. Drag the border at the left edge of a toolbar to make it wider or narrower. That's a good point to remember if, in fact, you can't find a blank spot to right-click. The resulting shortcut menu offers these choices, which appear above the usual taskbar shortcut menu choices:
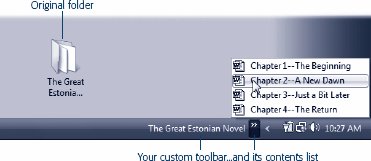
2.14.9. Build Your Own ToolbarsThe Quick Launch area of the taskbar is such a delight that you may actually develop a syndrome called Quick Launch Envyyou'll find that having only one isn't enough. You might wish to create several different Quick Launch toolbars, each stocked with the icons for a different project or person. One could contain icons for all the chapters of a book you're writing; another could list only your games . Fortunately, it's easy to create as many different custom toolbars as you like, each of which behaves exactly like the Quick Launch toolbar. Windows creates toolbars from folders; so before creating a toolbar of your own, you must create a folder and fill it with the stuff you want to toolbarize. Next, right-click a blank spot on the taskbar. From the shortcut menu, choose Toolbars
Now there's a brand-new toolbar on your taskbar, whose buttons list the contents of the folder you selected. Feel free to tailor it as described in the previous discussionsby changing its icon sizes, hiding or showing the icon labels, or installing new icons onto it by dragging them from other Explorer windows. |

 button appears at its right end. Click it to expose a list of the commands or icons that didnt fit
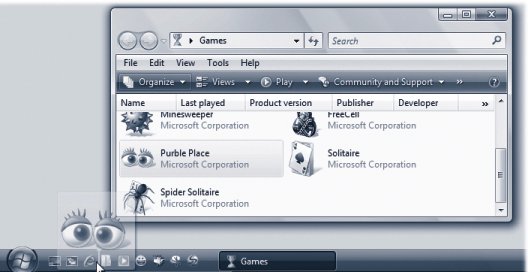
 Control Panel. Under "Clock, Language, and Region," click "Change keyboards or other input methods ." In the Regional and Language Options dialog box, click "Change keyboards." In the
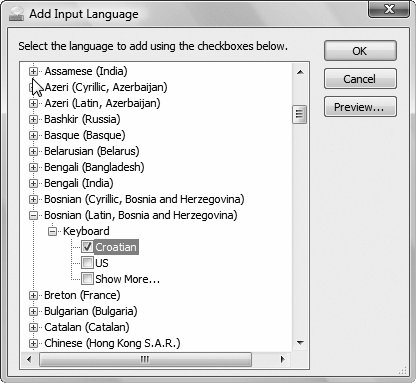
EAN: 2147483647
Pages: 284