Section 16.5. Photos and Video: Home Premium Ultimate
16.5. Photos and Video: Home Premium ¢UltimateJust above Music in Media Center's blue-toned main menu is the intriguing entry, Pictures+ Videos . Here you'll find a list of all the digital photos and video clips that Media Center found when you first showed it which folders you wanted it to watch.
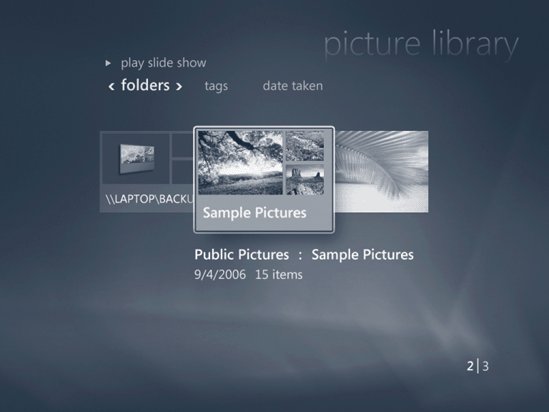
Once again, Microsoft starts you off with some basic pictures and vids, so that, at the very least, you can practice navigating the system. To view some photos, select Pictures+Videos, and open Picture Library. From here, you can view sample photos, as shown in Figure 16-11.
Once again, you work this mode by drilling down. Highlight a folder (Sample Pictures, say) and then press Enter. If you then highlight an individual photo, clicking Enter makes it fill your screen. Tip: To close the picture, click the Back button. (Don't click the X button at the top right of the screenyou'll shut down the entire Media Center!) 16.5.1. SlideshowsAlternatively, click "Play slide show" at the top of the screen to trigger a magnificent full-screen display. To control its playback using a remote control, use its buttons; if you're using the mouse, move the cursor to the bottom-right corner of the screen to make the playback controls appear. You can also manually move from one image to another using the Fast-forward and Rewind buttons. Click the Back button in the top-left corner to close the slideshow. 16.5.1.1. Adding musicOf course, just about any slideshow is more compelling if there's music playing in the background. In Media Center, that's an easy effect:
16.5.1.2. Slideshow settingsUnless you change the settings, the standard slideshow presents your pix in random order, a new photo every 12 seconds, with a standard crossfade (transition) effect. Frankly, however, 12 seconds per photo is an eternity if you're anyone but the subject of the photo (or you're in love with that subject). Fortunately, you can change the settings easily enough; see page 529. 16.5.2. Editing PicturesIf you really want to edit your photos, of course, Microsoft has a specialized new Vista tool just for you: Photo Gallery (Chapter 13). But sometimes you spot a misrotated photo, a picture that needs cropping, or some red-eye in a portrait that you just want to fix quickly without exiting Media Center. Sure enough, you can actually perform basic photo editing from the comfort of your own living room couch . Start at the thumbnails page. Right-click the problem photo; next , from the shortcut menu, choose Picture Details. Now you arrive at a new screen that lists tasks at the left side. You can click Rotate to rotate the photo 90 degrees clockwisea great way to fix a photo that you took with your camera turned vertically. The real fun, though, awaits when you click Touch Up. On this new screen, these more powerful editing options beckon:
When you're finished, click Save. You're asked if you want to replace the original; click Yes. There is no other option for saving. Tip: Click Next and Previous to edit additional pictures. 16.5.3. Burn a CD of Pictures or VideosBurning photos or videos to a CD or DVD is a handy way to make a backup of them, and it's also a convenient way of taking them with you to a friend's house or a party. Note: You're not actually creating a music CD that will play in a CD player, or a video DVD that plays in a DVD player. You're basically creating backup discs that hold a lot of computer filesand that are designed to go into another computer .If you want to burn a music CD or video DVD, see Chapters 14 and 15. Start on the Media Center main menu. Choose Tasks Vista asks you to insert a blank CD or DVD, if you haven't done so already. (What it actually says is, "Insert media," but it means a blank disc; nobody expects you to insert CBS News or the New York Times.) Insert a blank disc and then click Retry; choose the CD or DVD type (Data CD or Audio CD); type a name ; choose the photos folder or music album you want to back up (Figure 16-12); and then click Burn CD (or Burn DVD).
Tip: During the Burn CD/DVD process, Vista invites you to click OK if you want to do other work while the disc is being burned. Light background work like typing or Web surfing should be no problem. Heavy work (Photoshop, video editing) can interfere with the burning, however, resulting in a half-burned, failed discyet another Frisbee for the yard! |
 Music Library. Select an album, playlist, or other music grouping, and then click Play.
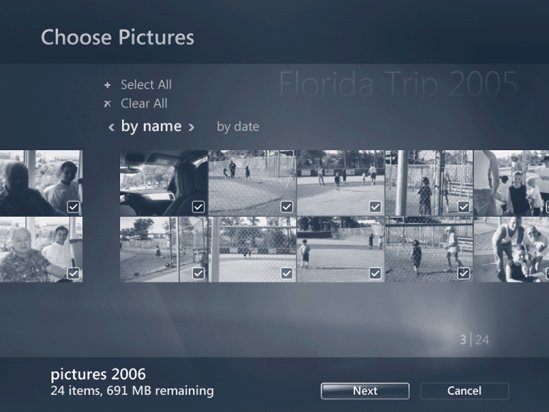
EAN: 2147483647
Pages: 284