| One of the great features of Motion is that it was designed to be used while a project is playing. That means that you can add files and even adjust them while the playhead is movingin real time! Anyone who's worked with motion graphics over the past decade will appreciate the magnitude of this feature. Real time means that you can see live updates to your project as you make changes. You don't need to stop, render, take a nap, and come back in a few hours to see the changes. It all happens before your eyes in the Canvas. So let's add a prebuilt yellow circle to your project while the playhead is moving. NOTE One point to remember is that an object will always start at the beginning of the project if you add it while the playhead is moving. You can also change the Motion preferences to add all new objects at the playhead position. The default setting is for objects to start at the beginning of the project.
Then you'll add a drop shadow and move the circle into position to add some animation. The circle is part of the content in the Lesson_02 folder. 1. | Press the spacebar or click the Play button in the transport controls to begin playback.
| 2. | Click the File Browser tab to change from the Library to the File Browser pane.
| 3. | Locate the Circle icon in the lower pane of the File Browser.

NOTE If the lower pane of the File Browser does not show the contents of your Lesson_02 folder, navigate to the Lesson_02 folder in the File Browser and double-click the Lesson_02 folder to reveal the contents. | 4. | Drag the Circle icon from the File Browser to the center of the Canvas and release the mouse.
Two things happen when you release the mouse: A yellow circle appears in the middle of the Canvas in front of the Summer Background movie, and a blue region called Circle copy appears in the mini-Timeline.
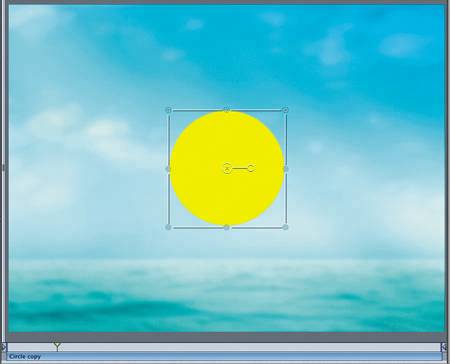
Let's separate that circle from the background by adding a drop shadow.
| 5. | Press D to open the Dashboard.
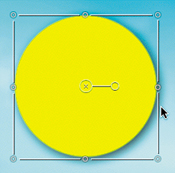
| 6. | Click the Drop Shadow box in the Dashboard to add a drop shadow to the circle.
Now let's reposition the circle so it will enter the frame from the right as it moves instead of appearing in the middle.
| 7. | Press Cmd-(hyphen) to zoom out in the Canvas by one level.
| 8. | Drag the circle and place it just outside the frame in the upper right of the Canvas window.
Why place the circle outside the frame instead of inside the frame? Good question. For the circle to enter the frame, it must originally be placed outside the frame, just as when you want to show someone entering a room, the person must start the scene outside the room.
Circle object outside the upper-right corner of the frame 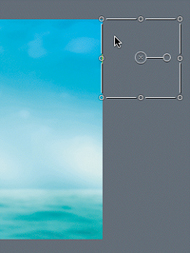
NOTE Whenever you move an object outside the viewable frame area, you will not be able to see the object, only the bounding box around the object. | 9. | Close the Dashboard window.
| 10. | Press Cmd-S to save your progress.
Great! You have successfully imported a shape over a background, added a drop shadow, and moved the object out of the frame. Now all you need to do is make the shape move.
|
|