Enabling and Disabling Filters and Behaviors


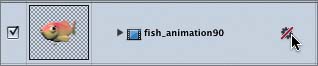
The little gear icon on the Layers tab is actually an enable/disable behaviors control to enable or disable the behaviors applied to an object. If you click the enable/disable behaviors control for the fish_animation90 object, a red line appears over the button to show that all behaviors applied to that object have been disabled.

Let's disable the behaviors for the fish_animation90 object to see how this affects the project.

1.

Click the Behaviors enable button for the fish_animation90 object to disable the behaviors.

2.

Press the spacebar to view the project in the Canvas, if the project is not already playing.

The fish disappears altogether because the object starts outside the frame; with the behaviors disabled, she never actually enters the frame.

3.

Click the Behaviors enable button again to reenable the behaviors.

4.

Click the disclosure triangle for the fish_animation90 object to view the various behaviors applied to the object.

I used a combination of three behaviors to make Poly swim across the screen. The Throw behavior and Grow/Shrink behavior were combined to make her slowly grow as she moves across the frame. The Random Motion behavior is a Simulations behavior that creates a random pattern in the motion path. The Throw behavior moves objects in a straight line. The Throw behavior combined with the Random Motion behavior creates a more random-looking, natural movement.

Notice the purple Activation check boxes next to each behavior. You can use the Activation check boxes to turn individual behaviors on or off, just as you can use the Activation check boxes to turn individual objects or layers on or off.

NOTE

Any element that has been turned off (using the Activation check boxes) will not be rendered in the final output of a project.

5.

Click the disclosure triangle for the fish_animation90 object to hide the behaviors.

The last and lowest element in the Scene layer is the Water Bubbles-Large object.

Notice that the enable/disable filters control has a red line through it, which means there is a filter applied to the Water Bubbles-Large object and it has been disabled.

6.

Click the Filter enable button to enable the applied filter on the Water Bubbles-Large object.

The water in the Canvas changes to a cartoonish blue to go with the rest of the scene. What filter do you think was used to colorize the water?

7.

Click the disclosure triangle on the Water Bubbles-Large object to view the applied filter.

Sure enough, I used the Colorize filter.

As you can see, this project was created using all of the skills that you have learned so far in this book. Now all you need to do is apply a mask.

First, you'll need to select the entire Scene layer.

8.

Click the disclosure triangle for the Scene layer to hide all the contents.

9.

On the Layers tab, select the Scene layer.

10.

Press Cmd-4 to close the Layers tab.


    Apple Pro Training Series Getting Started with Motion
    Apple Pro Training Series: Getting Started With Motion
    ISBN: 0321305337
    EAN: 2147483647
    Year: 2005
    Pages: 283
    Authors: Mary Plummer

    flylib.com © 2008-2017.
    If you may any questions please contact us: flylib@qtcs.net