| Now that you've created your own version of the Star Wars logo, you need to animate it to give it that cinematic touch. In the Star Wars movies, the logo waits on the screen for just a second as the music begins to swell. Once we're fully engaged, the logo drifts out of the way into outer space, to let the scrolling text tell the story. In this section, you'll learn how to animate the logo using a built-in Premiere Elements "Preset" effect, which we'll have to tweak slightly. You'll learn how to adjust the settings on a keyframe as an introduction to the concept of keyframes, which are used extensively in other chapters in this book. For this task, we apply keyframes and then make small adjustments to the keyframes to get the effect we want. Make Your Logo Zoom Off Into Space  Select the Snow Wars logo in the Video 3 track on the Timeline. Select the Snow Wars logo in the Video 3 track on the Timeline.
 Press the Page Up or Page Down key as needed to move to the head (start) of the clip. Press the Page Up or Page Down key as needed to move to the head (start) of the clip.
 In the Properties panel for the Snow Wars logo, click the Show Keyframes button to reveal the workspace for adding keyframes, as shown in the illustration. In the Properties panel for the Snow Wars logo, click the Show Keyframes button to reveal the workspace for adding keyframes, as shown in the illustration.


Tip After you click it, the Show Keyframes button becomes the Hide Keyframes button.  In the Properties panel, click the triangle next to Motion to reveal the effect's controls. In the Properties panel, click the triangle next to Motion to reveal the effect's controls.
 Set the Scale to 125.0. Set the Scale to 125.0.
 Click the Toggle animation button (shown below) to turn on the animation functionality of Premiere Elements. Click the Toggle animation button (shown below) to turn on the animation functionality of Premiere Elements.

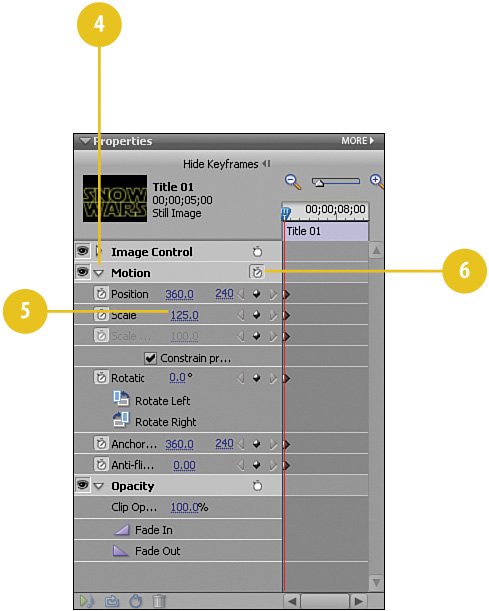
Tip Premiere Elements automatically places a keyframe at this point.  Move the CTI to the end of the clip by pressing the Page Down key on your keyboard. Move the CTI to the end of the clip by pressing the Page Down key on your keyboard.
 Set the Scale to 0.0. Set the Scale to 0.0.
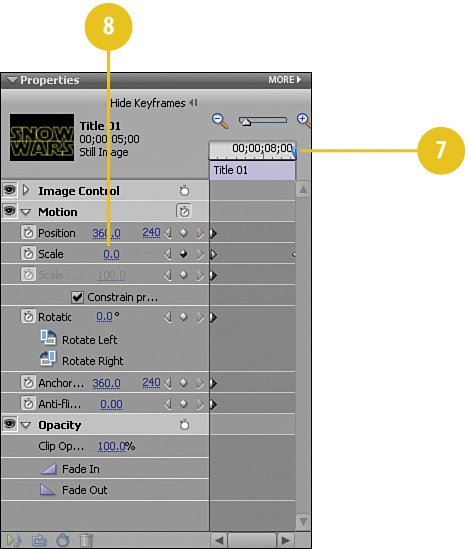
Tip Premiere Elements automatically places another keyframe at this point.  We now have a logo that starts at 125% and fades away to nothing. However, we want the Snow Wars logo to pause on screen at 125% for a few seconds, so let's jump back to the beginning of the clip and "insert" a pause. Press the Page Up key. We now have a logo that starts at 125% and fades away to nothing. However, we want the Snow Wars logo to pause on screen at 125% for a few seconds, so let's jump back to the beginning of the clip and "insert" a pause. Press the Page Up key.
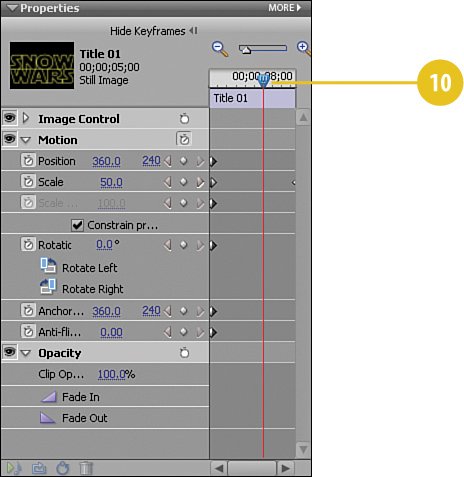
 To insert the pause, drag the CTI to the 00;00;08;00 point. To insert the pause, drag the CTI to the 00;00;08;00 point.
 Set the Scale to 125.0. Set the Scale to 125.0.
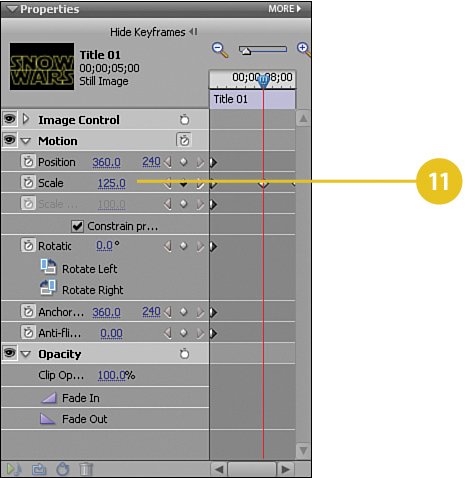
Tip Again, Premiere Elements automatically places a keyframe at this point.
Did You Know? The difference between Render and Realtime. You can optionally render your project at anytime, for example after applying an effect such as a Motion effect. When you apply an effect, Premiere Elements shows you a realtime representation of the effect. This representation allows you to see somewhat how the effect will look which lets you try different effects and tweak their settings. It's not until you render, however, by pressing the ENTER key that you will see how the effect truly looks. To show you that a clip has effects applied but not rendered, Premiere Elements places a thin red line above any clip waiting for rendering.
|
|