Understanding the Split Screen Function The Split Screen Creating a convincing scene using the tried-and-true split screen is simple to do, yet surprisingly effective. There are three key factors that make this technique work: the actor, the setting, and the timing. The Actor The first key factor is the actor's talent. The actor's ability to remember lines so that he or she can time their pauses to allow the "other" actor to talk is very important. So is the actor's ability to stay within the "safe zone." That is, their ability to stay on the correct side of the split without accidentally stepping across it or gesturing across iteither of which might potentially ruin the effect. 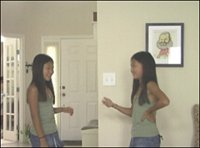
The Setting The second factor is the setting. In order to pull the "twin thing" off convincingly, you should shoot the scene against a background that has a natural vertical line of some sort in the middle of the shot. This can be a wall, a flagpole, a telephone pole, a door, or anything of that nature that fills all or most of the frame. The Timing If the actor does a good joballows enough time in the pausing, reacts correctly to what the other "twin" had said, and stays within his or her "world," in other words, their side of the screenall that's left is to sync up the timing. Pauses that are too long (such as when one twin asks a question and then the other twin just stares at him or her too long before answering) are easy to fix. Just trim the clip to remove the extra pause time. Pauses that are too short are harder to fix, but they can sometimes work for you. If the actor starts talking too soon, but you can still hear both "twins," it actually better imitates natural conversational speech. So, encourage shorter pauses rather than longer ones. Lighting and Other Considerations Another consideration when shooting "twins" or "triplets" is to be aware that natural light changes more quickly than you realize. So don't wait too long, or at all if possible, between shoots of the first twin and the second twin. Also, watch for shadows, which can change over time resulting in the two twins casting shadows in different directions, creating an unnatural look to the scene. When shooting outdoors, be aware of actionpeople, dogs, cars, kitesin the background. Remember, this is a composite and you risk having a dog running across the scene in the background and suddenly "disappearing" right at the midpoint of the screen, where your crop is. If you are working with "triplets," finding a suitable location to film may be more difficult, but you can get creative. Find a wall where two hallways meet, or a street location where there are two signs together, or the side of a building that's also near a telephone pole, allowing the actor to first stand on the left side of the building, then on the right, and then to the right of the telephone pole, thus giving you your two vertical lines "in nature" to run your crop up against.
Here's an ideal starting point for setting your split screen scene, the perfect place for a couple of twins to hold a conversation! Notice the sharp vertical line created by the edge of the wall right down the middle of the shot. What also makes this location ideal is that the left and right sides are slightly different in terms of lighting. The left side, because it's a hall, is slightly darker than the right side, because the wall is reflecting light. 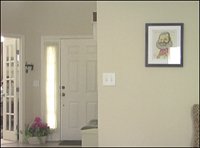
Shoot the actor and have her act out all of the dialog and reactions for the twin on the left side of the screen. The only direction you'll need to give her is to remember that the wall represents the border of where she can move. She should not walk or even gesture beyond that point (or even get too close). 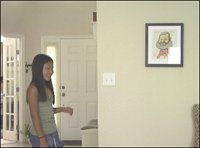
Now that actor plays the part of the second twin, on the other side of the shot. As before, she should act out all of the dialog and reactions for her part in the "dialog." Again, she should be alert to the wall demarking the edge of her "world." 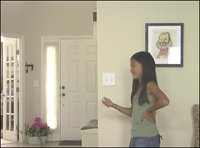
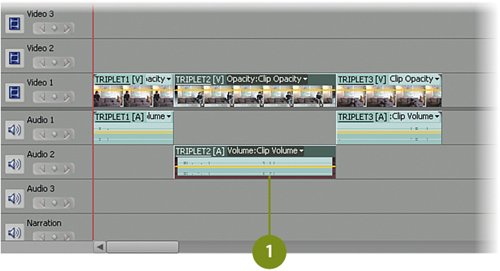
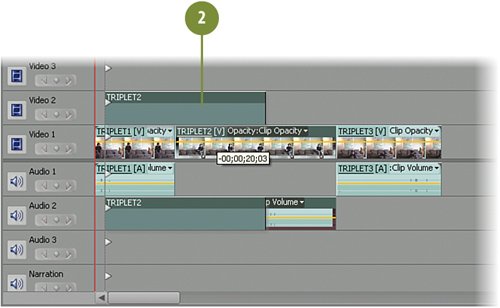
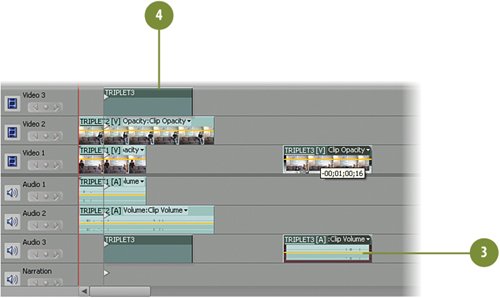
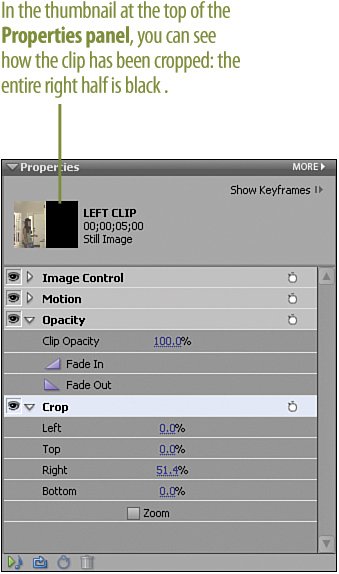
In Premiere Elements, the two clips are stacked one on top of the other. In this case, the LEFT CLIP is in the Video 2 track above the RIGHT CLIP, which is in the Video 1 track. The Crop effect has been applied. Notice in the illustration how the crop has been adjusted so that it falls exactly on the edge of the wall, creating the perfect illusion of there being no crop at all. 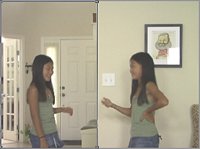
|